Set up request tabs
Request tabs split the requests of one connected instance into separate views, for example one tab for incidents and another for service requests. Each tab has its own title and its own request table: what it shows, which columns it has, and, for JSM, which counters. Tabs work for every connected tool.
Before you start
- Work on the master instance. You edit tabs there, and UniPortal shares them with the secondary instances.
- Connect the instance first. See Connections.
- A newly connected instance has no tabs, and it doesn’t appear in the dialog until you add its first one.
Steps
In Jira, select the cog icon and go to Marketplace apps > UniPortal > Configuration.
If you use dialog variants, open the Dialog variant field and select the dialog you want to edit. Each dialog variant has its own set of tabs.
Select the Configure tabs tab.
In the Instance field, select the instance you want to add a tab to.
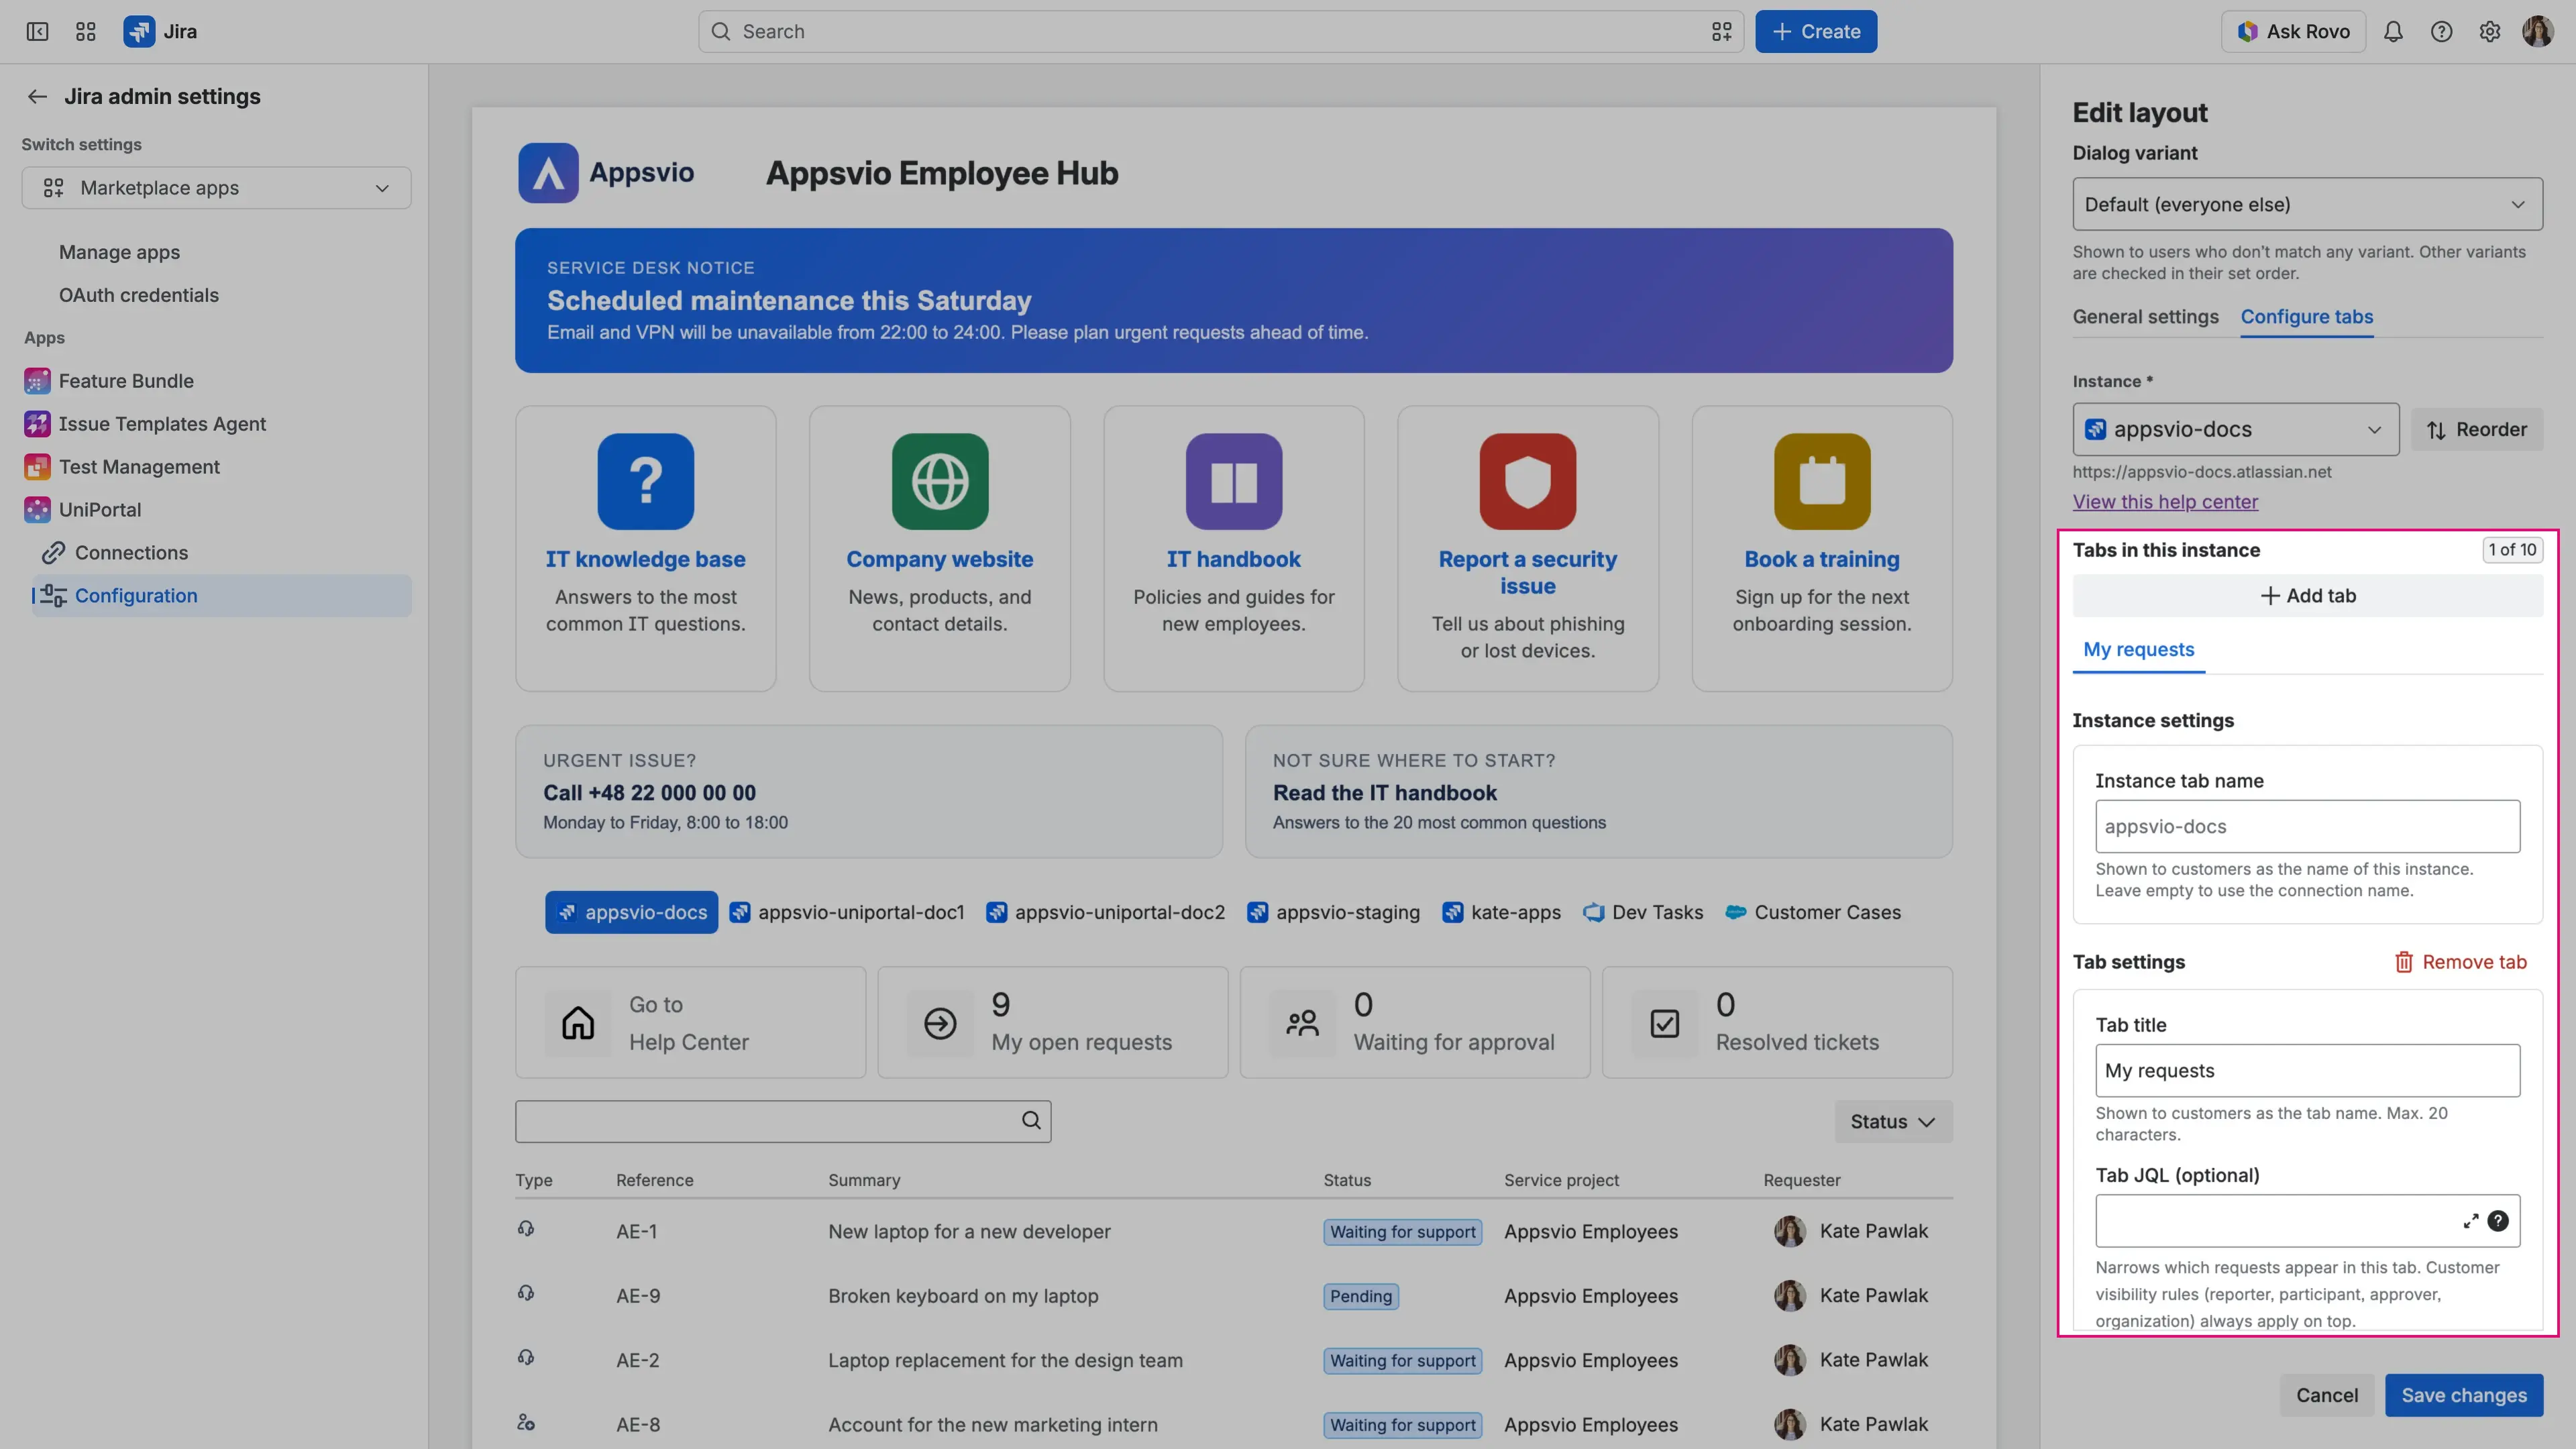
Select Add tab. For a newly connected instance, this creates its first tab. Each instance can have up to 10 tabs. The counter next to Tabs in this instance shows how many you’ve used, for example 9 of 10. At the limit, Add tab is disabled, so remove a tab to add a new one.
Optionally, in Instance settings, enter an Instance tab name. Customers see it as the name of the instance tab in the dialog, for example “IT Help Desk”. Leave it empty to use the name of the connection. All tabs of the instance share this name, and each dialog variant has its own.
In Tab settings, enter a Tab title. Customers see it as the tab name. A title can have up to 20 characters. Until you change it, a new tab is named “Tab 2”, “Tab 3”, and so on. The first tab of an instance shows the Instance tab name (or the name of the connection, when that field is empty) until you enter a Tab title for it. A Tab title you enter takes precedence, even if you later clear the Instance tab name again. A new tab is never a copy of another tab: it starts with the default columns, the three default JQL counters, and an empty Tab JQL.
Set up the request table of the tab. Choose the tool of the instance:

Optionally, enter a Tab JQL (optional) to narrow the requests of the tab. Leave it empty to show every request the customer has access to.
Optionally, turn off Show Go to Help Center tile to hide the Go to Help Center tile in this tab. The setting is on by default and applies to this tab only.
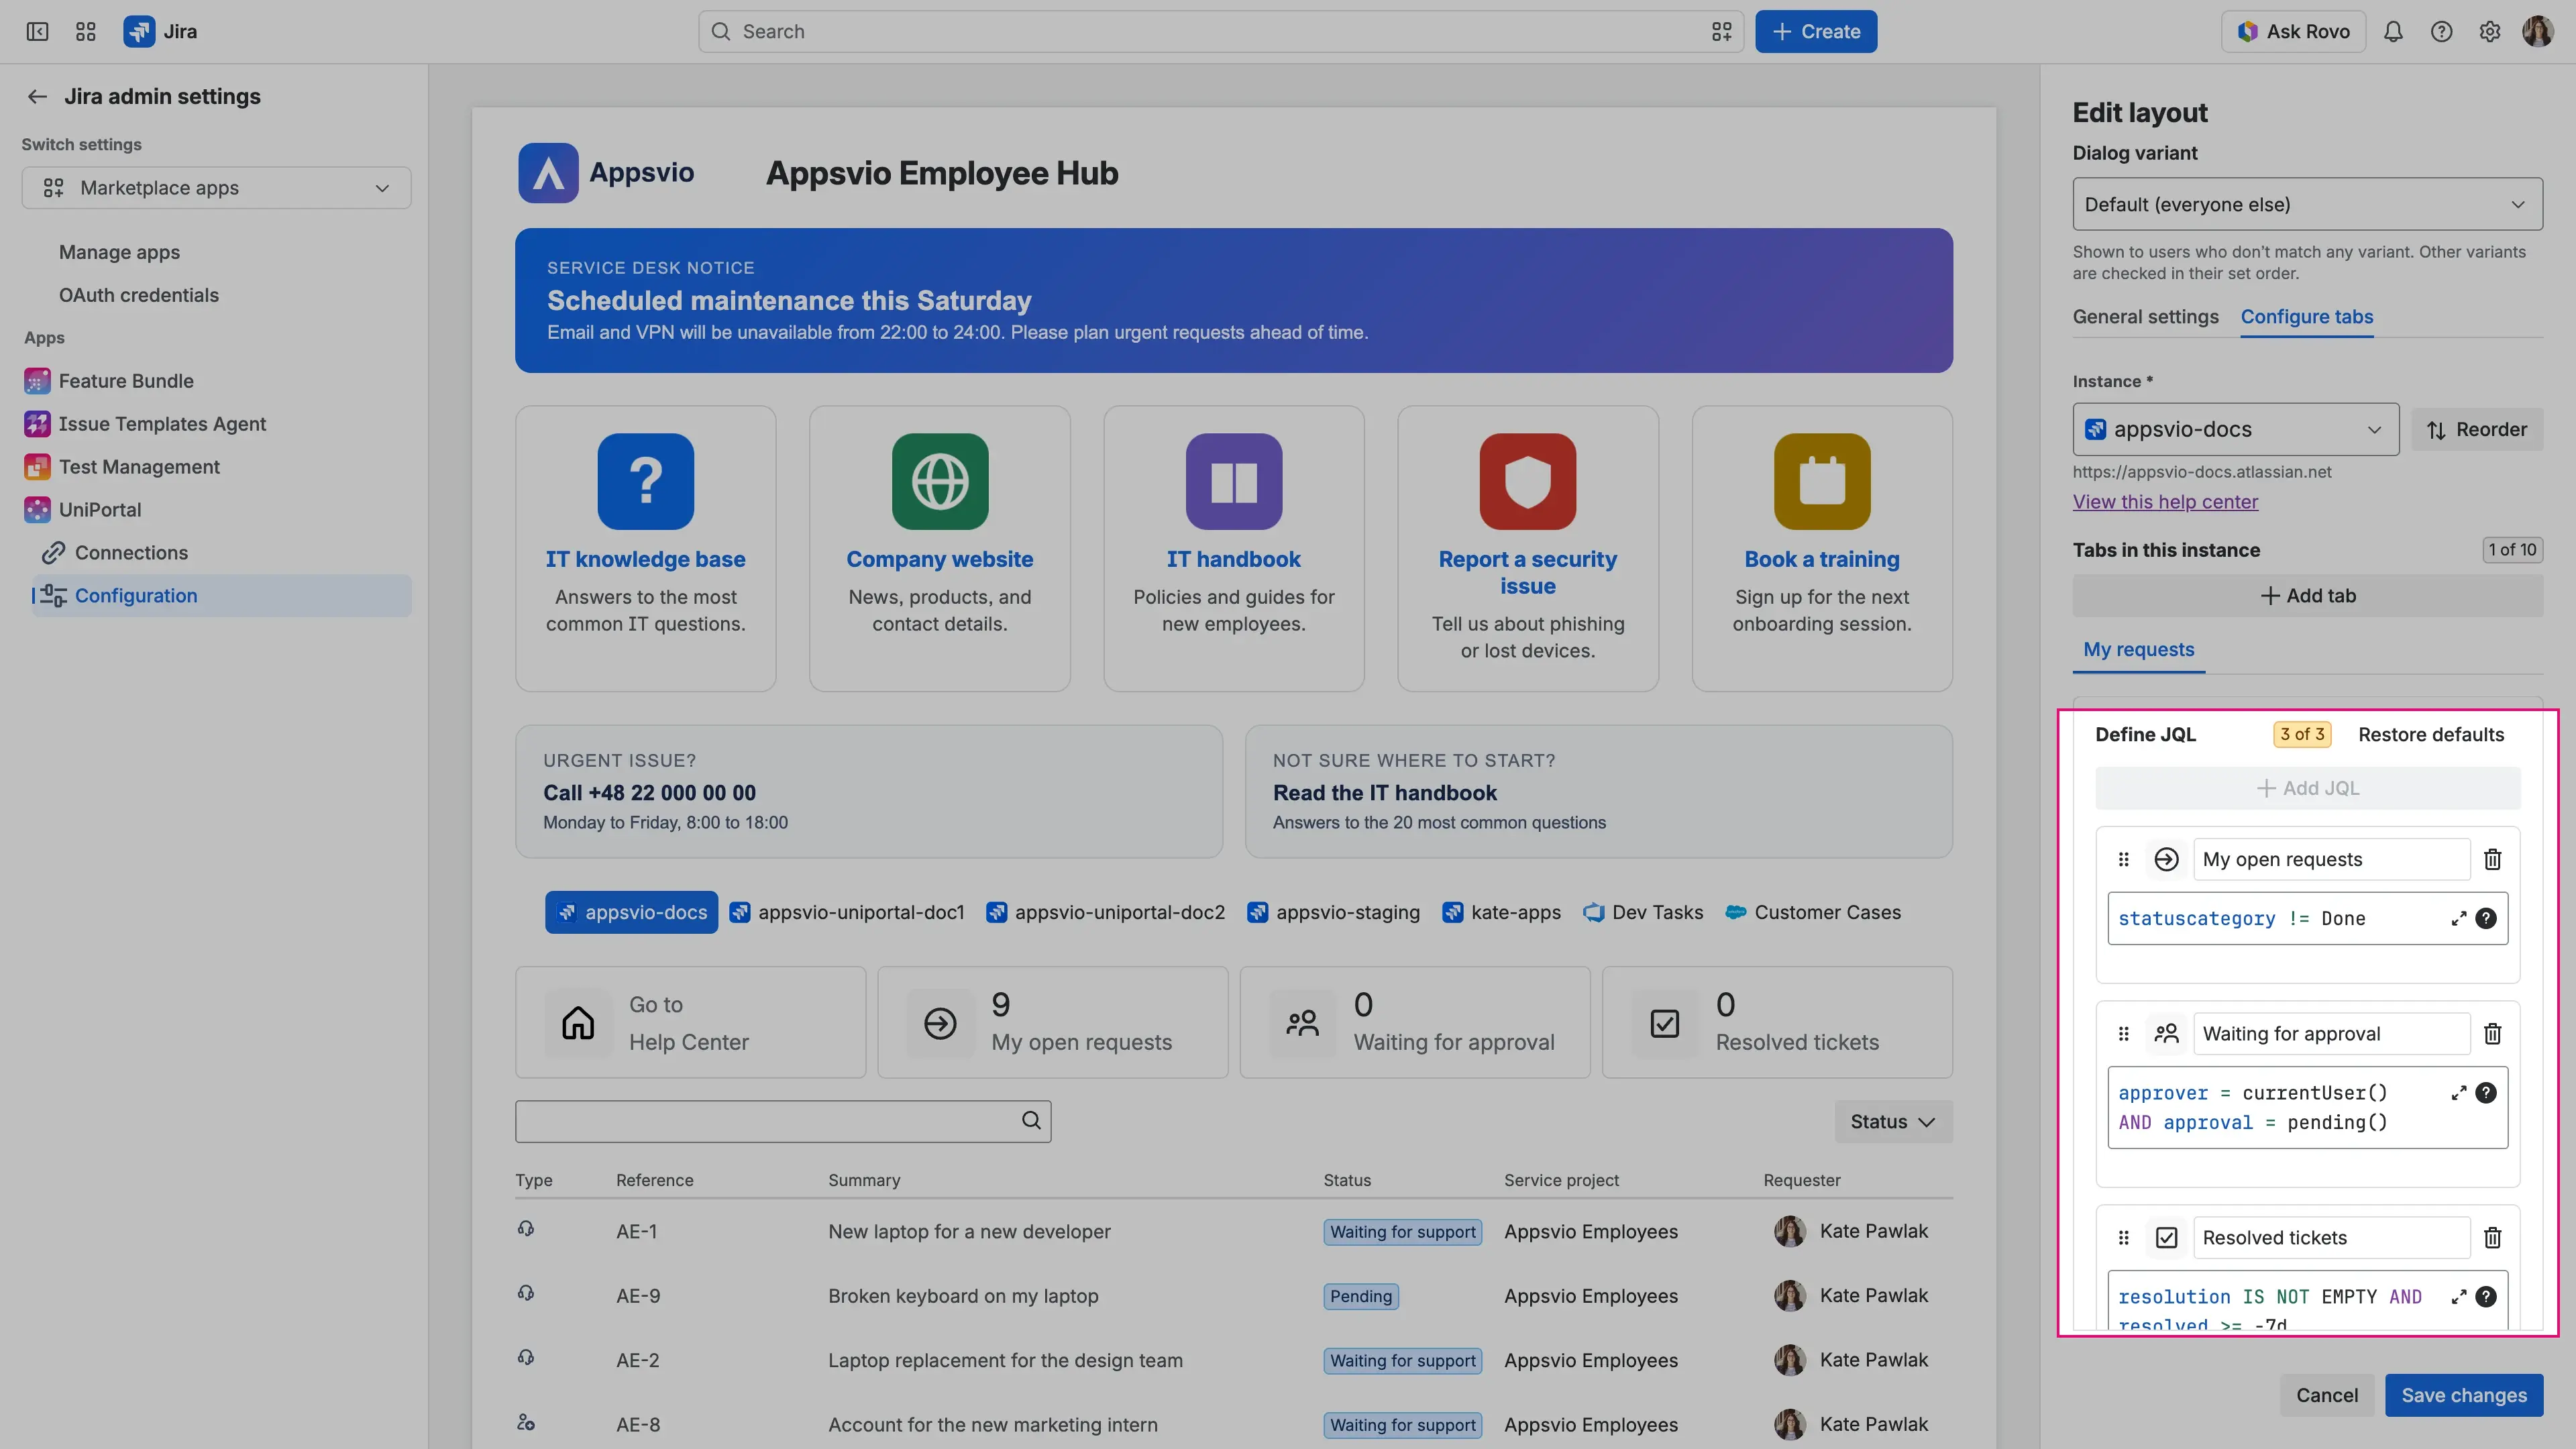
Under Define JQL, set up to three counters. Select Add JQL to add an empty counter, then enter a name and a JQL query. Optionally, add an icon: select the empty icon tile and upload an image. To change or remove an icon, select it, then select Replace icon or Remove icon. The counter next to Define JQL shows how many you’ve used, for example 3 of 3. At the limit, Add JQL is disabled, so remove a counter to add a new one.
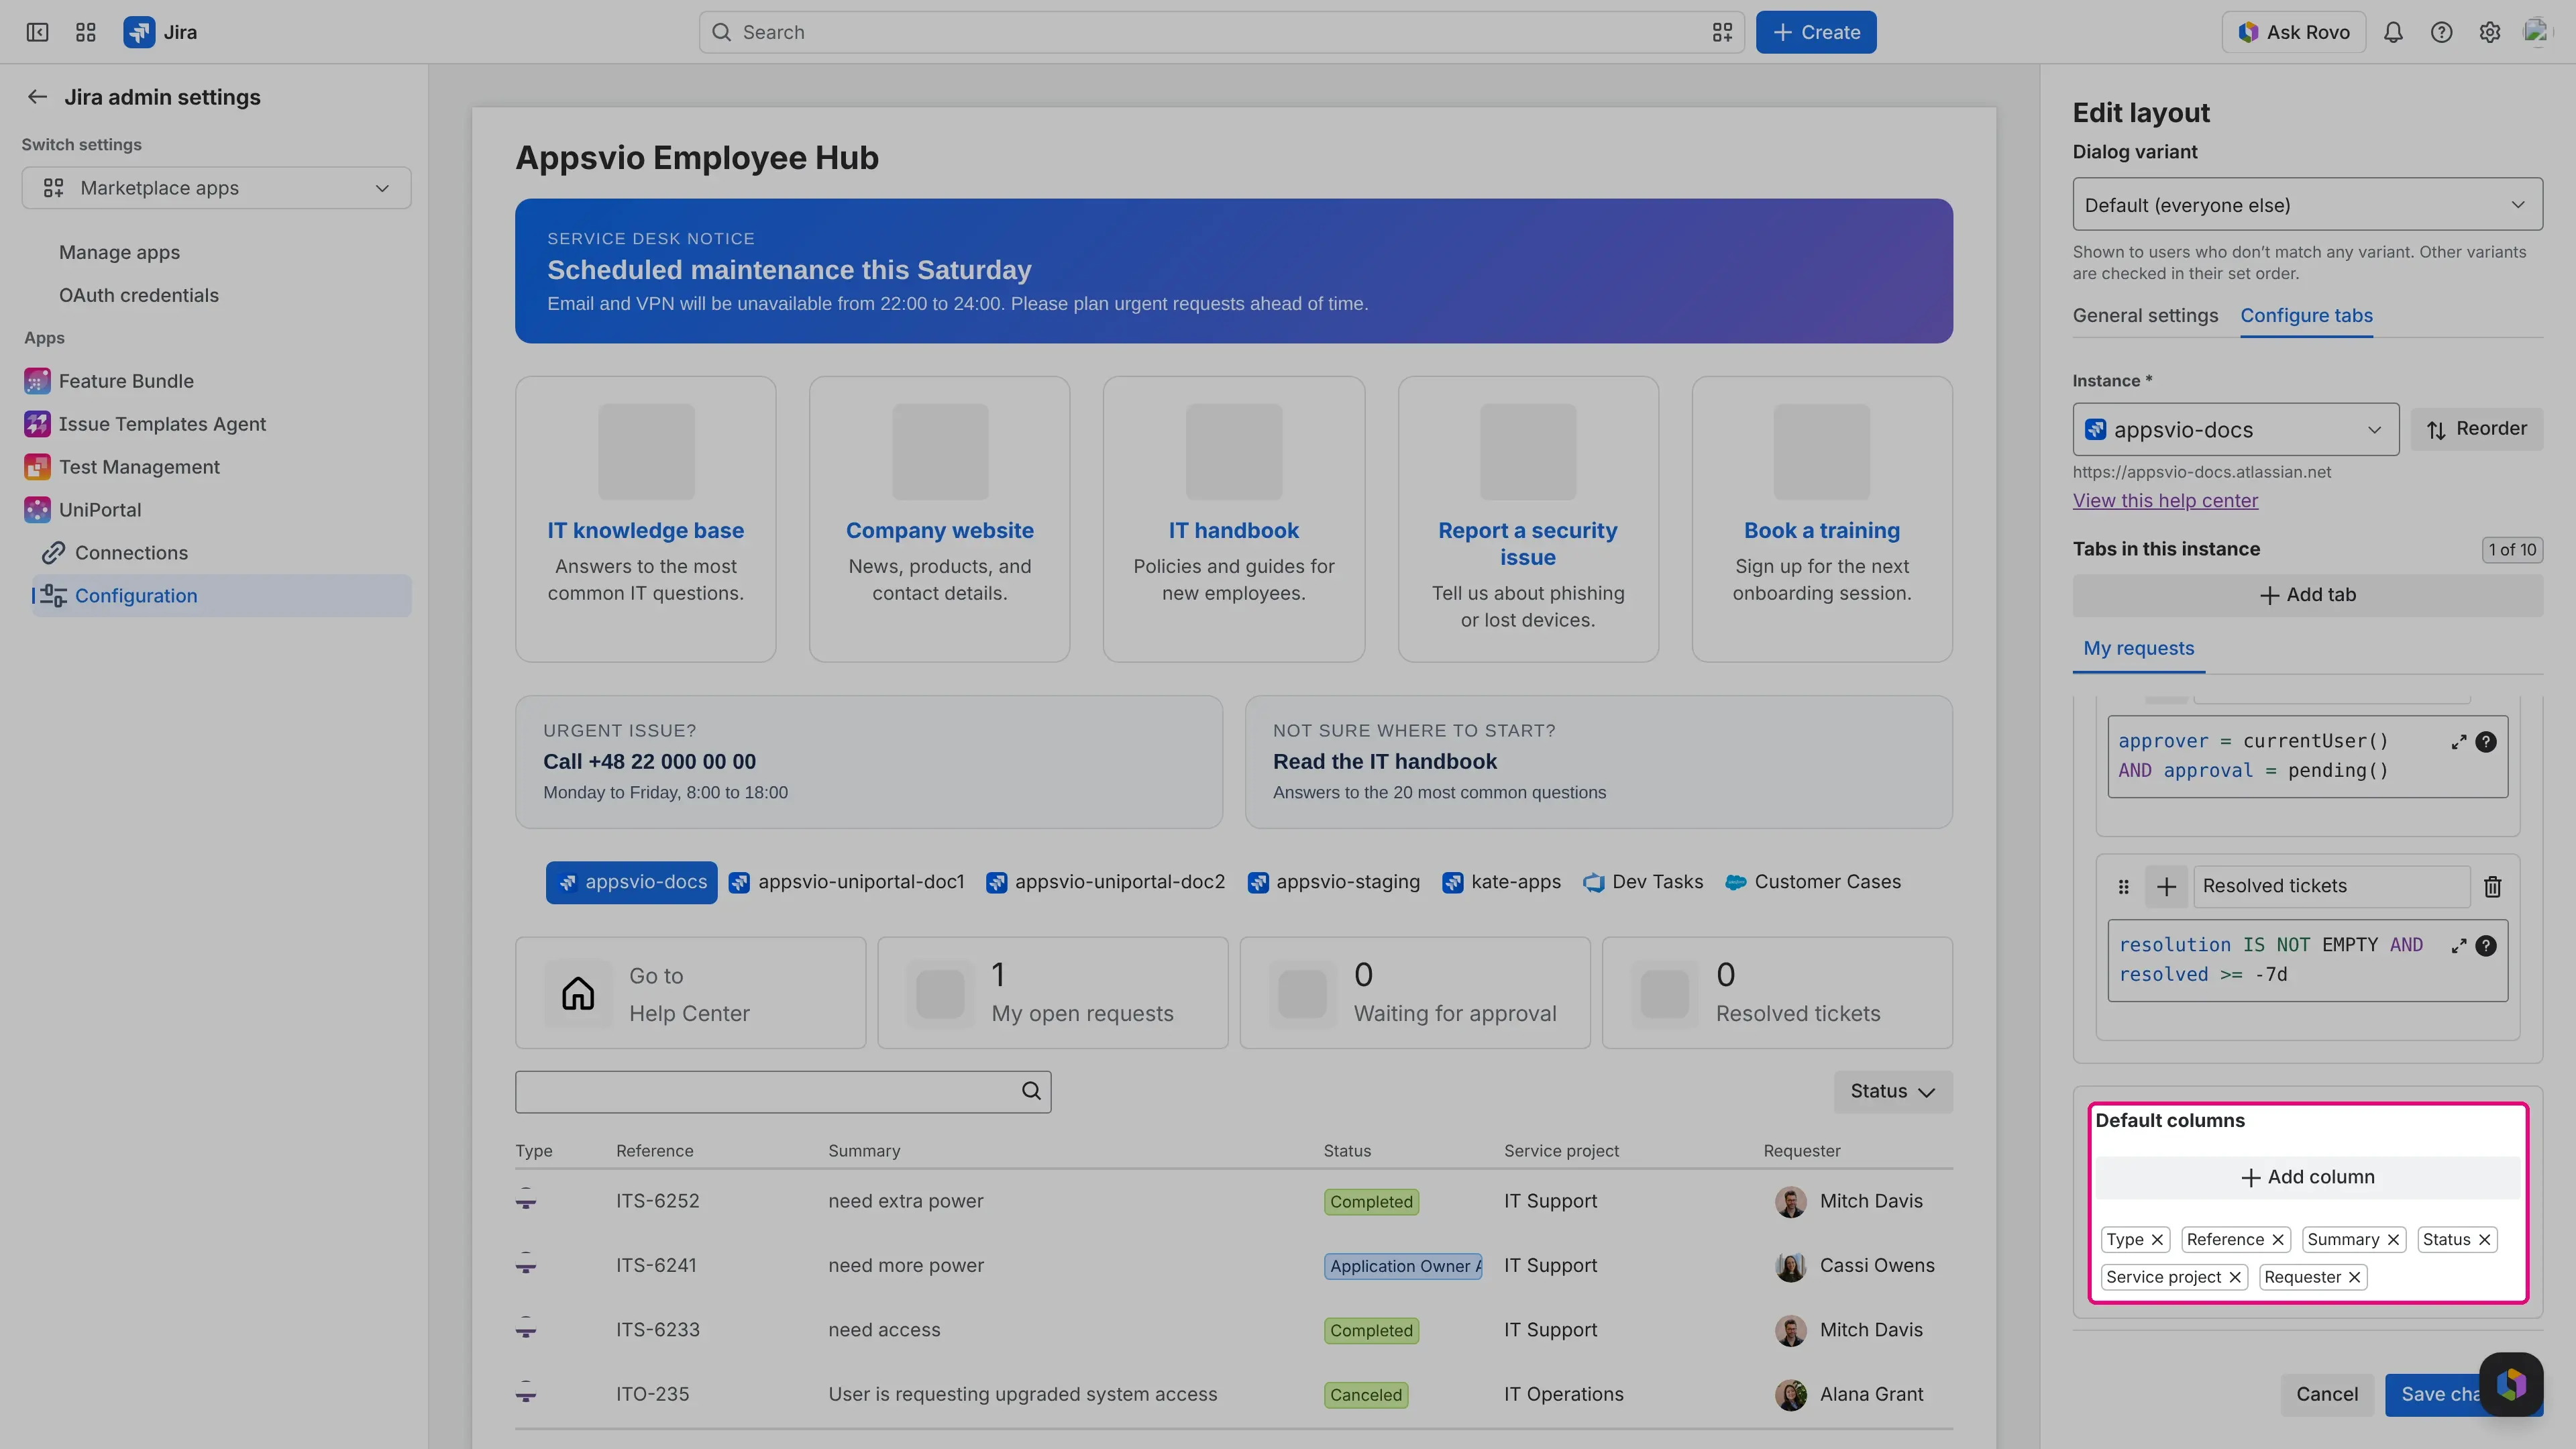
Under Default columns, select Add column, search for a column, and select it. Repeat for each column you want. To remove a column, select the remove button on its tag.


How the table works:
Tab JQL: it can only narrow the list. The rules for what customers can see (reporter, participant, approver, organization) always apply on top.
Counters: a tab can have up to three. Customers select a counter to filter the table by its JQL. A counter counts the requests the customer can see that also match the Tab JQL. If its JQL contradicts the Tab JQL, it shows 0. If its query fails, it shows a warning icon instead of a count. To change the order, drag the counters by their handles. To remove one, select its trash icon. Removing only an icon keeps the counter, and the counter then shows its name without an icon.
Default counters: a new tab starts with these three. To go back to them, select Restore defaults and confirm with Restore. This replaces all counters of the tab, it becomes permanent when you select Save changes, and it doesn’t change the Tab JQL, the columns, or other tabs.
Label JQL My open requests statuscategory != DoneWaiting for approval approver = currentUser() AND approval = pending()Resolved tickets resolution IS NOT EMPTY AND resolved >= -7dColumns: a new tab starts with the default columns, and you can’t reorder them. The table offers 11 built-in fields (Type, Reference, Summary, Status, Service project, Requester, Created date, Updated date, Due date, Assignee, Priority) and 8 supported custom field types (SLA, User picker, Multi-user picker, People, Approvers list, Group picker, Multi-group picker, and Assets).
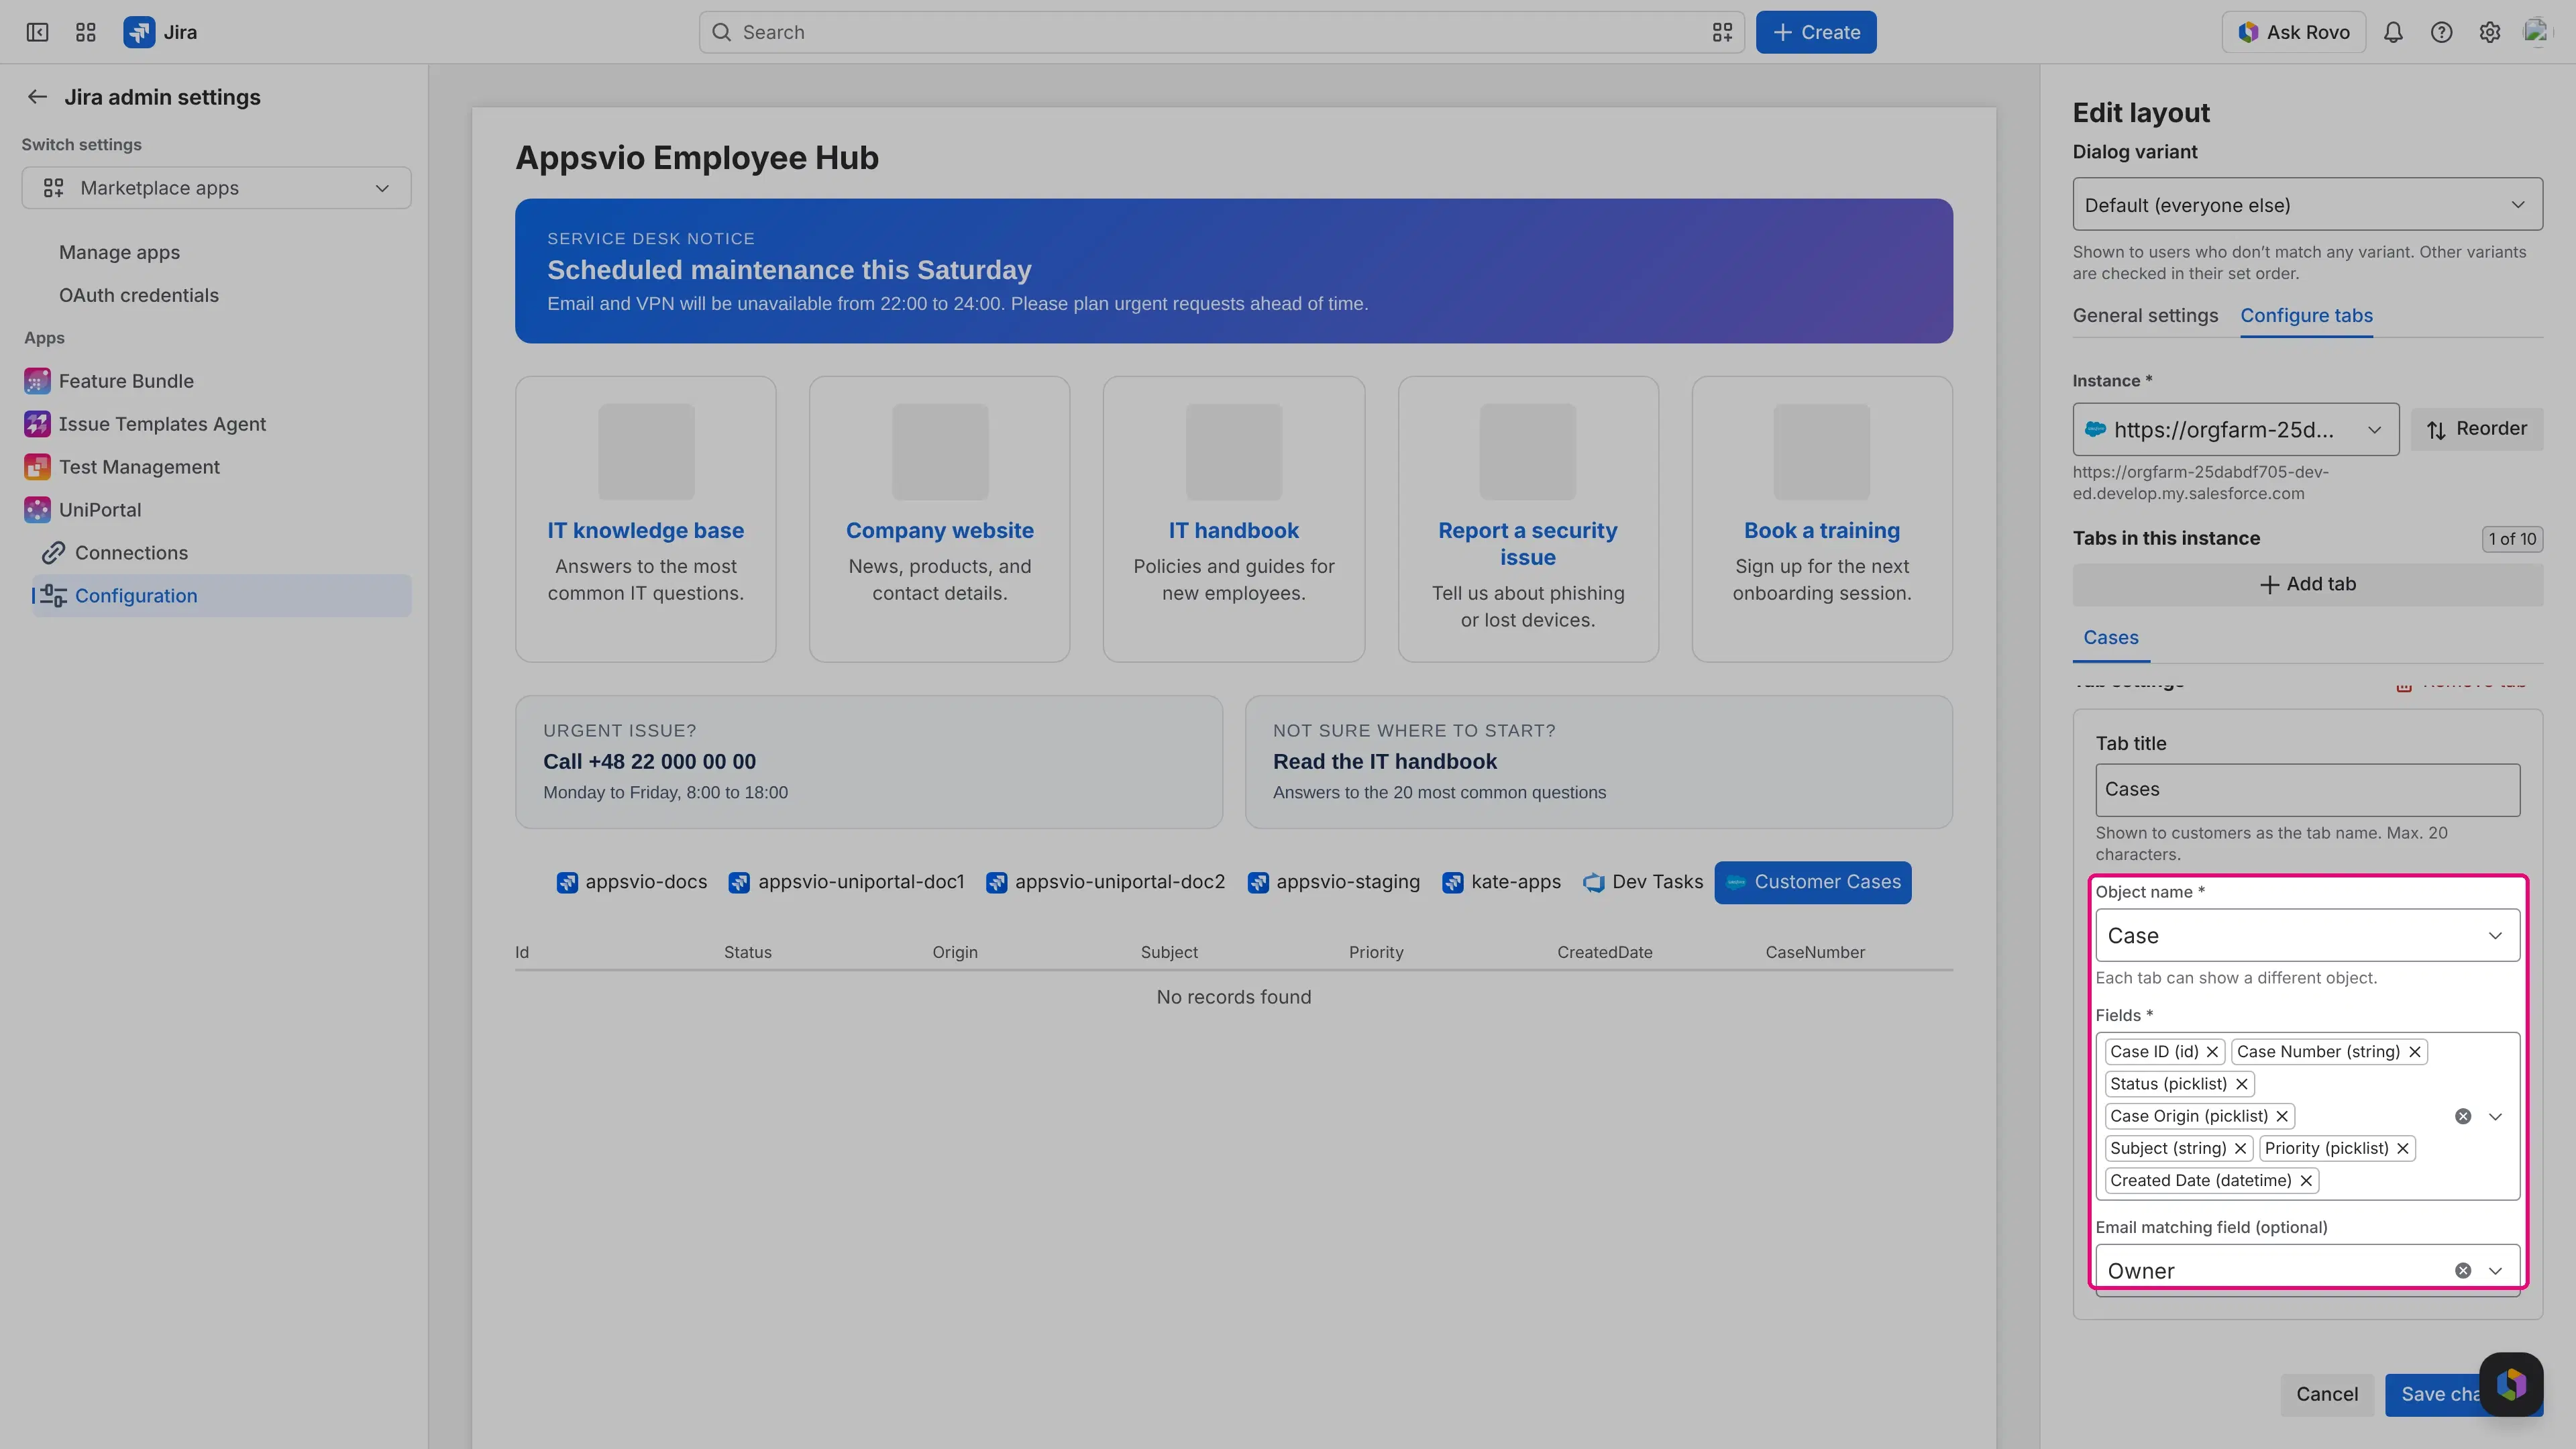
In Object name, select the object you want to show, most commonly Case.
In Fields, select at least one field. Nothing is selected by default.
Optionally, in Email matching field (optional), select a field that looks up a Salesforce user. UniPortal then shows a customer only the records where that field matches the customer’s email address.

How the table works:
The table shows one row per record. The picker lists each field with its label and type, but the column headers show the API name of the field. The
Idcolumn links to the record in Salesforce, and every other column shows its value as plain text, whatever the field type.If you select a different object and save, UniPortal replaces the whole configuration of that tab: the object, the fields, and the email matching field. To keep both objects, add another tab for the second one.
Without an email matching field
If you don’t select an email matching field, every customer sees all records of the selected Salesforce object.
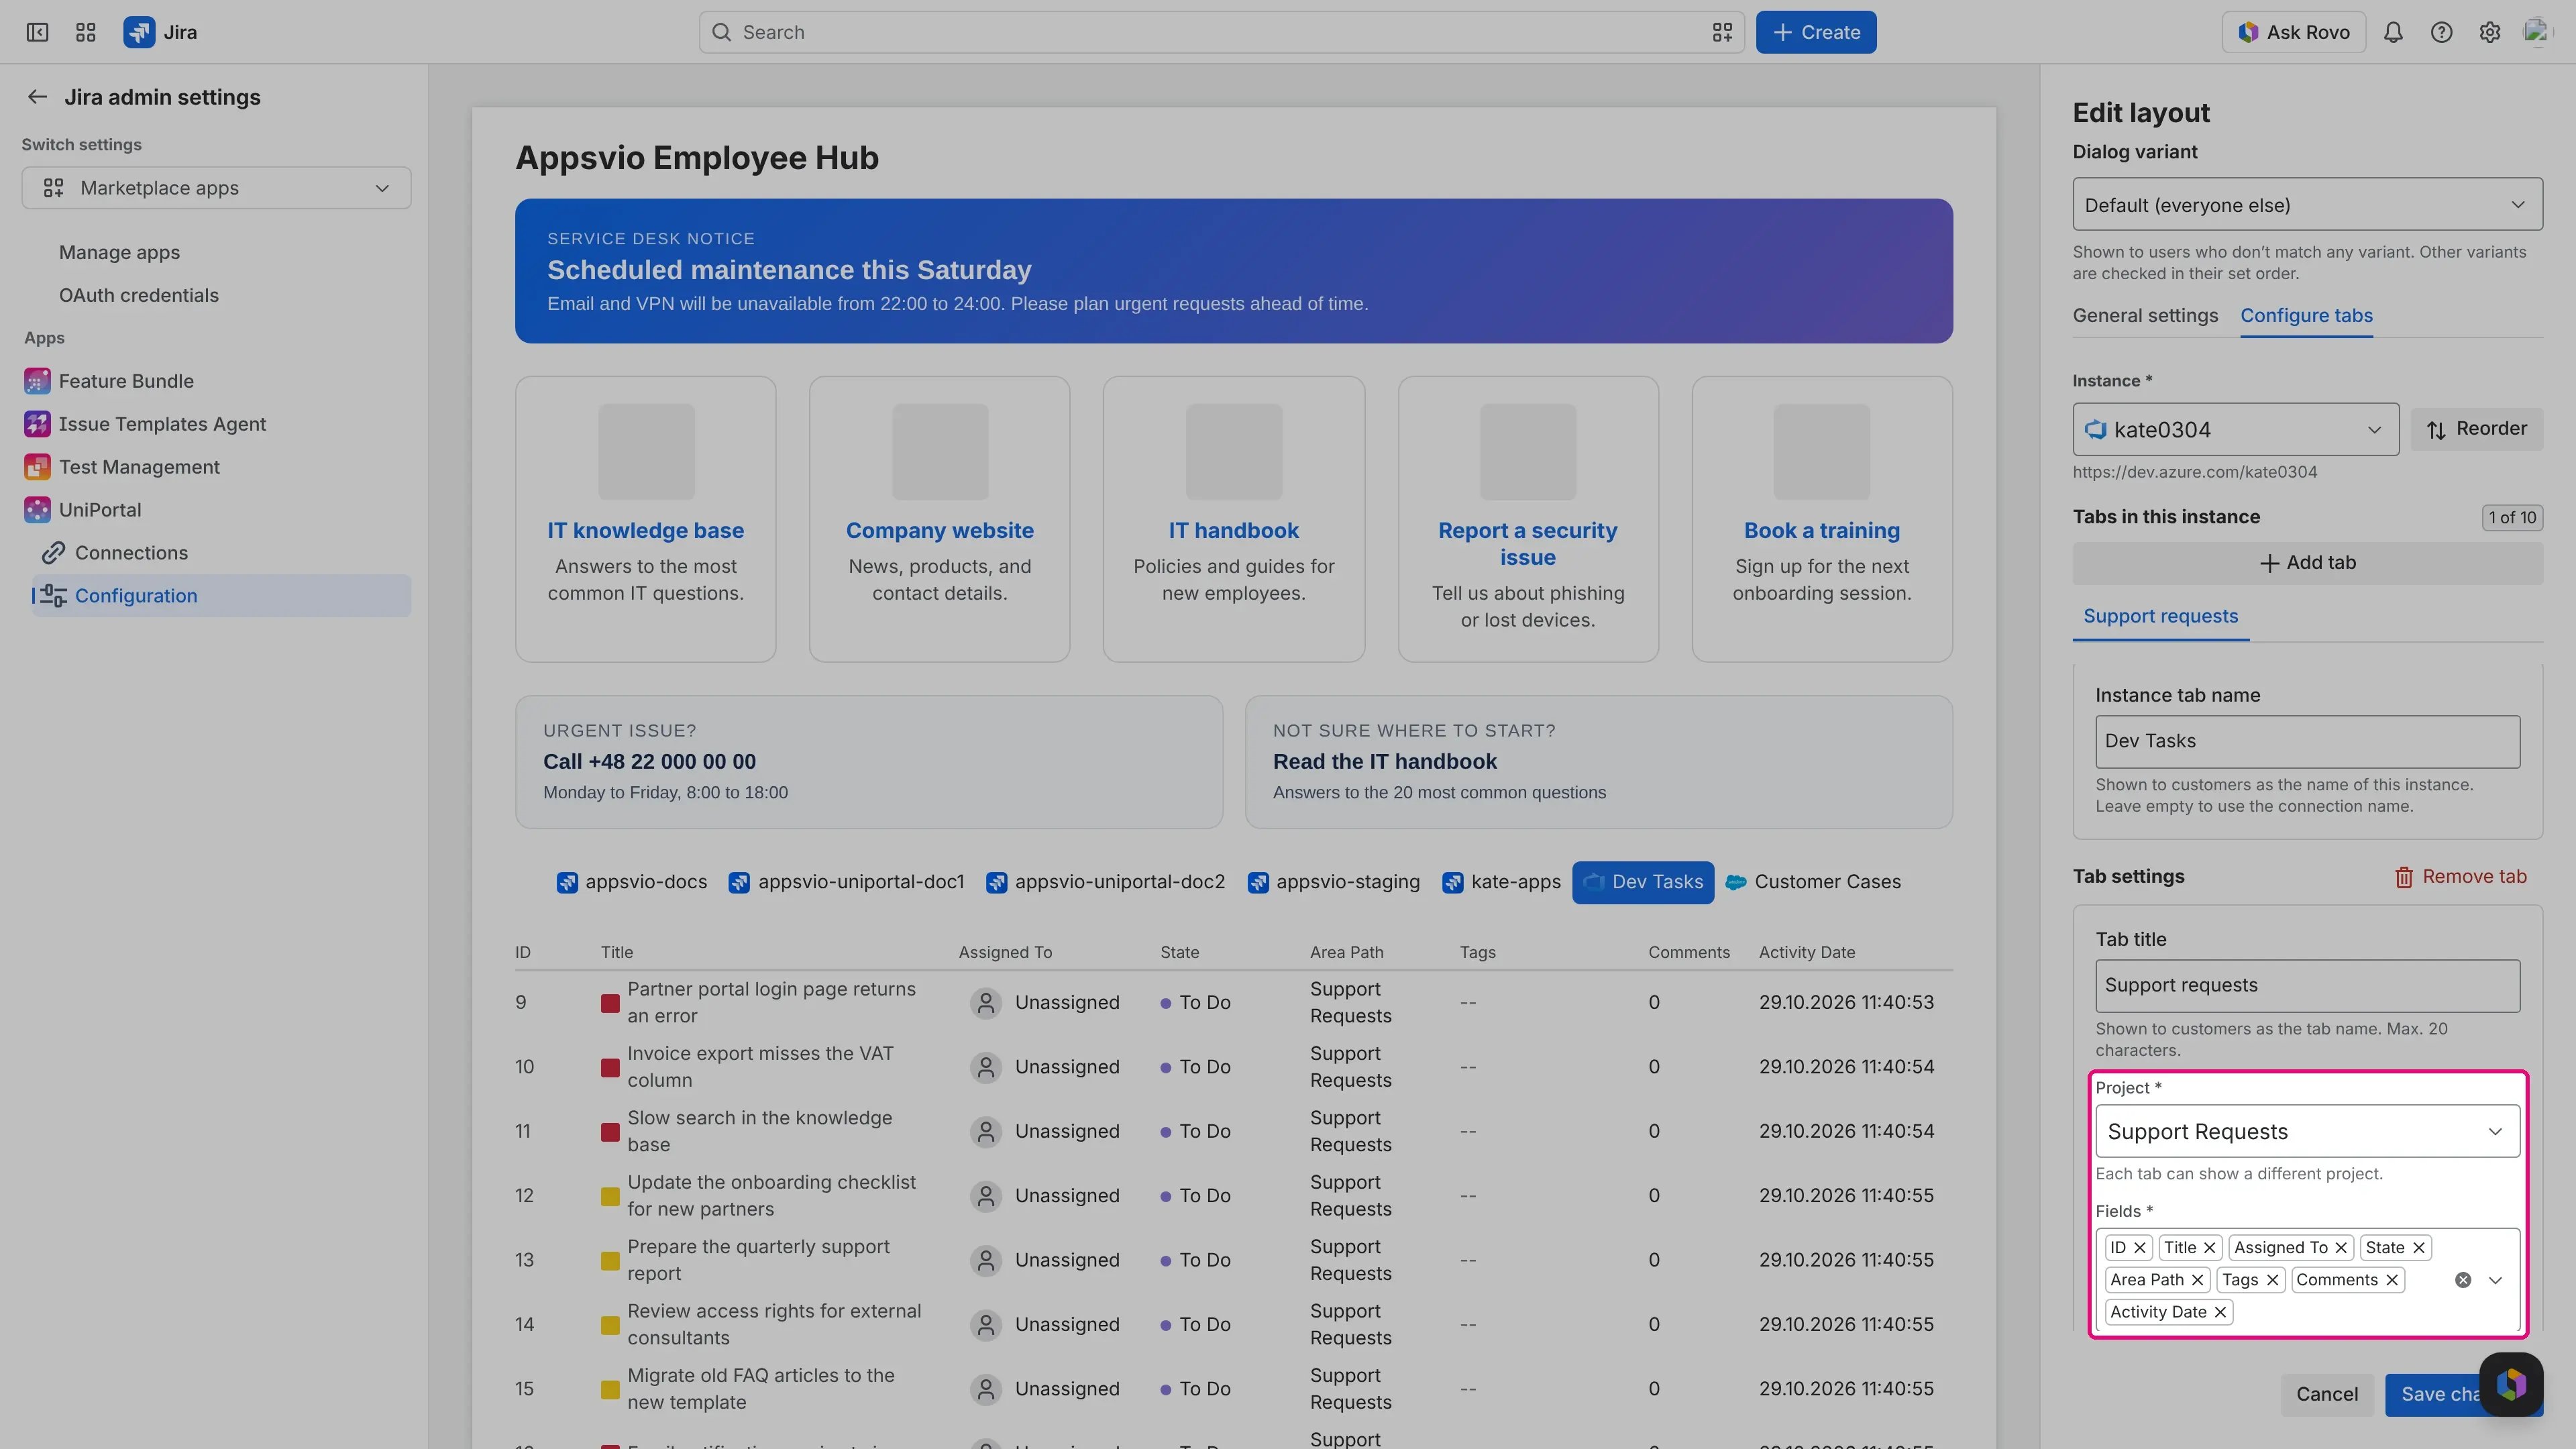
In Project, select the project you want to show.
Check Fields. After you select a project, it lists all 8 available columns: ID, Title, Assigned To, State, Area Path, Tags, Comments, and Activity Date. Remove the columns you don’t need. You need at least one.

How the table works:
The table lists the most recently changed work items of the project first. The ID links to the work item, and the other columns use matching formats, such as an icon for the work item type, badges for State, an avatar for Assigned To, and a list for Tags. If you empty Fields, the table is empty and you can’t save. An empty table right after setup is normal: work items appear once the project has some.
If you select a different project and save, UniPortal replaces the whole configuration of that tab. To show two projects, add another tab.
Customer visibility
Every customer sees all work items of the selected Azure DevOps project.
- Select Save changes. This saves all tabs of all instances you opened on the screen together. If any tab fails validation, UniPortal saves nothing and selects that tab. Switching between instances or tabs keeps your unsaved changes.
To check the result, select View this help center below the Instance field. It opens the live customer portal of that JSM instance with the dialog already open.
Result
Customers see the new tab next to the instance’s other tabs, with its own columns and filters. The tab strip appears when an instance has more than one tab. If there are more tabs than fit in the row, the rest collapse into a +N menu.

Change the order of instances and tabs
Customers see the instance tabs and the request tabs in the order you set. Until you set an order, instances keep their default order: Jira Service Management first, then Azure DevOps, then Salesforce.
On Configure tabs, select Reorder next to the Instance field.
To order the instances, use the Instances tab. To order the tabs of one instance, open the Tabs tab and select the instance.
Drag an item by its handle, or use the up and down arrows.
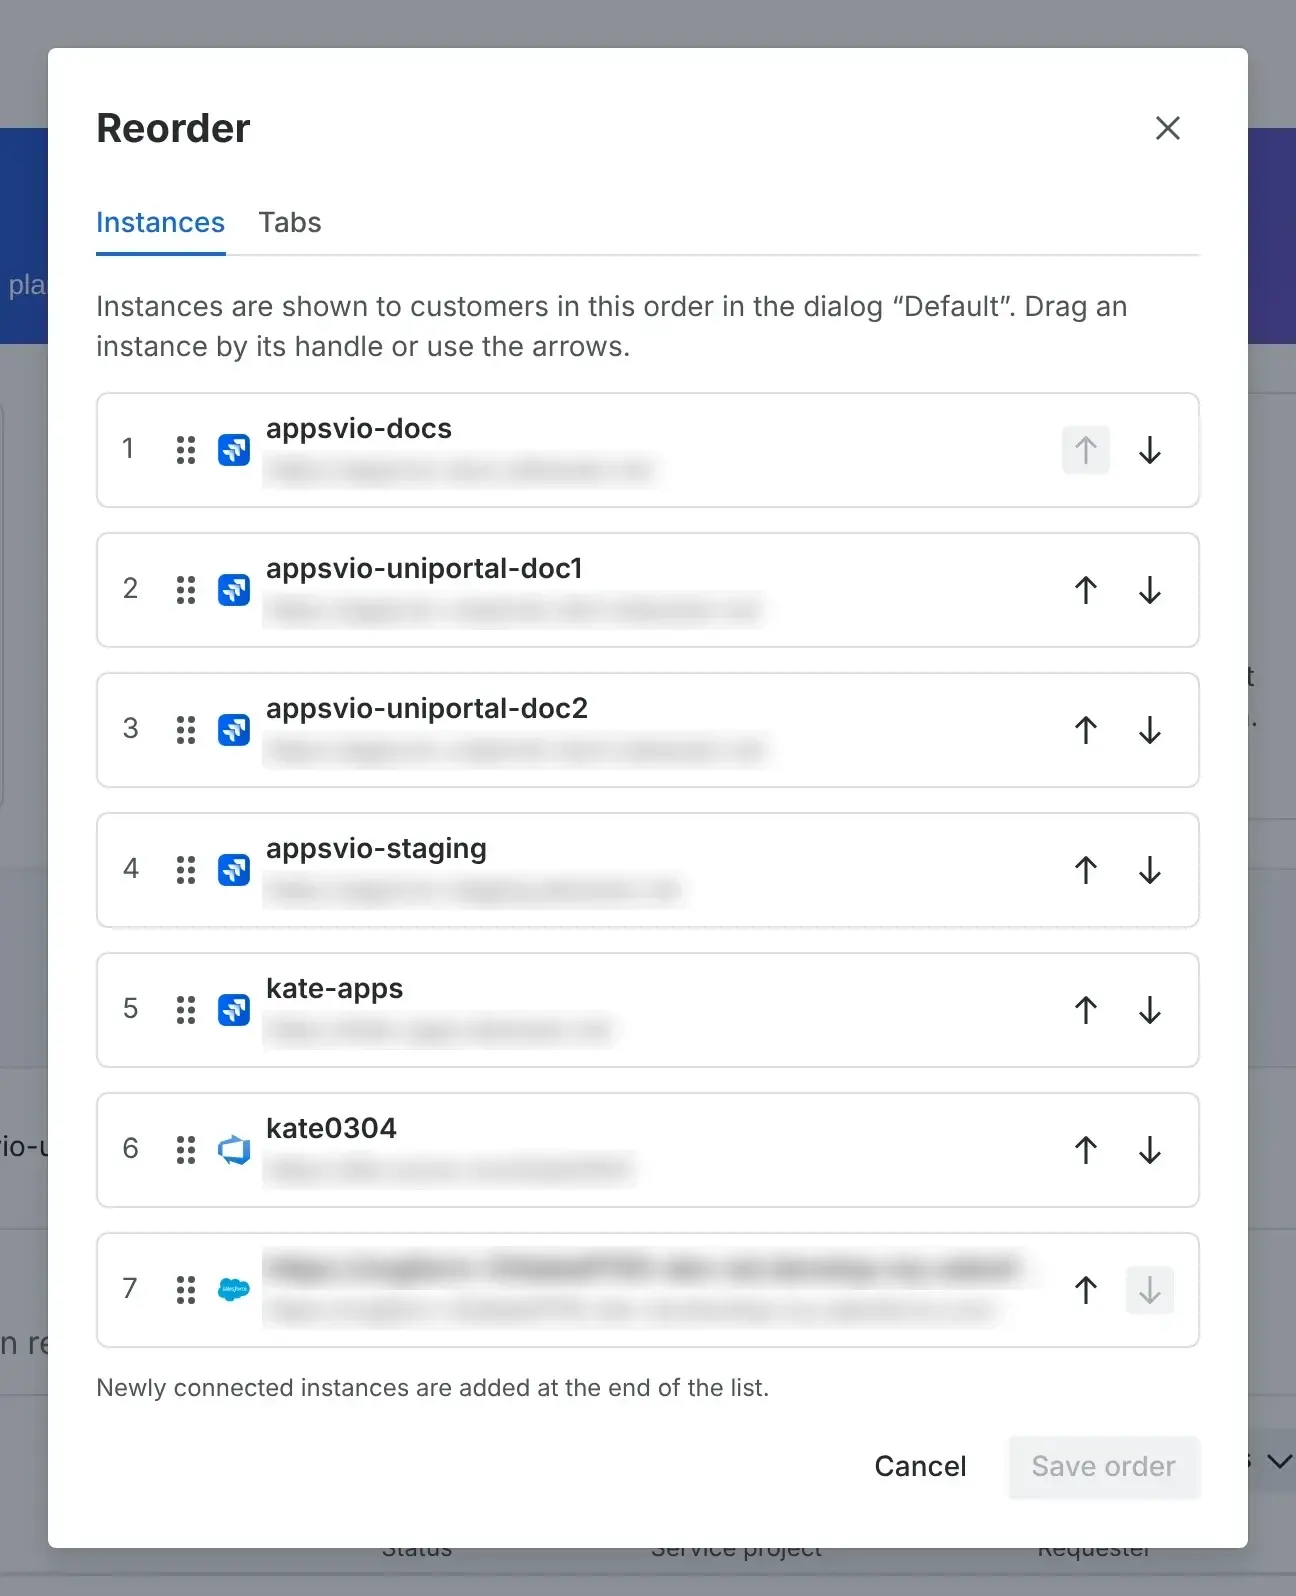
Select Save order.
Select Save changes.

Any tab can be moved, including the first one. The order of instances is saved for the selected dialog variant, so each variant can have its own. A newly connected instance is added at the end of the list.
Remove a tab
- Open Configure tabs and select the instance.
- Select the tab you want to remove.
- In Tab settings, select Remove tab, then confirm with Remove tab.
- Select Save changes.
UniPortal removes the tab with its title, filters, columns, and counters when you save. The instance and its other tabs are not affected, and customers no longer see the tab. If you remove the first tab, the next tab becomes the first one.
You can remove every tab of an instance. The instance then no longer appears in the dialog, and Configure tabs shows the notice “has no tabs in this dialog” until you add a tab again.