Templates on Transition screen
Connecting Jira issue templates to transition screens allows for the automatic filling of data. This feature is useful when specific information, like a “Definition of Done” checklist or a technical handover, is only required once a task moves to a new status. Using a Jira ticket template during transitions ensures that essential documentation is captured at the exact moment it is needed.
Template scope requirement
For a template to appear as an option within a transition dialog, the Transition view scope must be enabled in the General settings tab of that specific Jira ticket template configuration.
Configuring the Transition screen
Because the Template field is not added to transition screens automatically, a manual configuration by a Jira Administrator is required.
Creating the Transition screen
The first step involves creating a dedicated screen that includes both the template selection field and the fields that are to be auto-filled:
- Navigate to Jira settings > Issues (Work Items) > Screens and select Add screen.

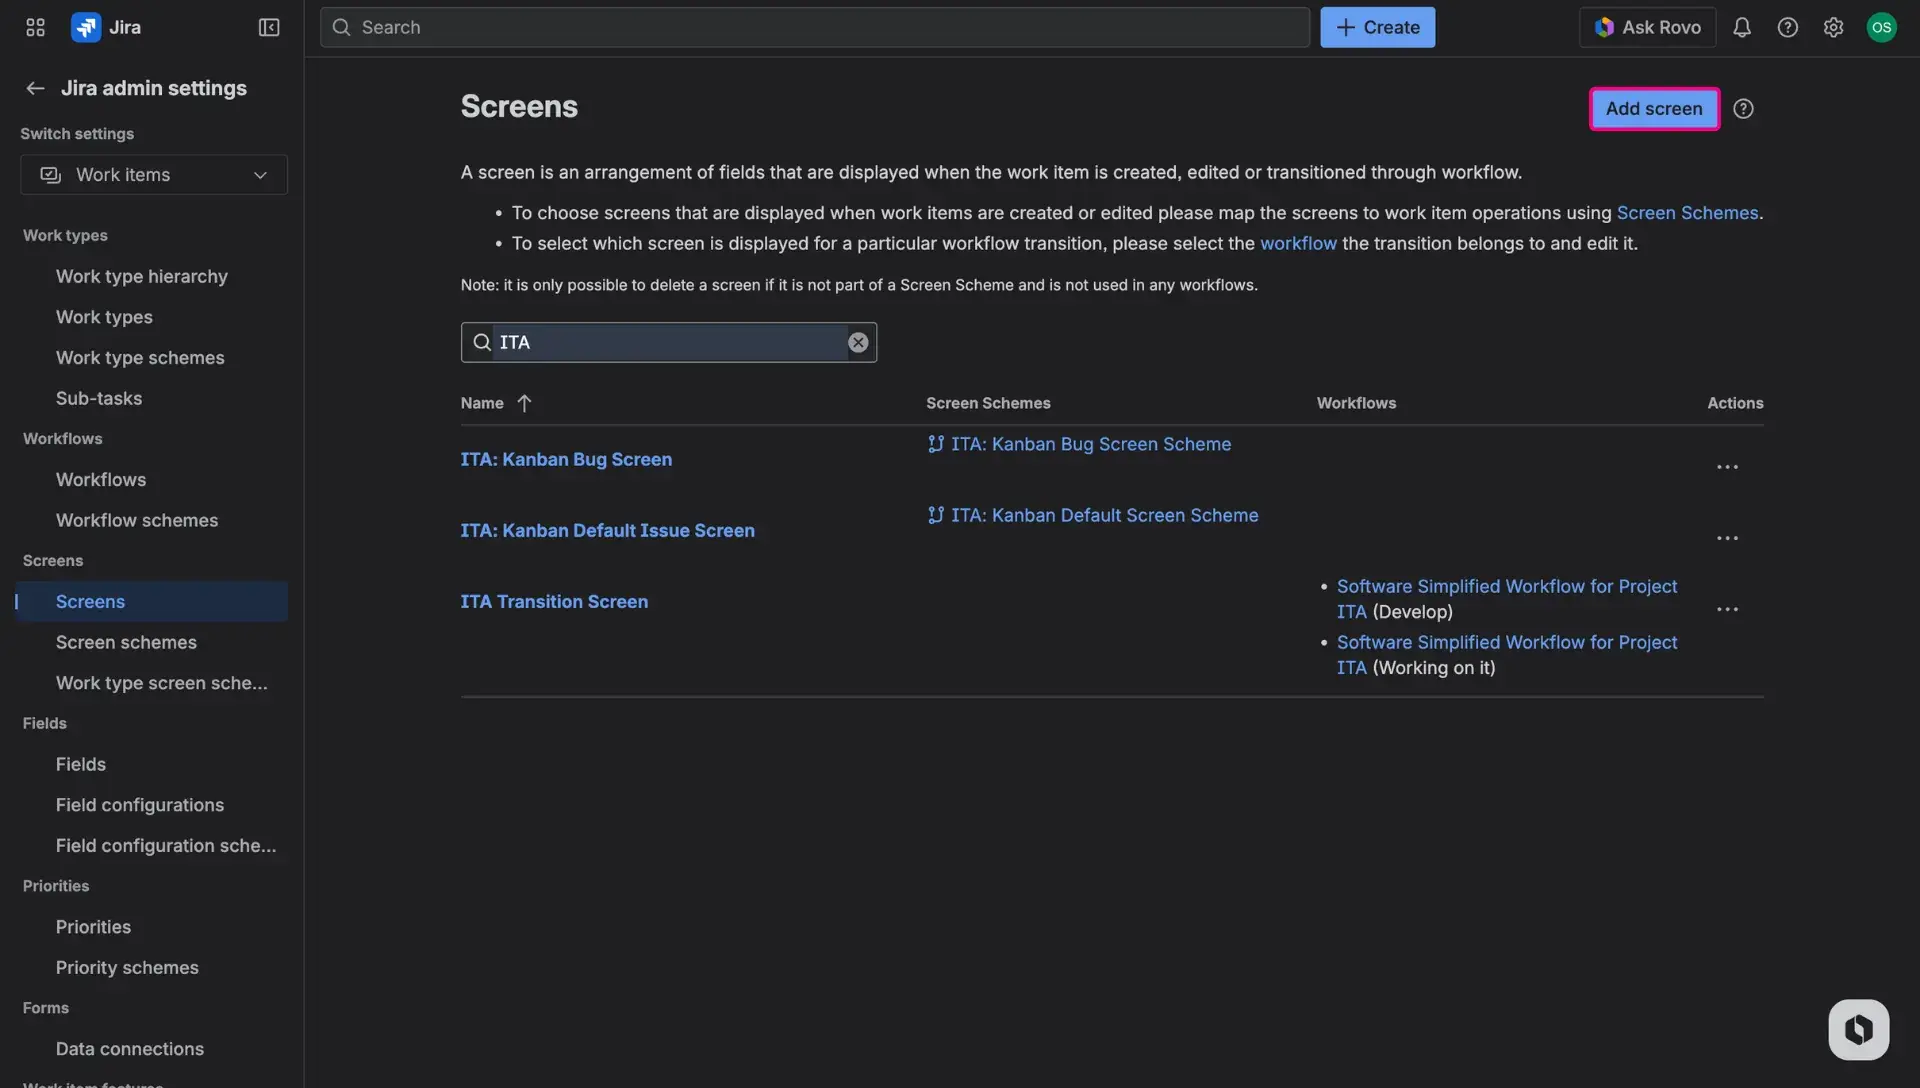
- Provide a Name and Description, then save the screen.
- Open the new screen configuration and add the Template field to the list of visible fields, along with fields that are included in a template.
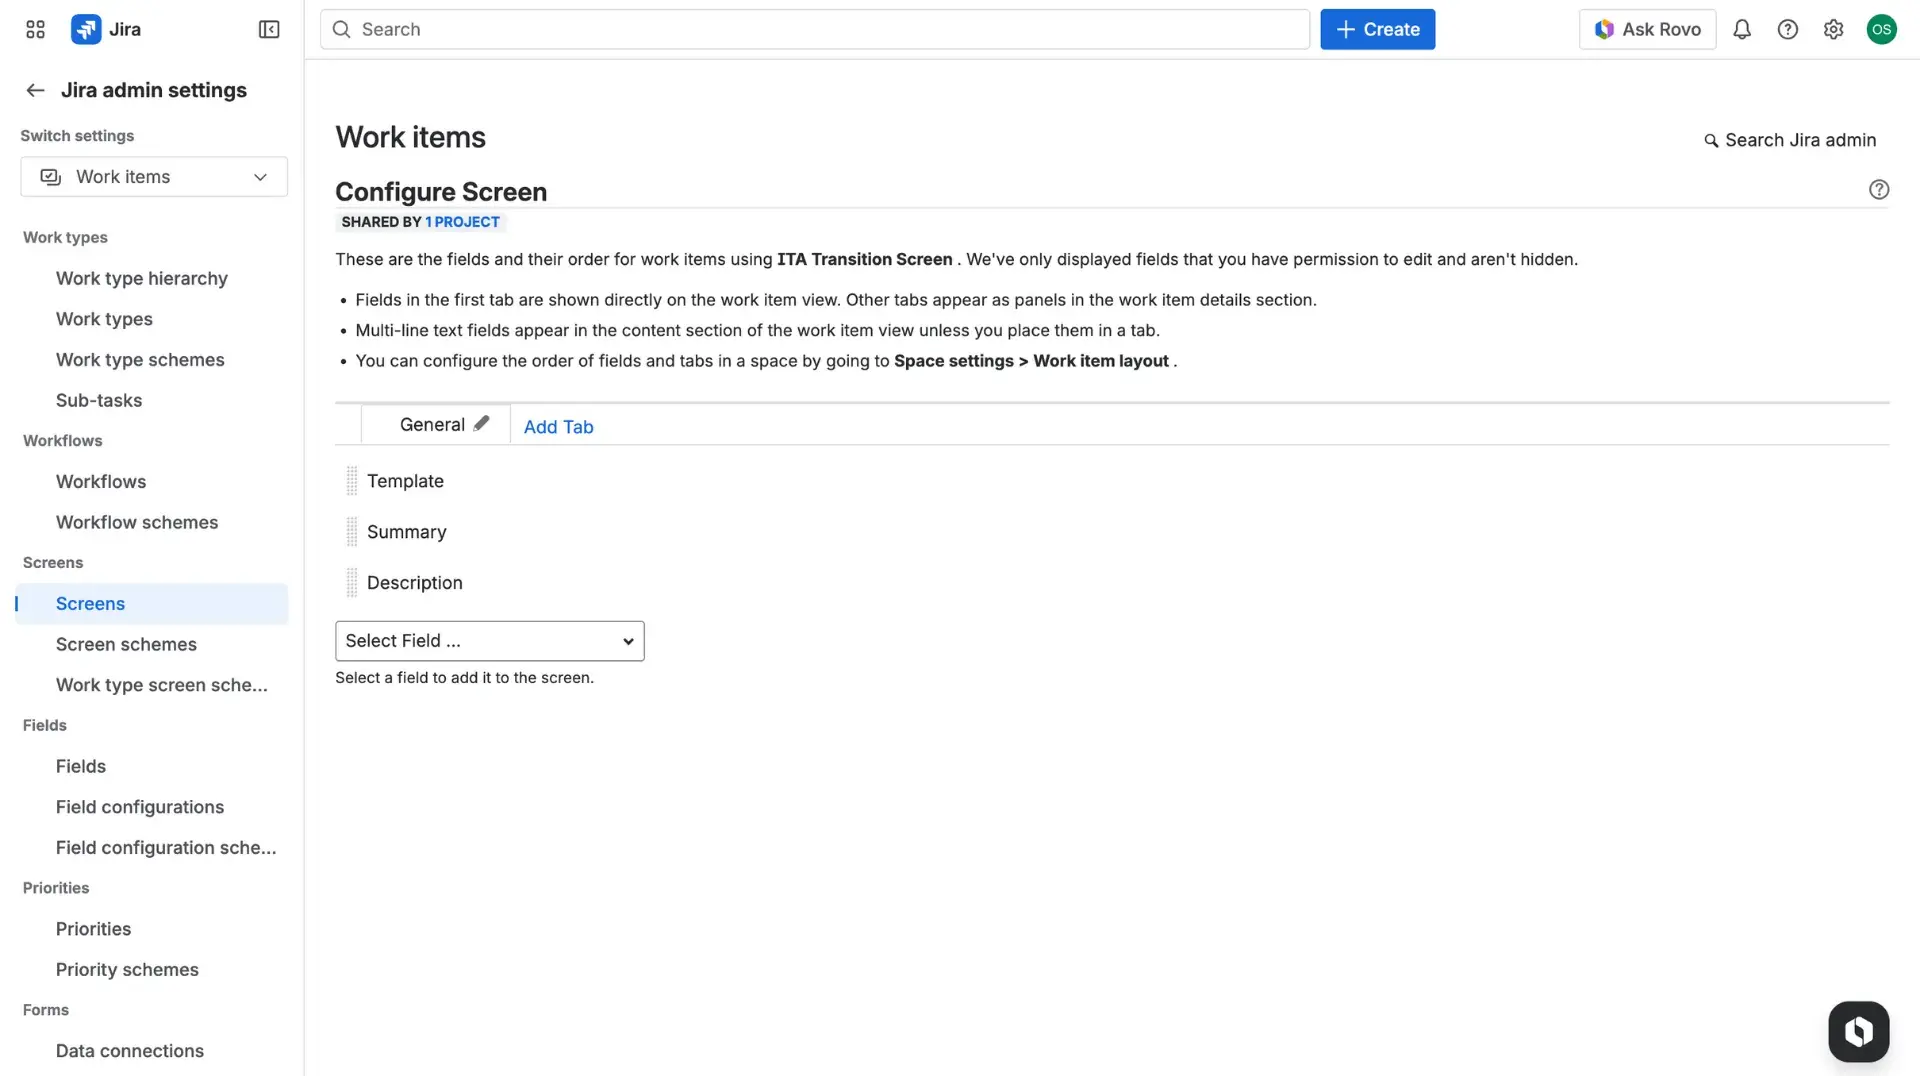
Important steps to remember
- For a template to appear as an option within a transition dialog, the Transition view scope must be enabled in the General settings tab of that specific Jira ticket template configuration.
- Add every other field that the template is expected to fill (e.g., Description, Priority, etc.) to this screen. If a field is not included in the screen configuration, the template will not be able to apply data to it during the transition.
Adding the screen to the workflow
Once the screen is created and fully configured with all necessary fields, it must be linked to the specific transition:
- In Jira Settings > Workflows, open the Workflow editor for the relevant project by clicking the Edit button (three dots).
- Select the specific Transition (e.g., from “In Progress” to “Ready for QA”).
- In the panel on the right, locate the Perform actions option and then search for Show a screen action.

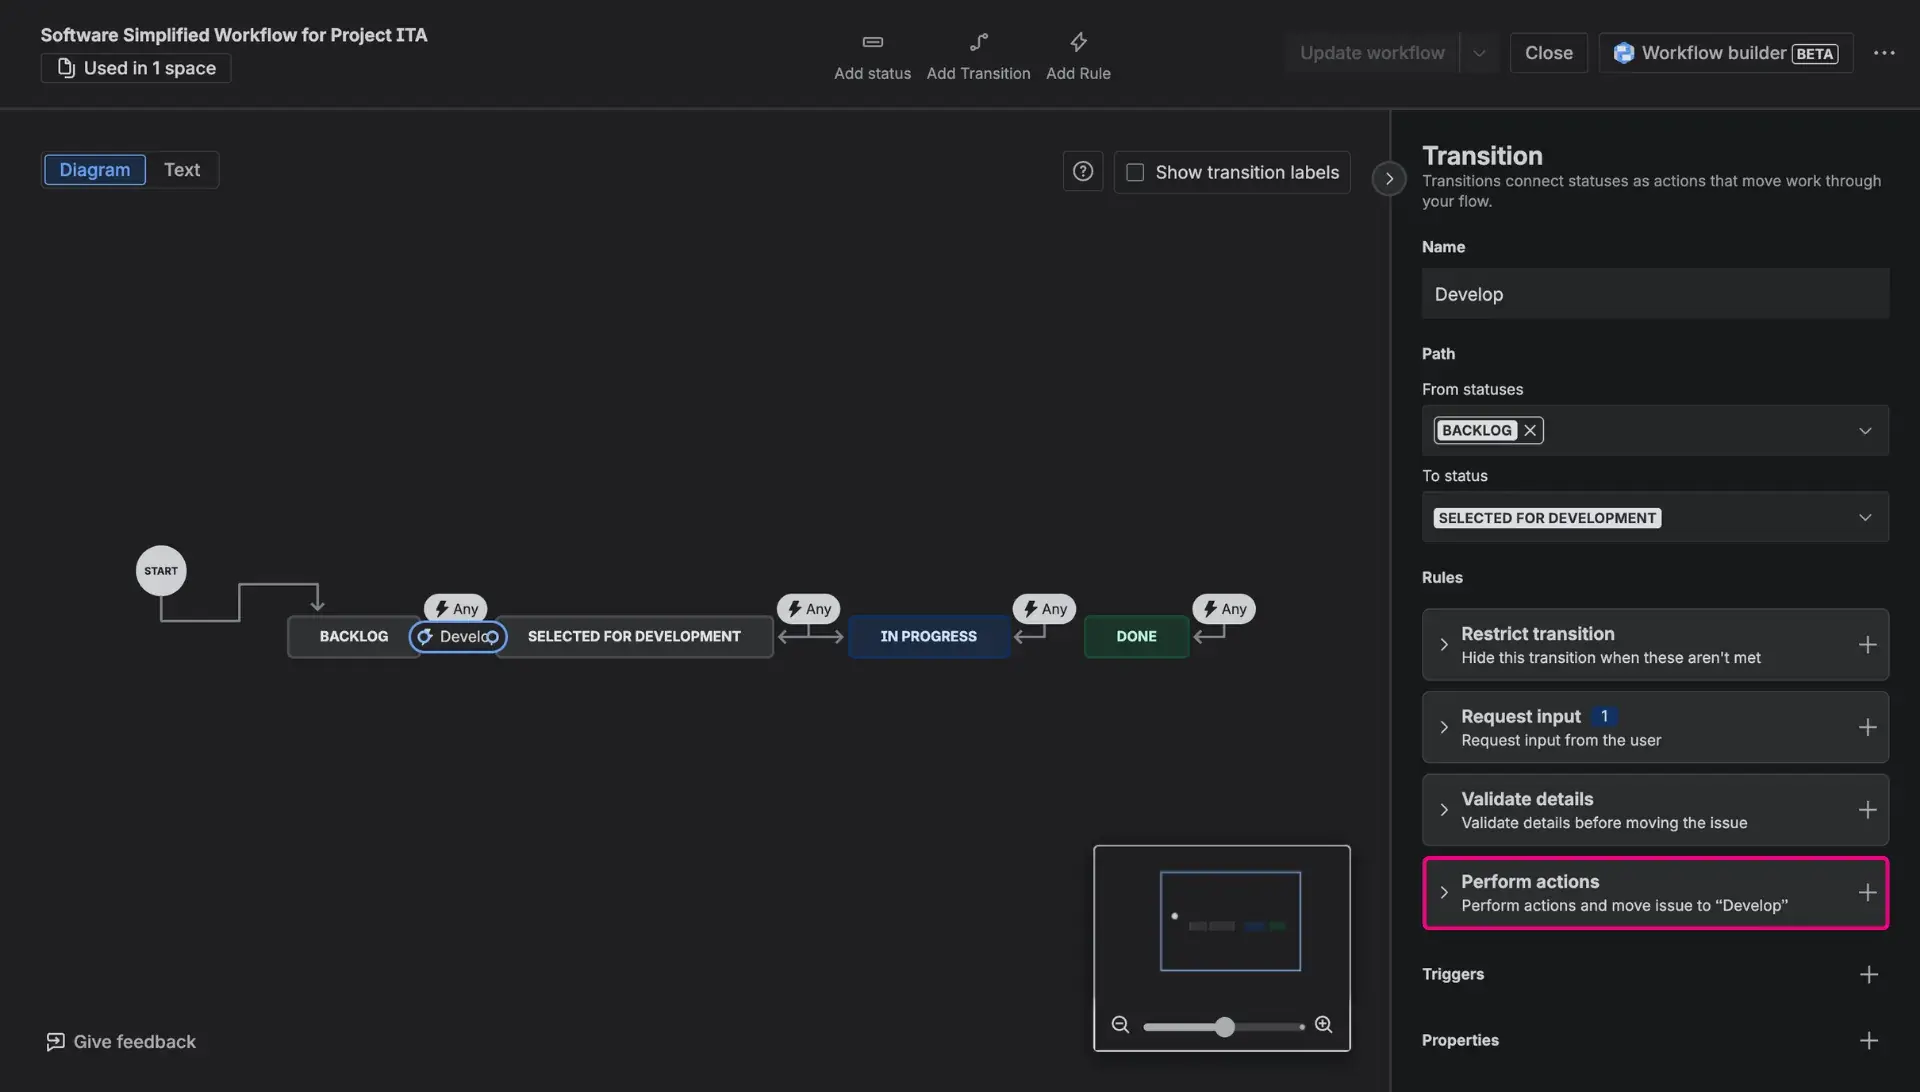
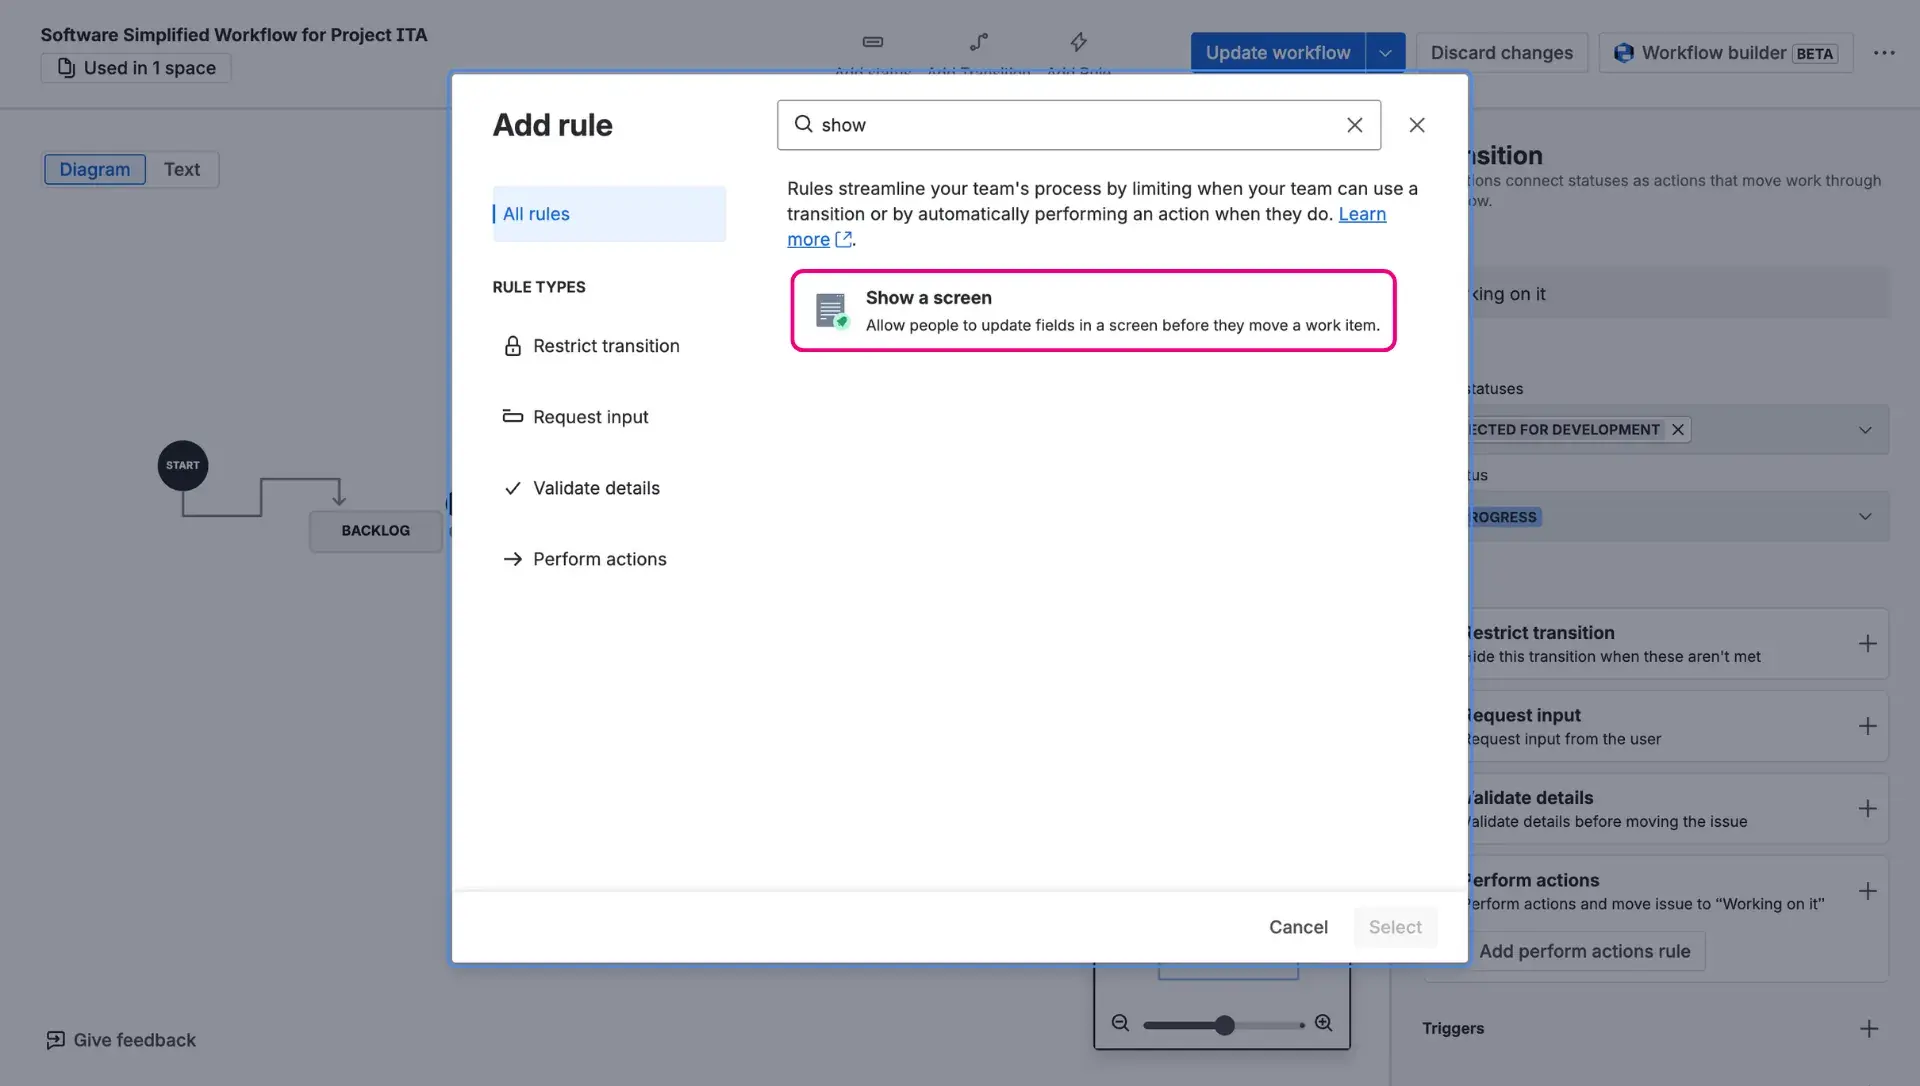
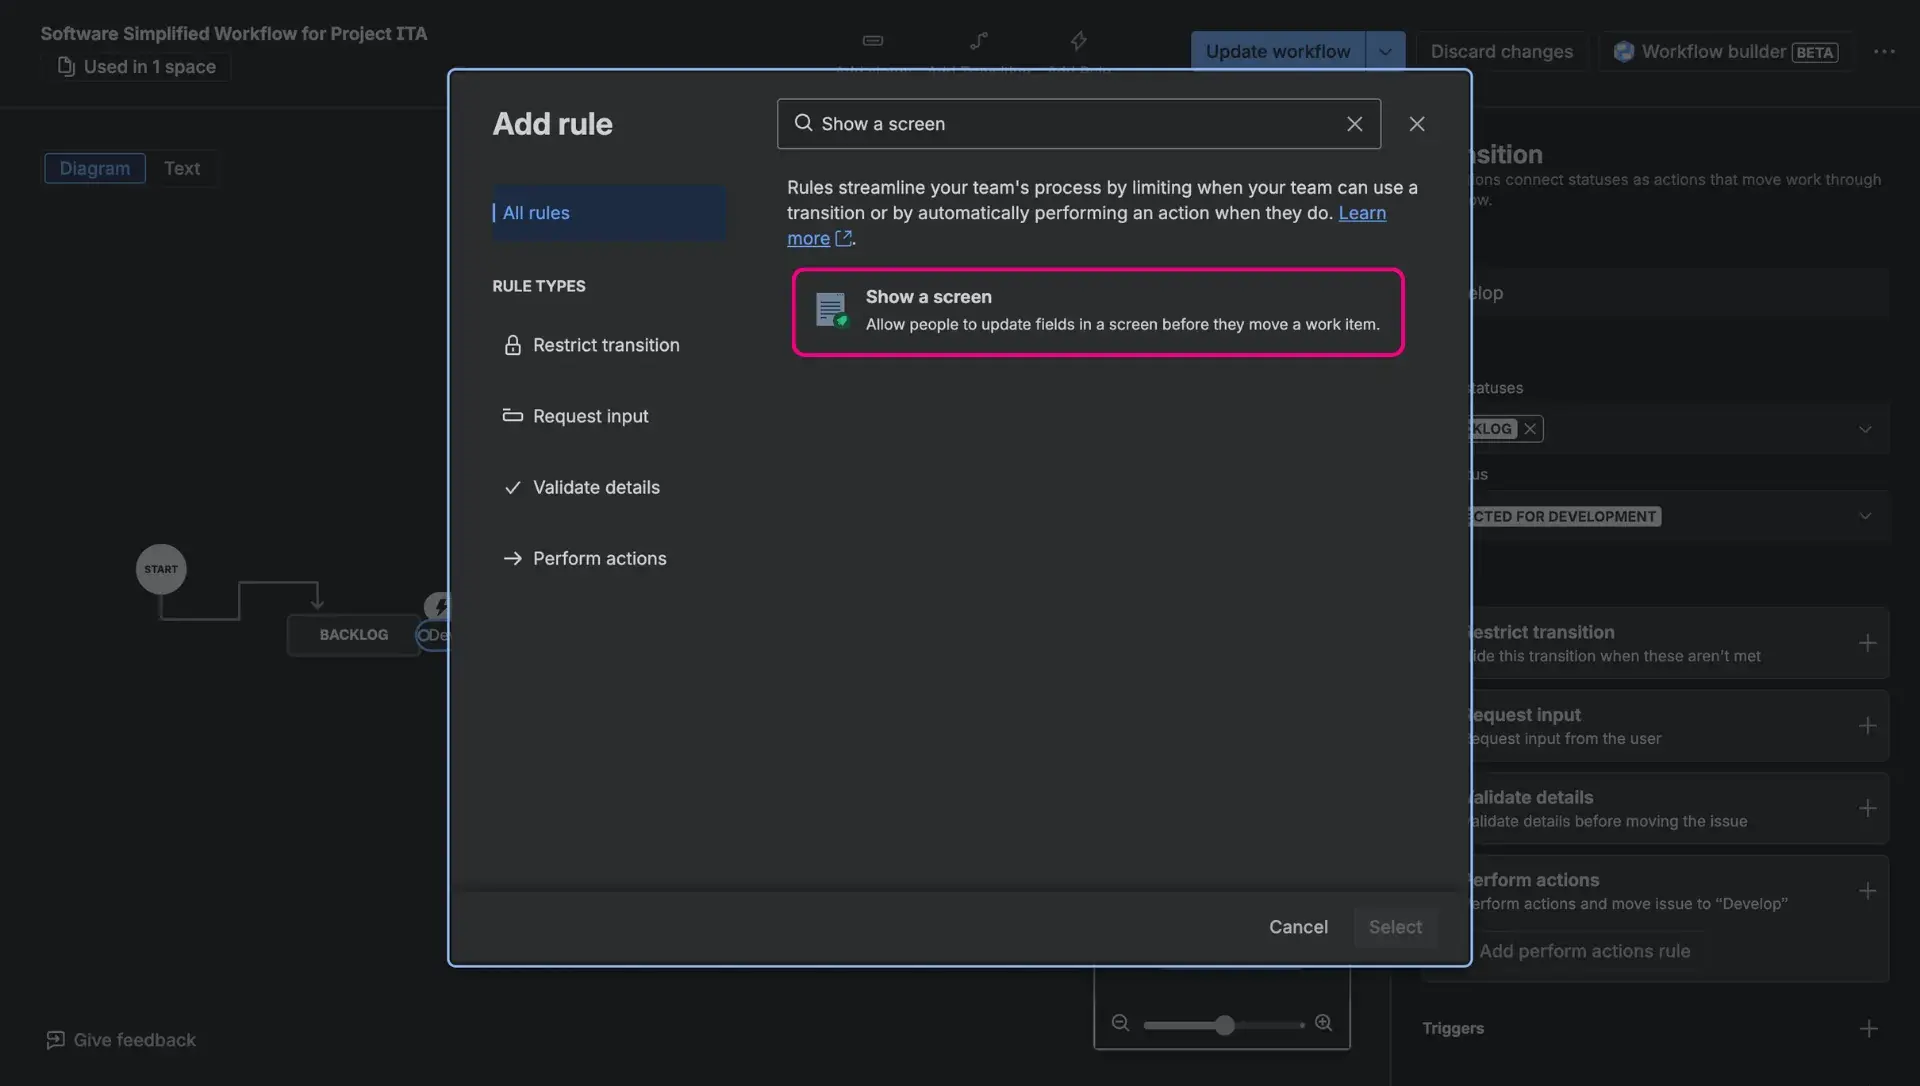
- Configure the action by selecting the previously created screen from the dropdown menu and choosing the wanted status transition.
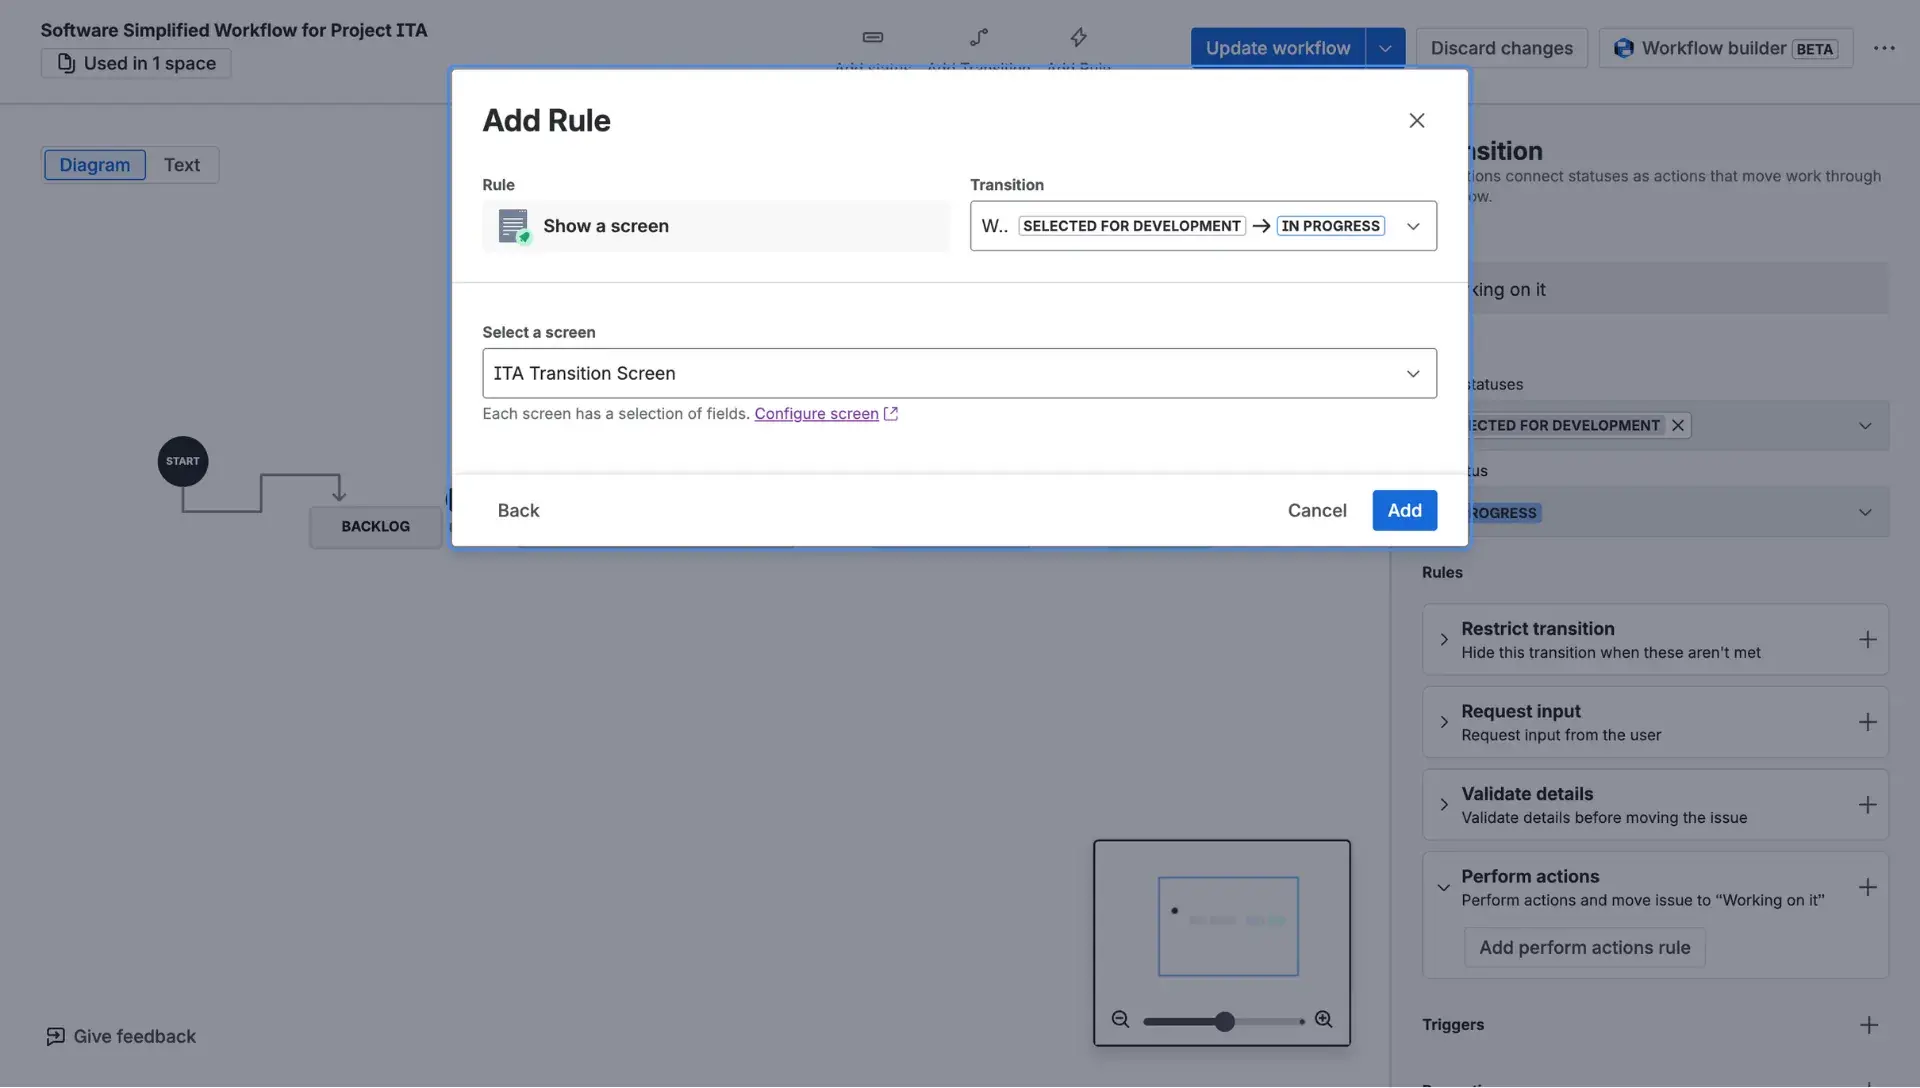
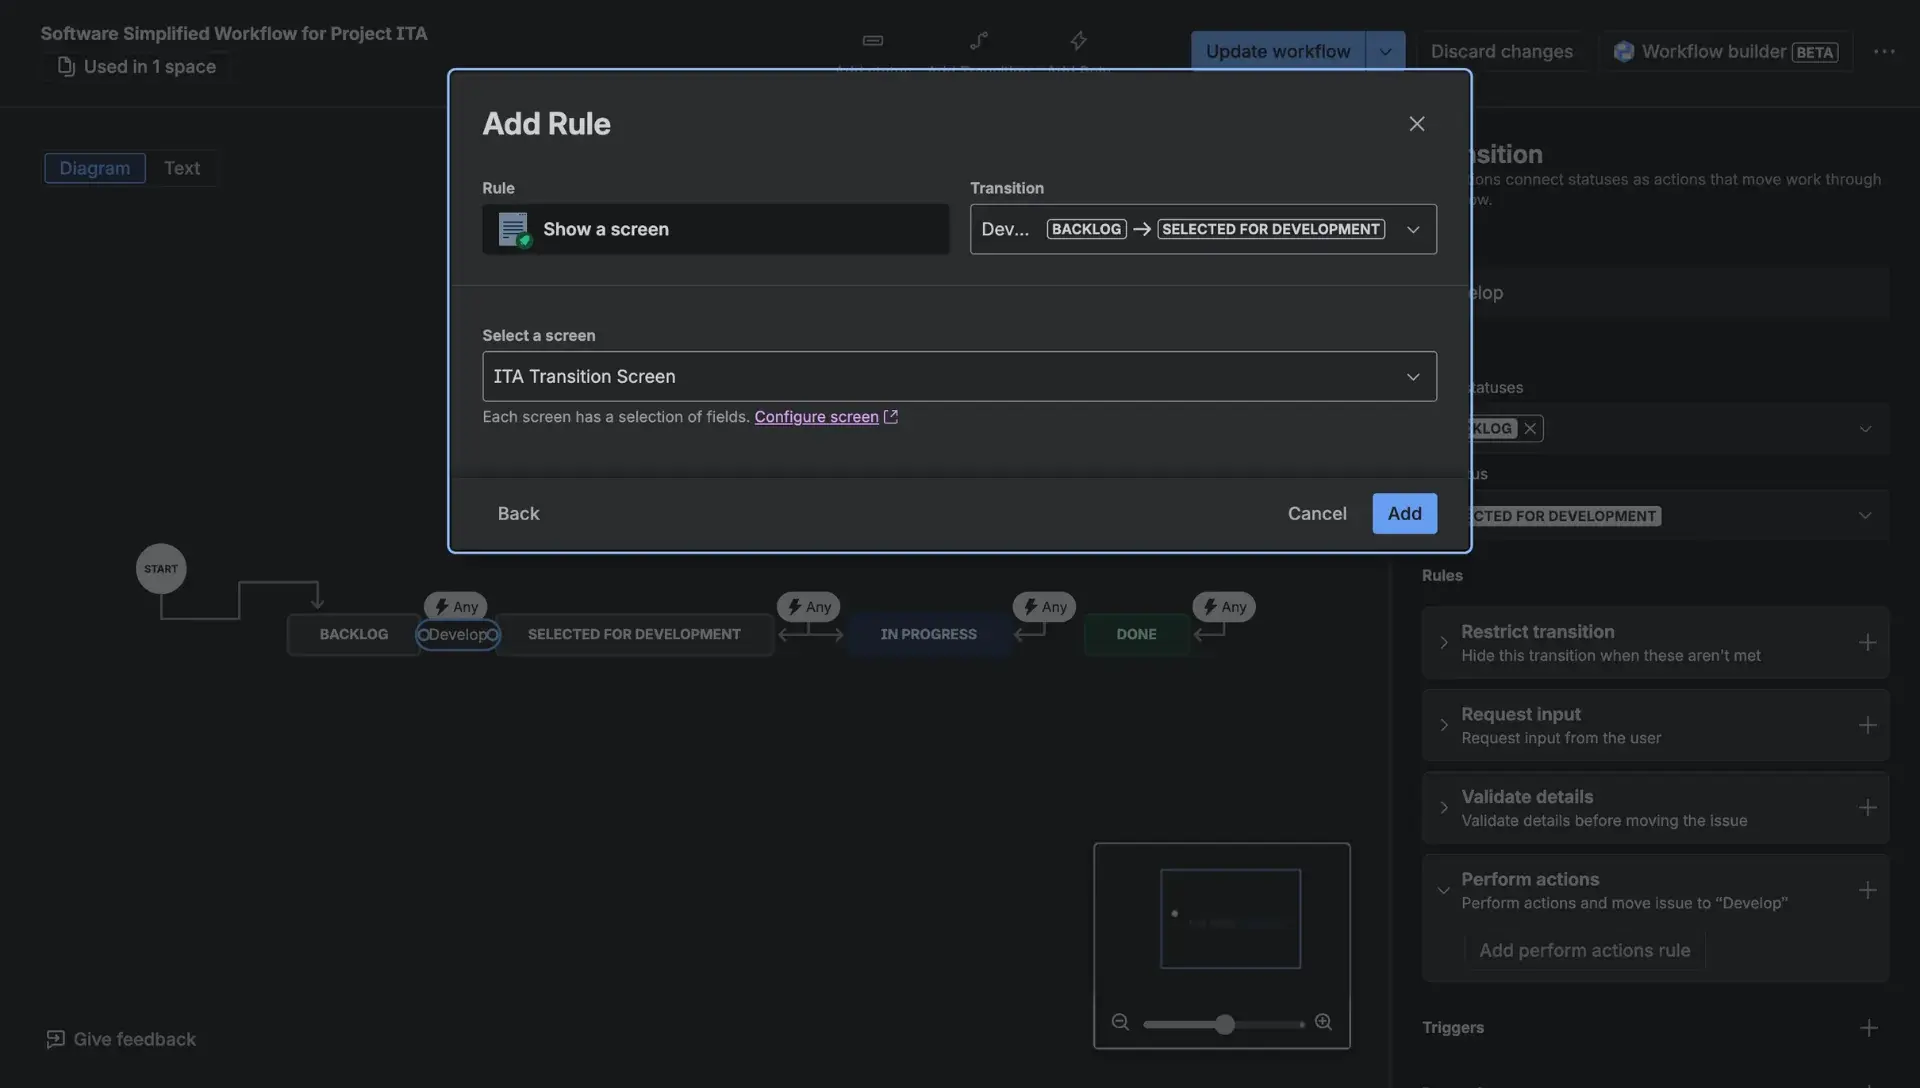
- Click the Update workflow button to apply the changes.
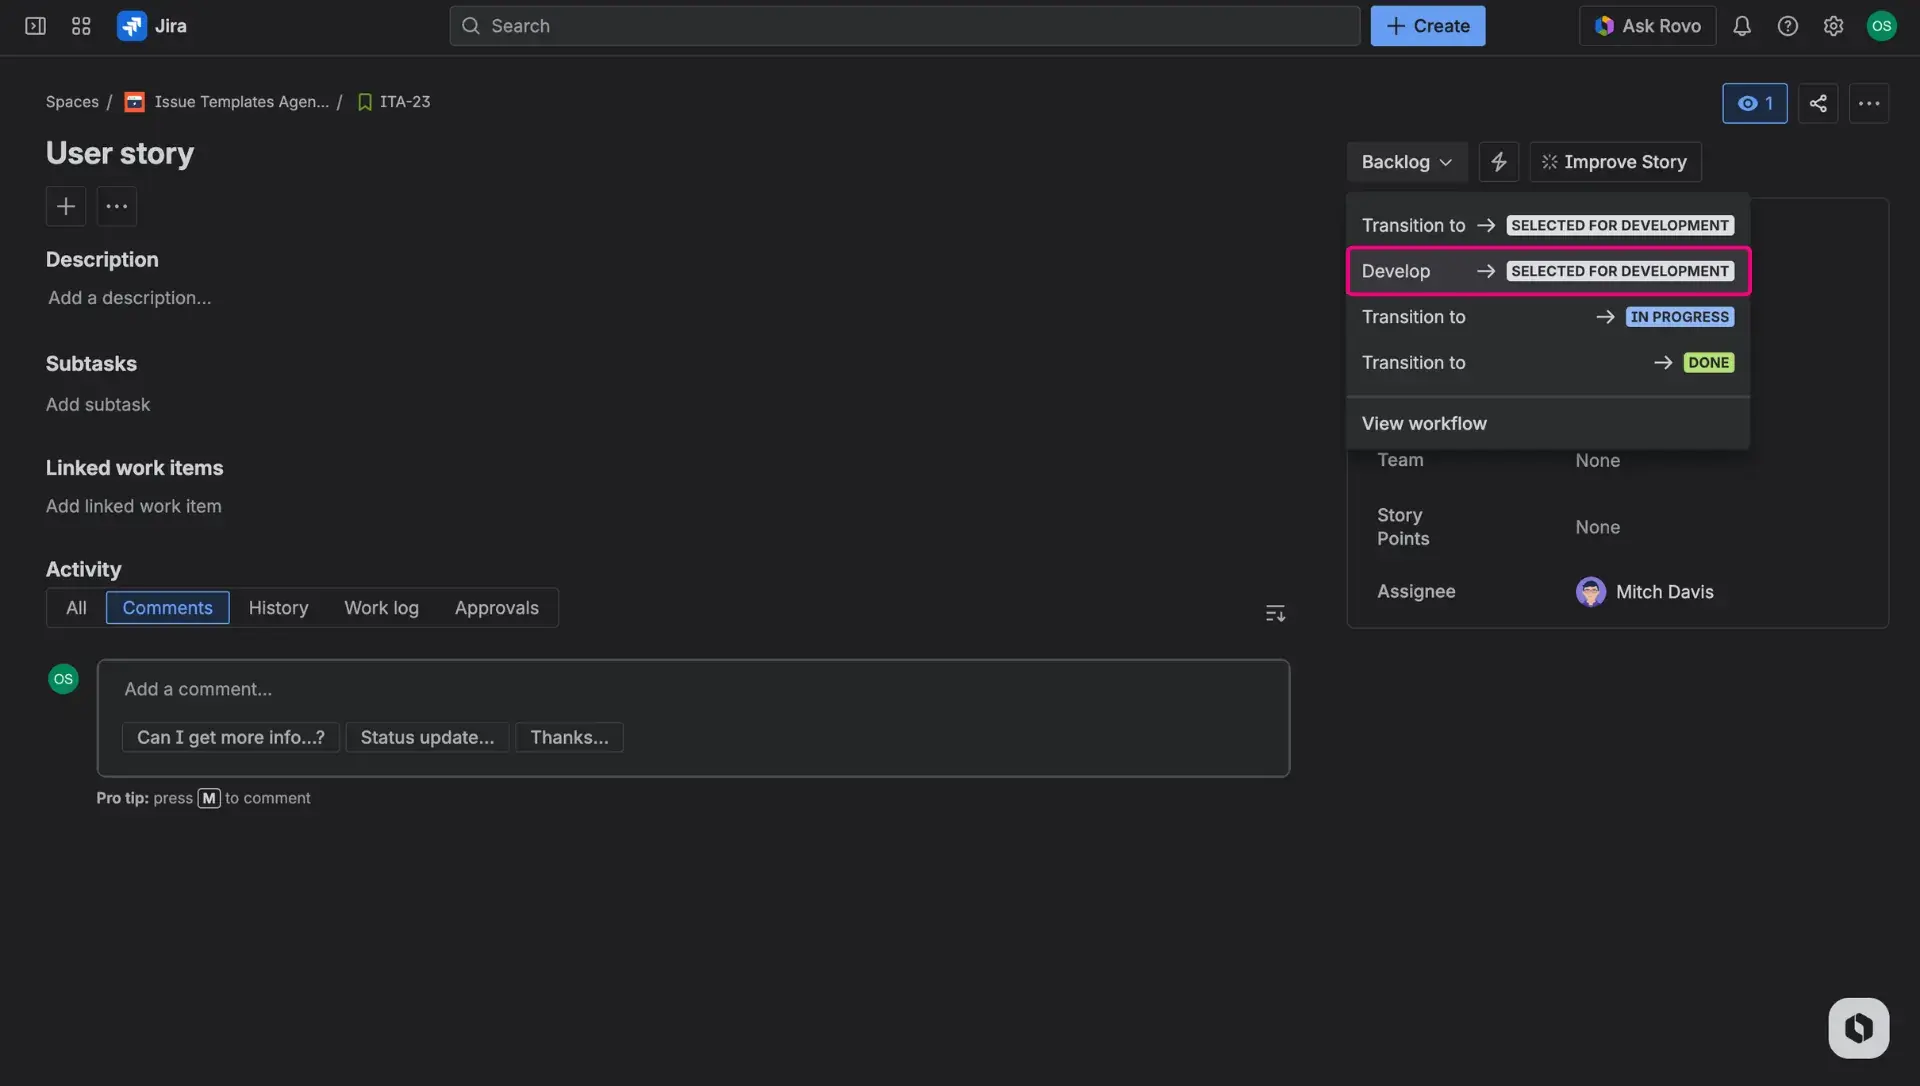
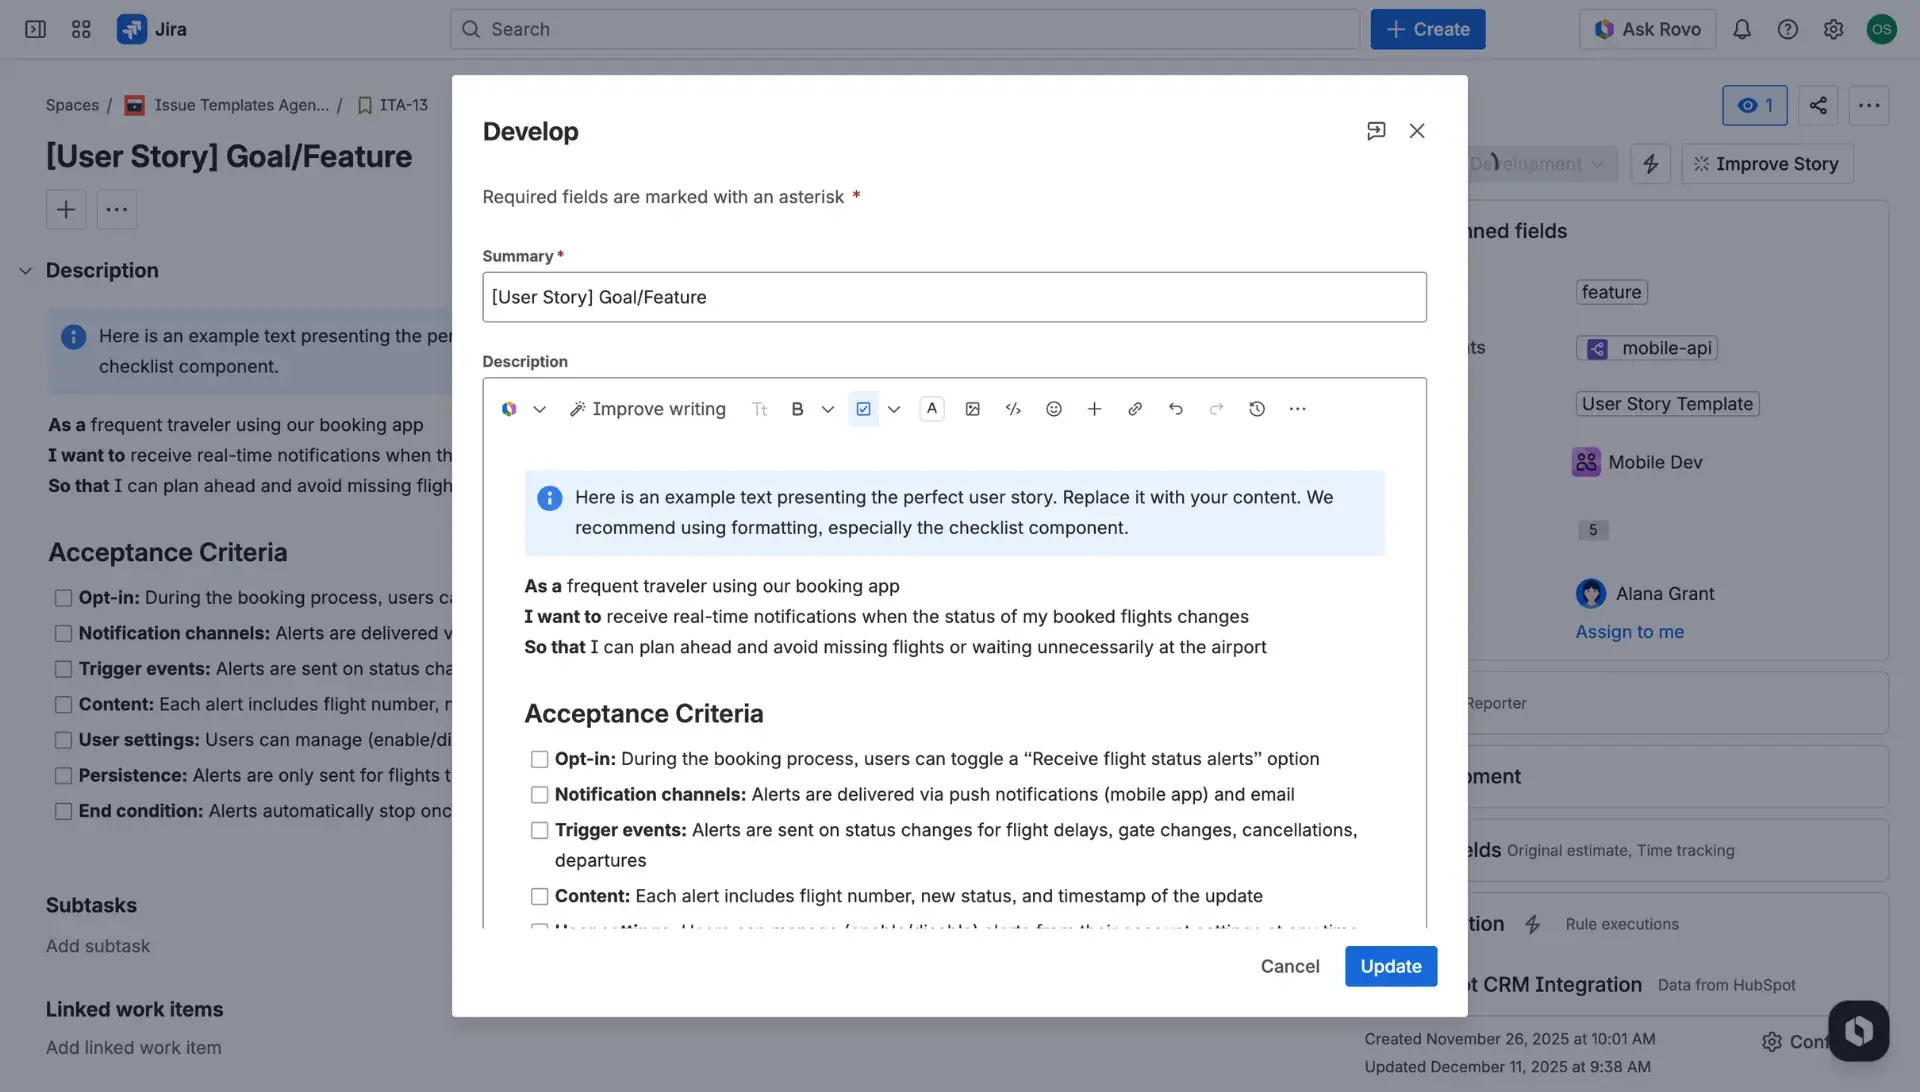
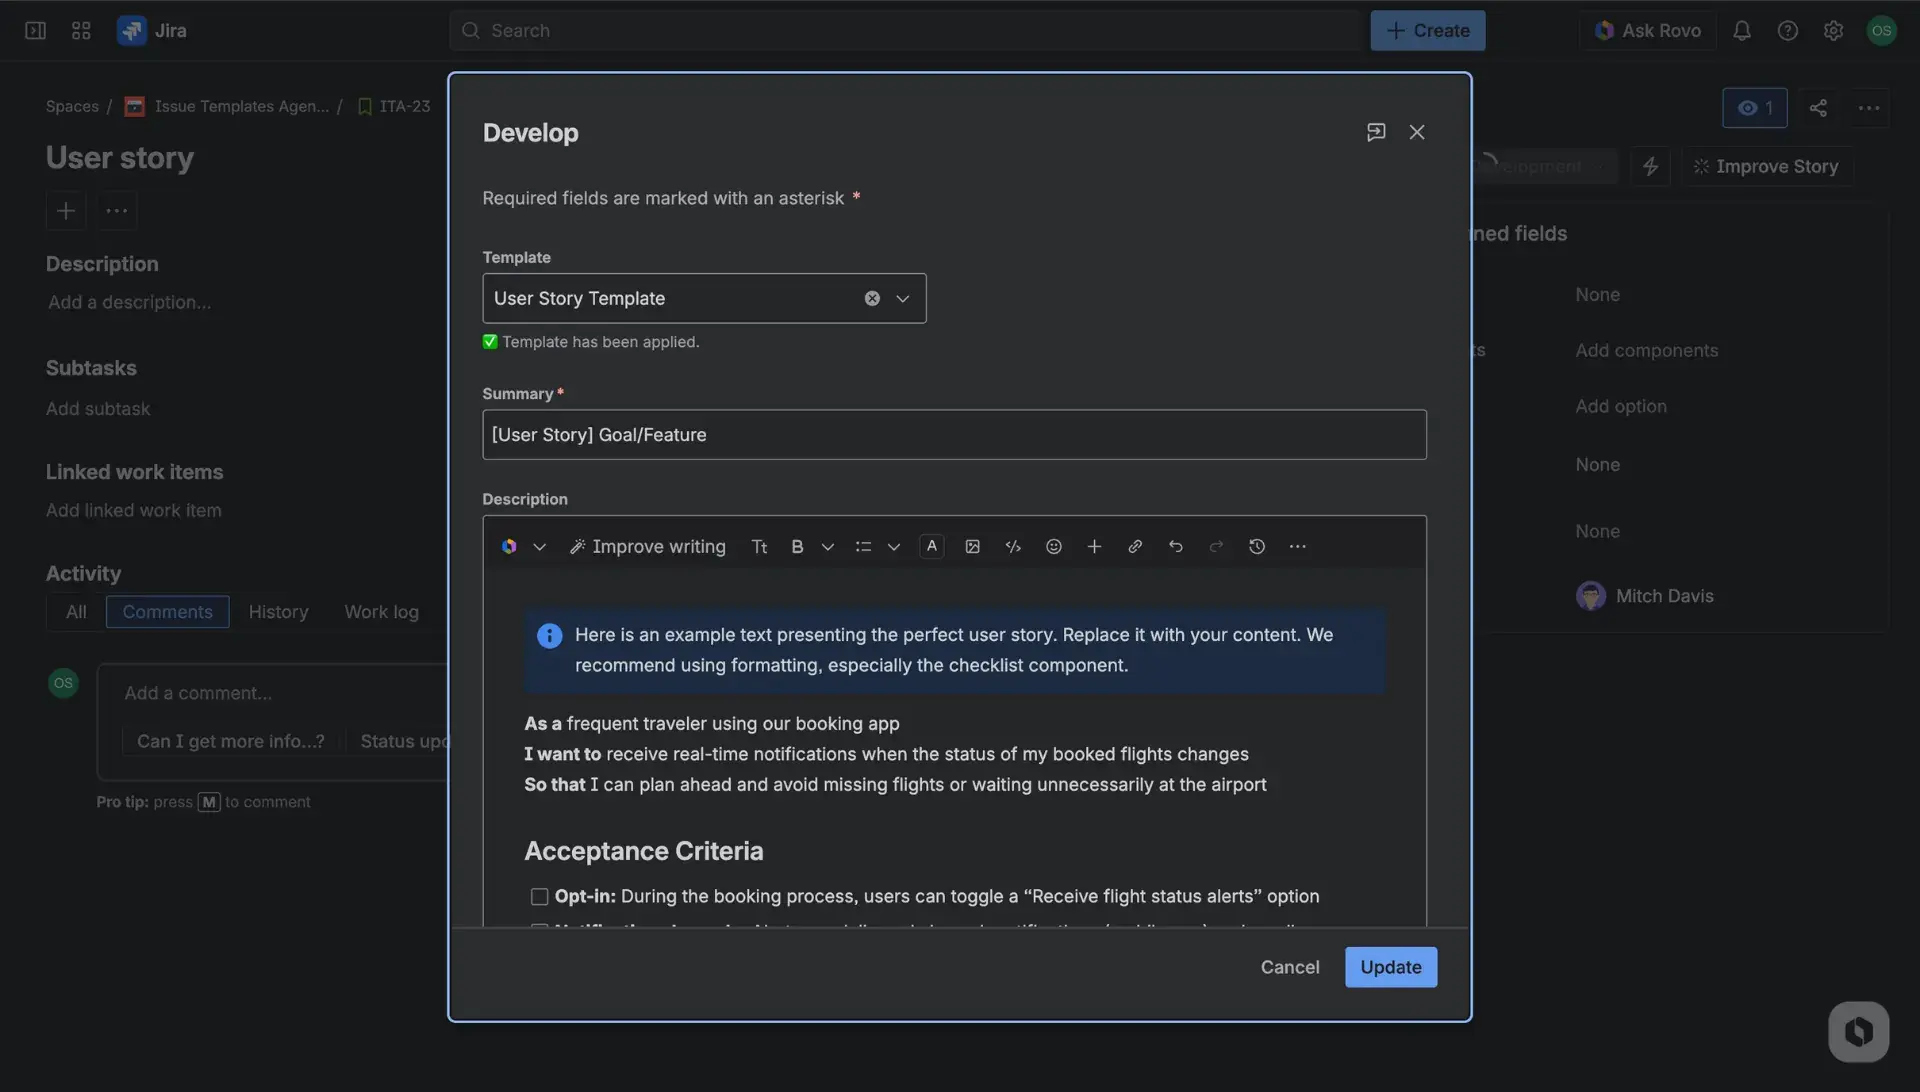
How does it work in practice?
When a user transitions a Jira item to a new status, a dialog window appears. The selected template then instantly fills in the pre-defined fields - it is shown in the dialog window. If any field had any value previously, template application will override it and fields will be filled in accirding to the template. After the transition, the applied template remains visible in the Template field within the issue’s right-hand panel for future reference.