Templates scope
Setting a clear scope makes the Jira experience much smoother. By defining exactly where a Jira ticket template appears, the workspace remains clean and focused. A well-chosen scope of Jira issue templates, turns them into strategic tools that guide users through every stage of a project - from the first user story template to final resolution.
Why define a template scope?
Limiting where templates show up helps teams stay productive:
- Better focus: Templates only appear when they are relevant. For example, a bug report template will only be available where it is actually needed.
- Consistent data: Users can make sure your team provides the right information at specific times, such as when creating a ticket or changing its status.
- Fewer mistakes: By showing fewer options in the Jira templates field, users are less likely to pick the wrong layout.
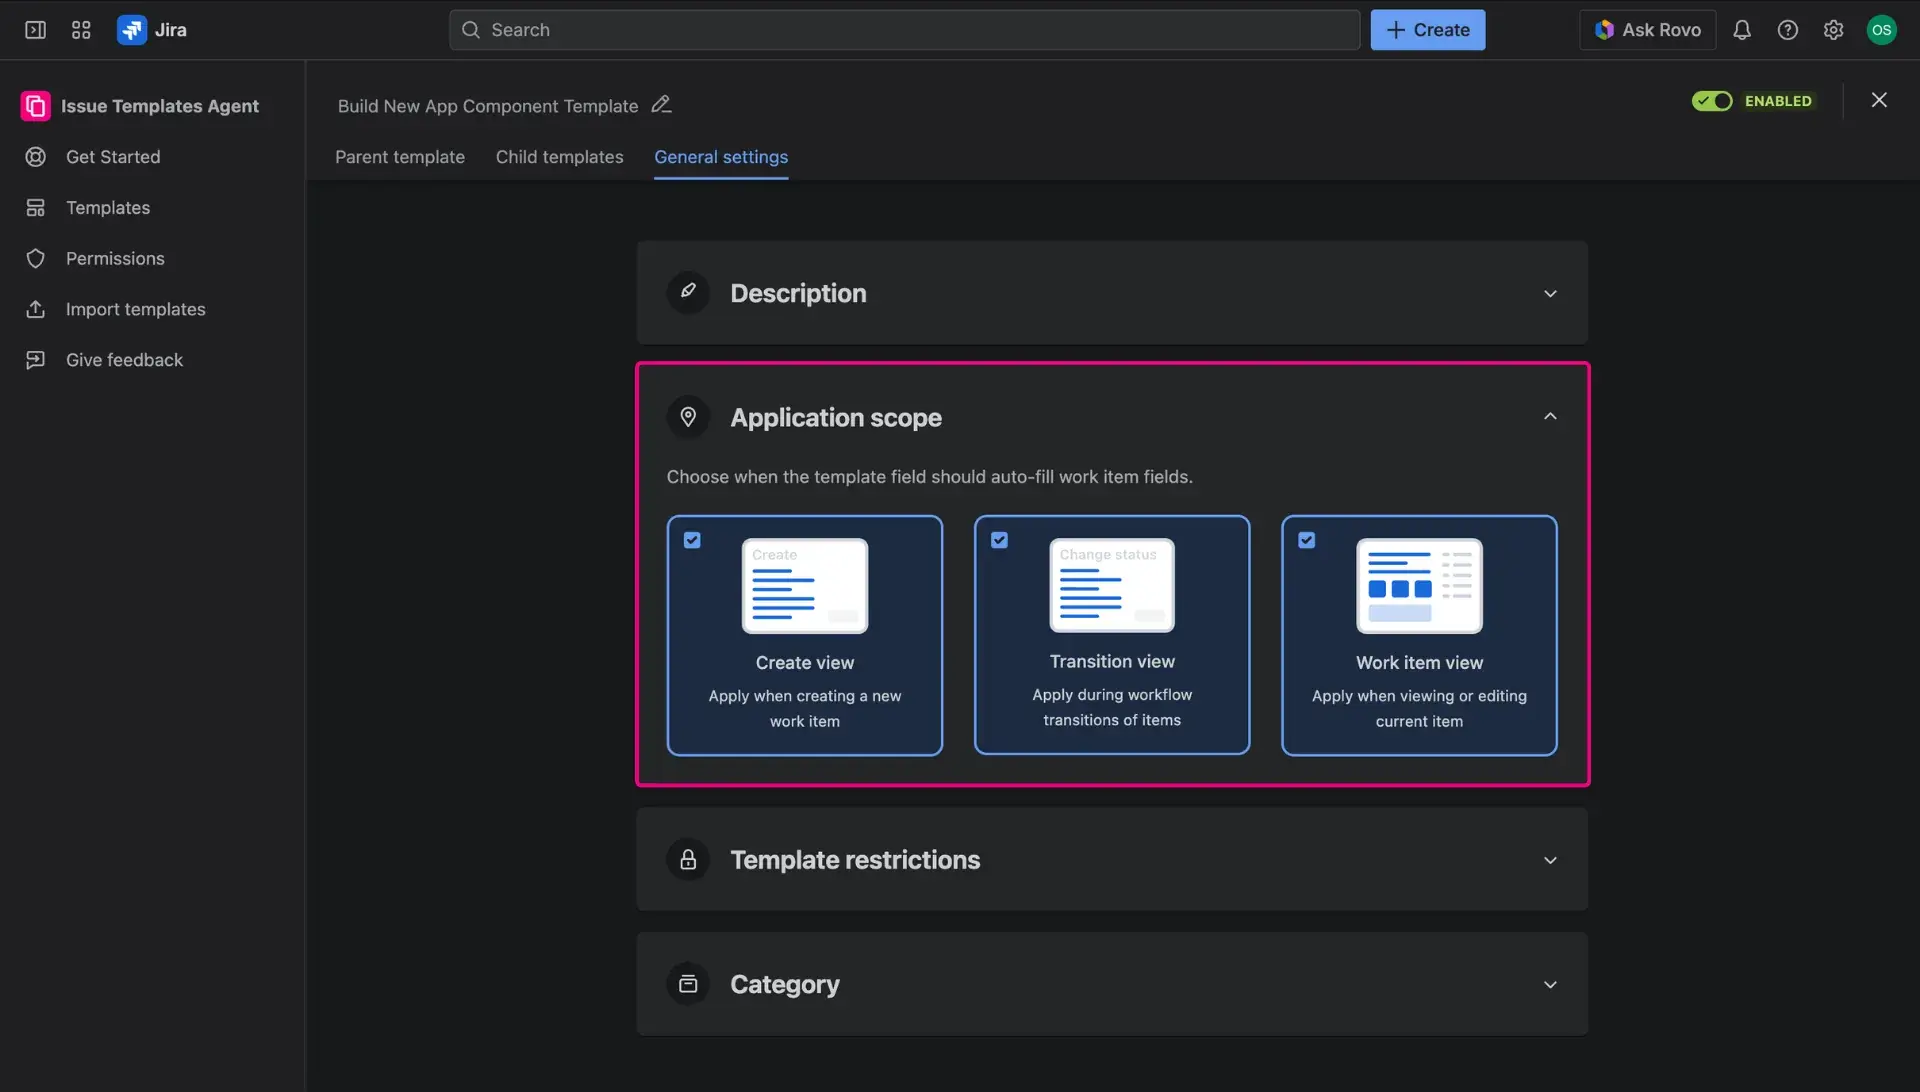
Scoping options
While configuring a template, in the General settings tab, user can choose one or more of these locations for templates:
Create Issue view
The template field is available when first creating a ticket. This is the primary way to use a user story template in Jira or a standard task structure to ensure a project starts with high-quality data.
Issue view
The field stays visible on the main page of an active ticket. This allows teams to apply or update Jira ticket templates as they get more information during the work process.
Transition view
The field appears when you change a ticket’s status (for example, moving a task from “In Progress” to “Done”). This is perfect for automatically adding a test plan example or a final checklist as the work moves to a new team.
Accessing the scope configuration
To define the visibility of a Jira issue template, the following steps should be taken:
- Navigate to the Apps menu in the left-side Jira navigation bar.
- Select Issue Templates Agent > Templates page.
- Create a new template with a button on top of the table or edit an already created template by clicking the three dots in the last column of the table and selecting the Edit button.
- Locate the General settings tab.
- Select the preferred check boxes within the Scope section.

For a comprehensive understanding of how each specific setting functions in real-world scenarios, the following deep-dive guides offer further detail:
- Create Issue view – Best practices for the initial ticket setup.
- Issue view – Applying templates on existing tickets.
- Transition view – Integrating templates into Jira workflows.