Ticket Journey
Building trust on the Jira portal starts with clear communication. The Ticket Journey feature (formerly Request Steps) replaces technical system statuses with an intuitive visual timeline or progress bar. This level of transparency ensures the help center remains useful, showing exactly where a request stands from the moment of creation until final resolution.
Compatibility and access
To be able to use this functionality, users must be logged in with the Project Administrator’s permission. Feature Bundle extension is fully compatible with both company-managed and team-managed projects.
To begin the setup, navigate to Project Settings > Apps > Ticket Journey.


Note on terminology
Atlassian now often refers to issues as work items, and projects as spaces. This documentation uses both terms interchangeably.
Configuration overview
- Select the specific request type for configuration from the list on the left side of the screen.
- A blue dot next to a name indicates that a Ticket Journey is already active for that specific request type.
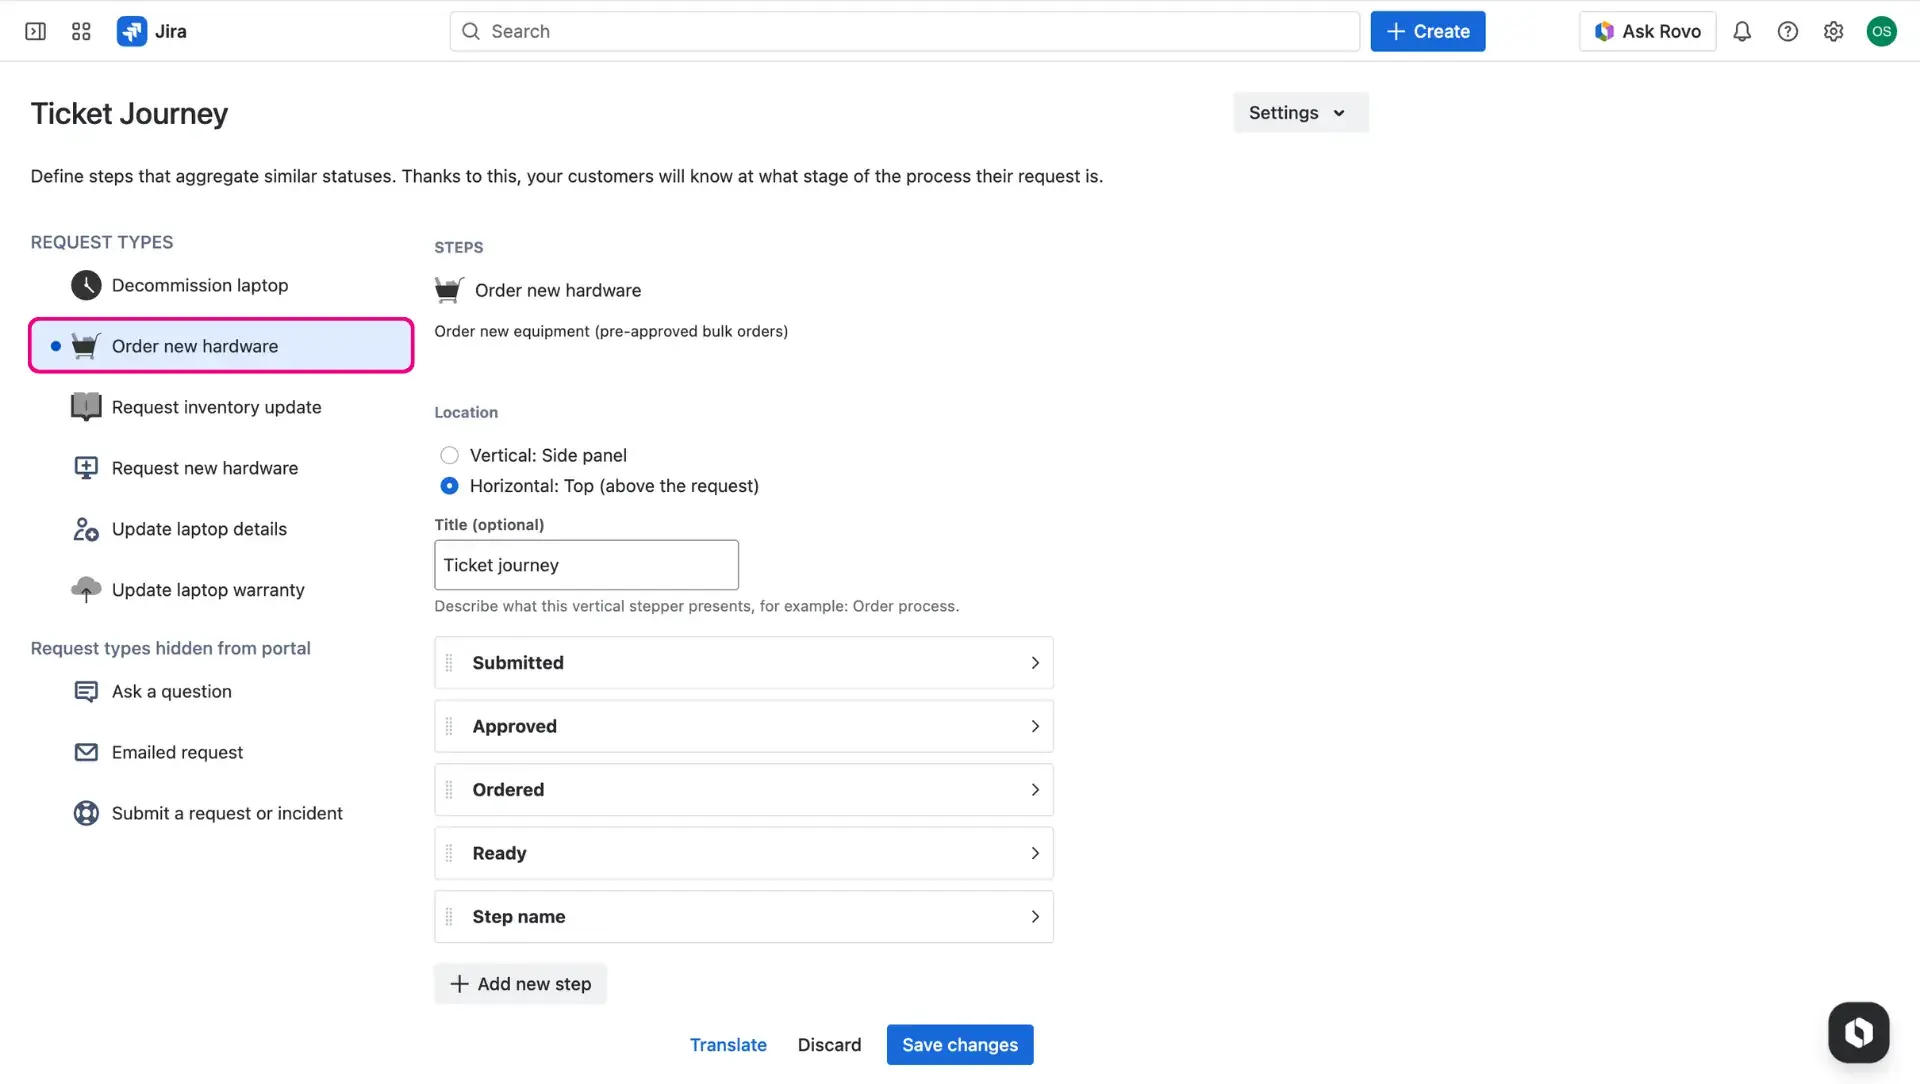
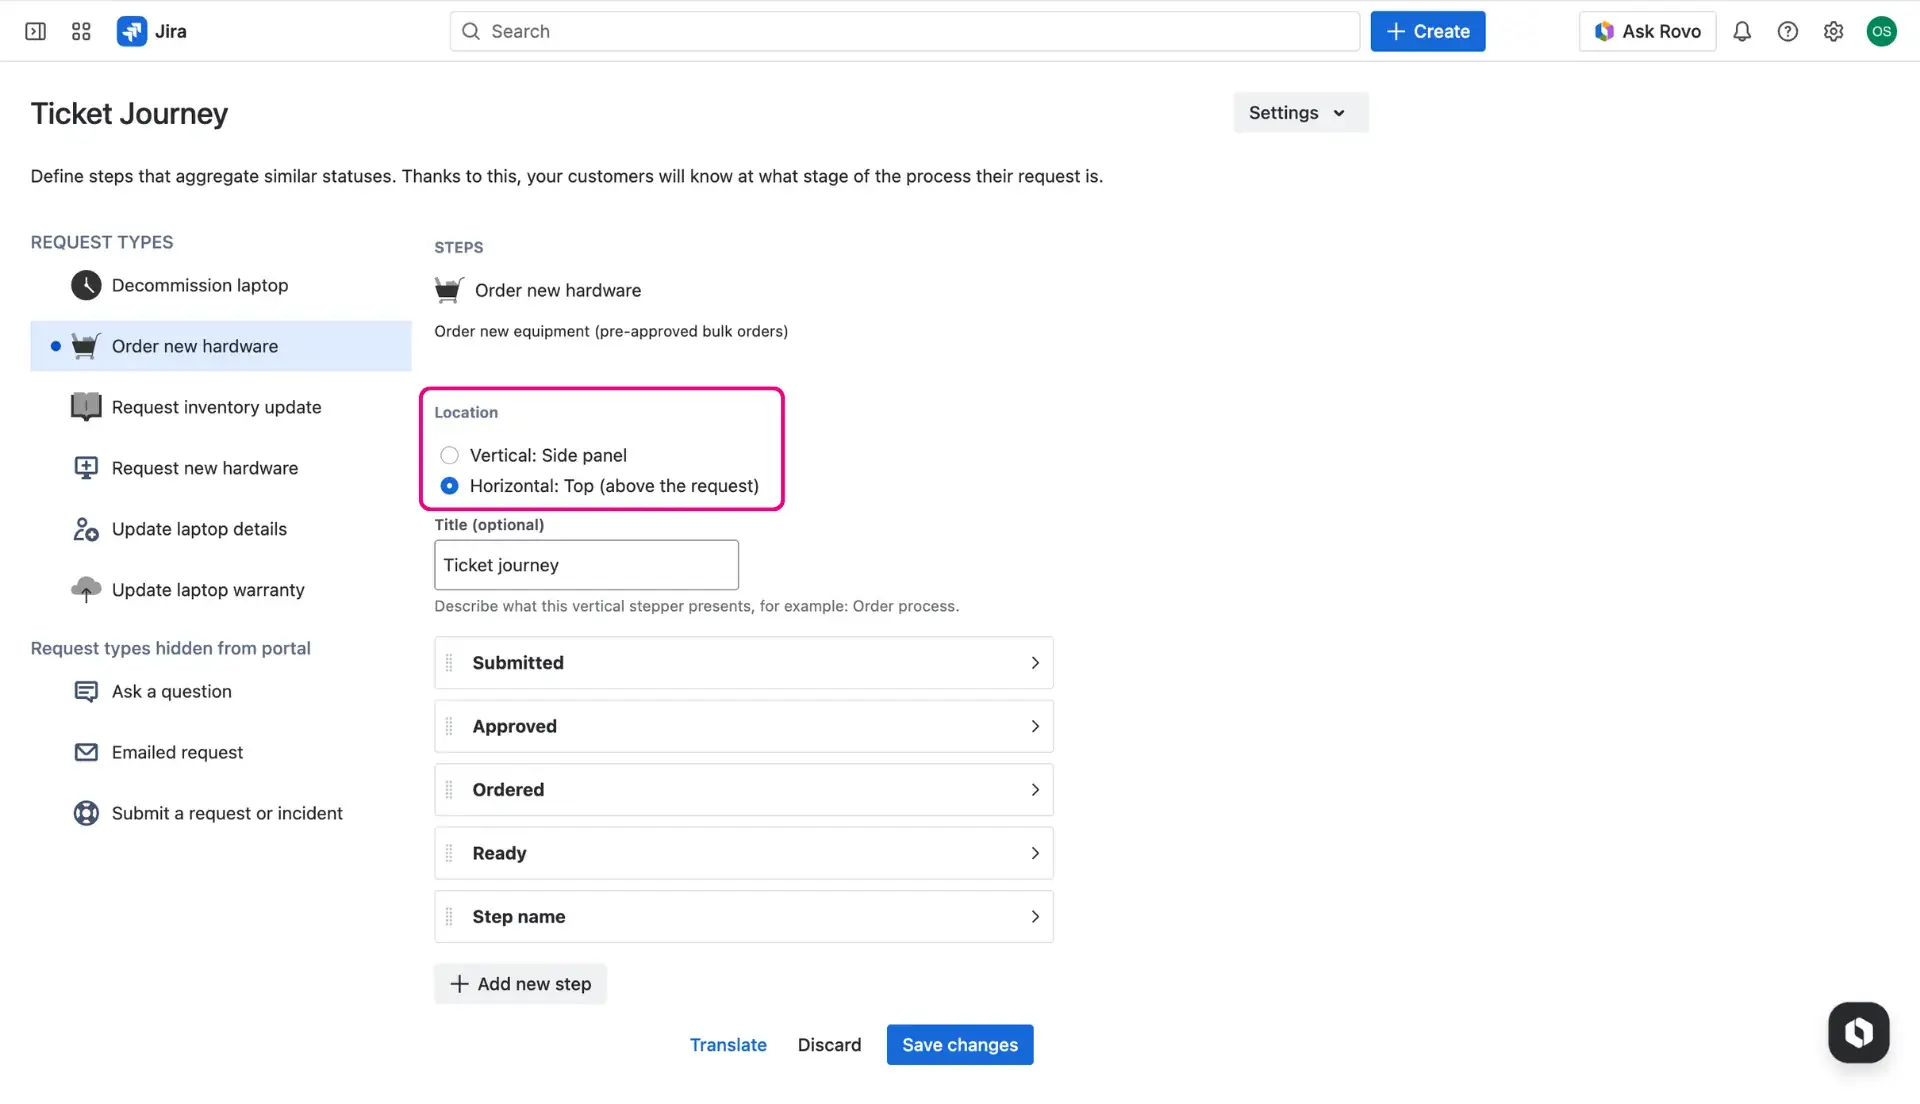
Selected layout determines how the Ticket Journey appears on the Jira customer portal:
Vertical (Default): A timeline view that works best for mobile users or complex incident management in Jira involving multiple stages.
Horizontal: A clean progress bar view, ideal for simple and linear processes.
Users can add an optional custom title to provide extra context, e.g. Incident Resolution Tracker.
Click on the Add a step button to define the path a ticket takes. There is no limit to the number of stages added to a journey.
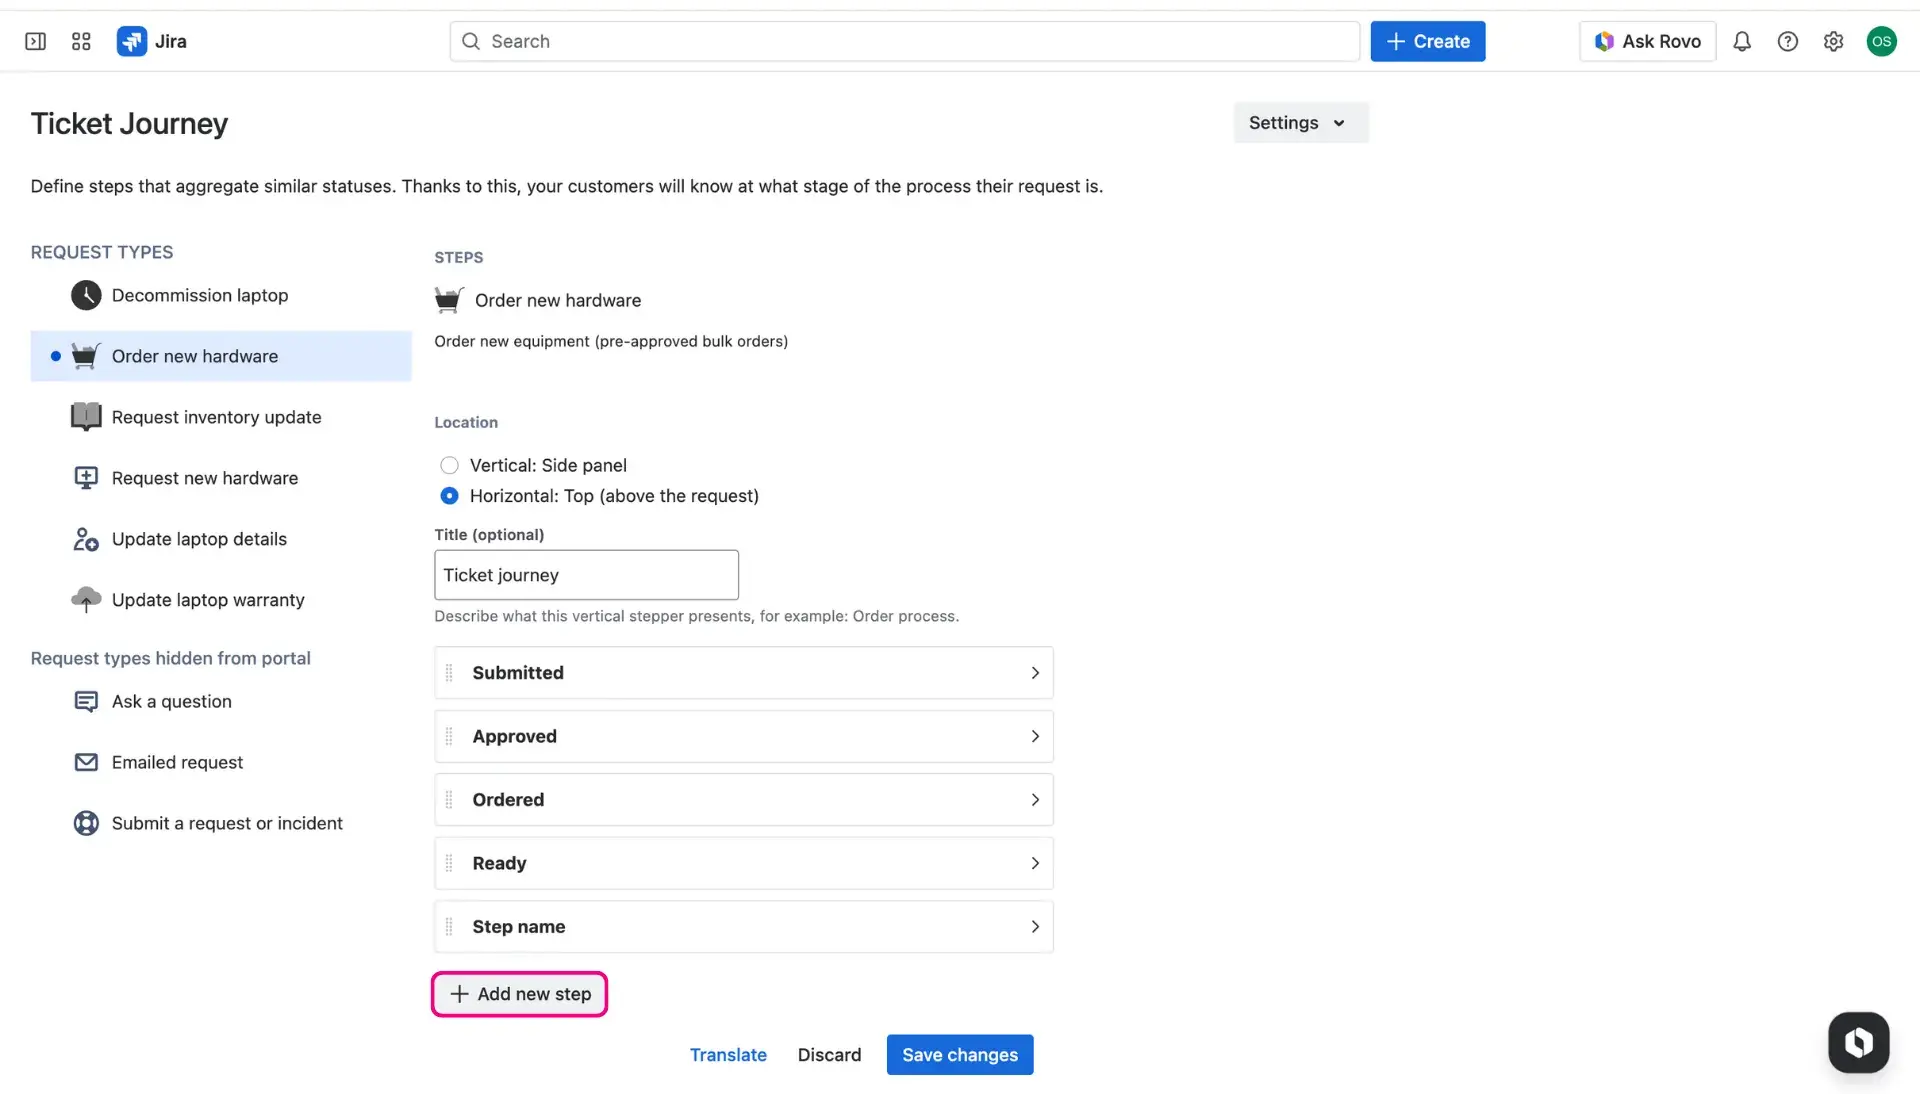
For each step, user configures following details:
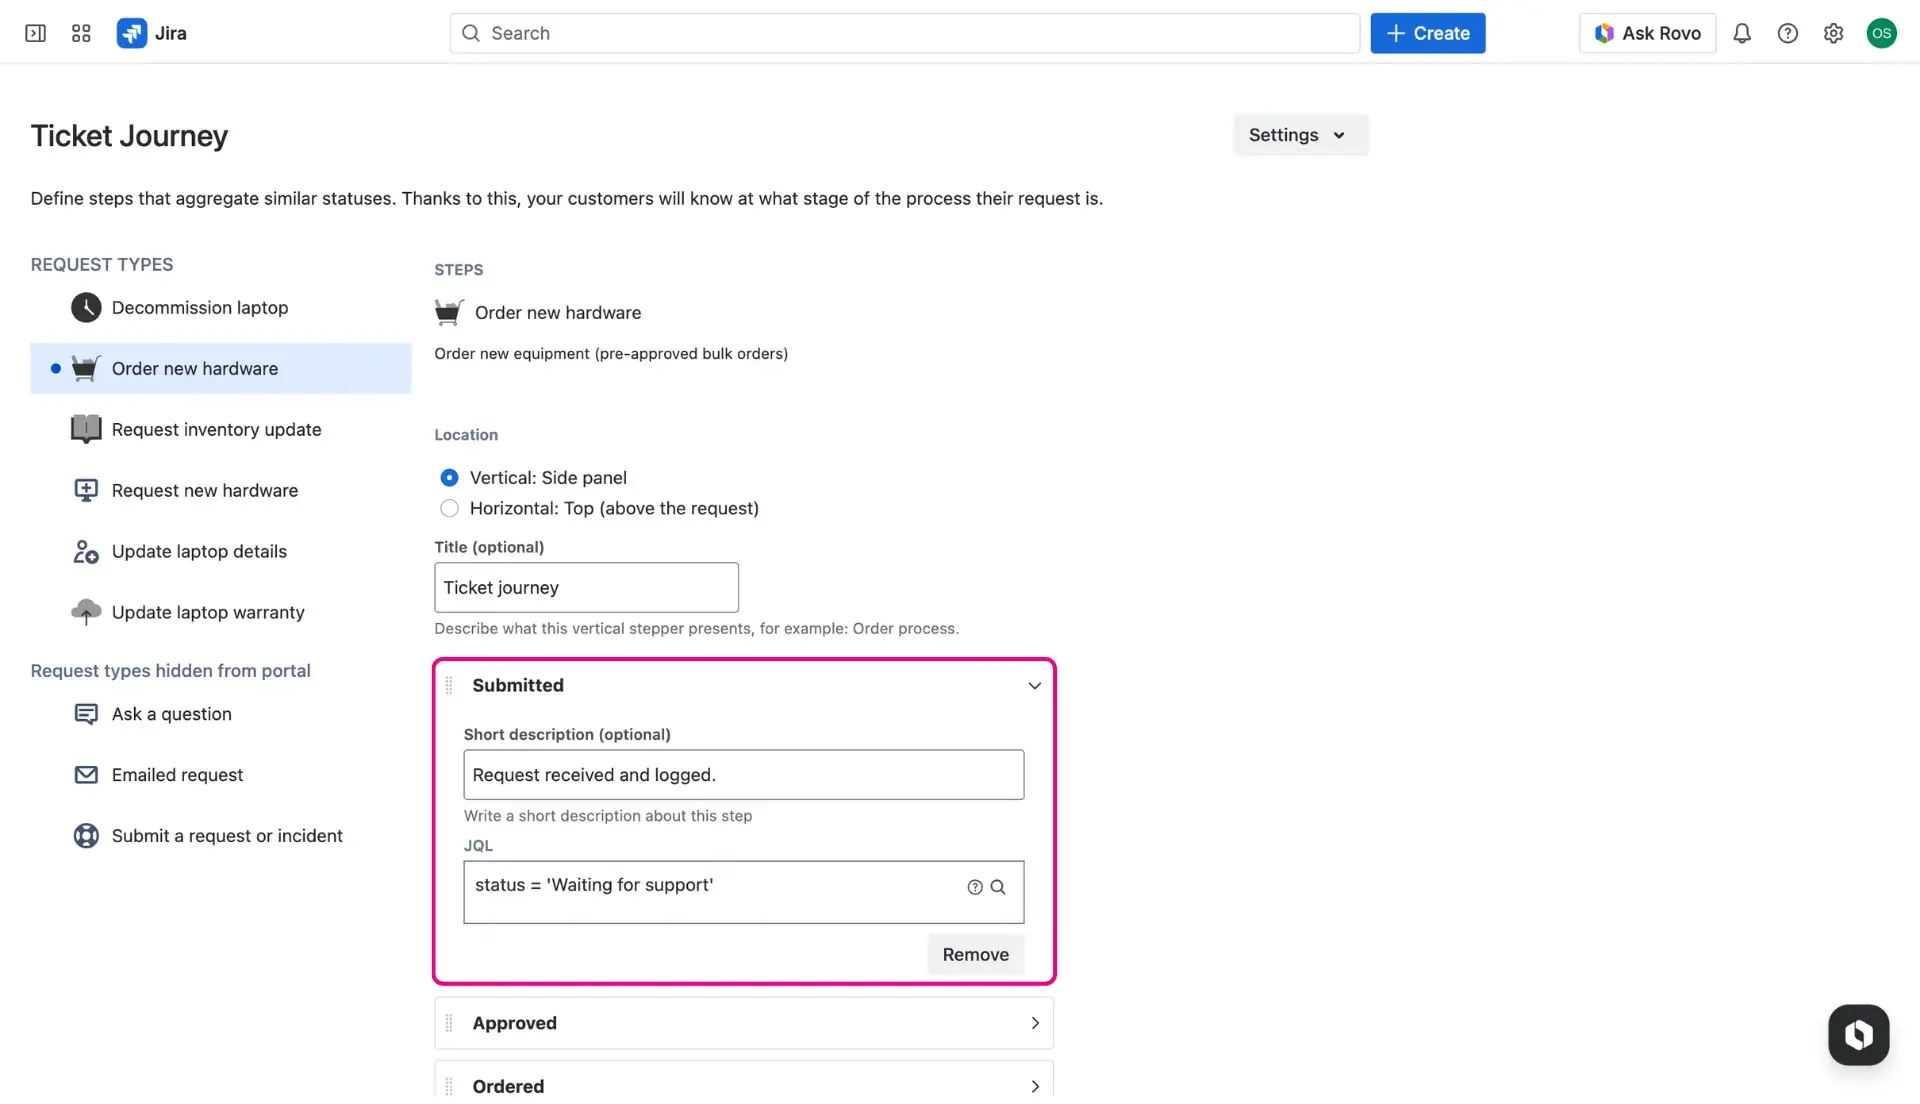
Name & description: These fields provide the labels and details visible to the user on the portal.
Condition (JQL): Enter a JQL query to trigger the step. When a ticket meets these criteria, the step becomes active.
Basic example: status = “In Progress”
Advanced example: status = “In Progress” AND dueDate < 2d (useful for tracking a specific Jira SLA).
- Click the Translate button to select specific elements, such as step names or descriptions, for translation into the target language.
Advanced settings
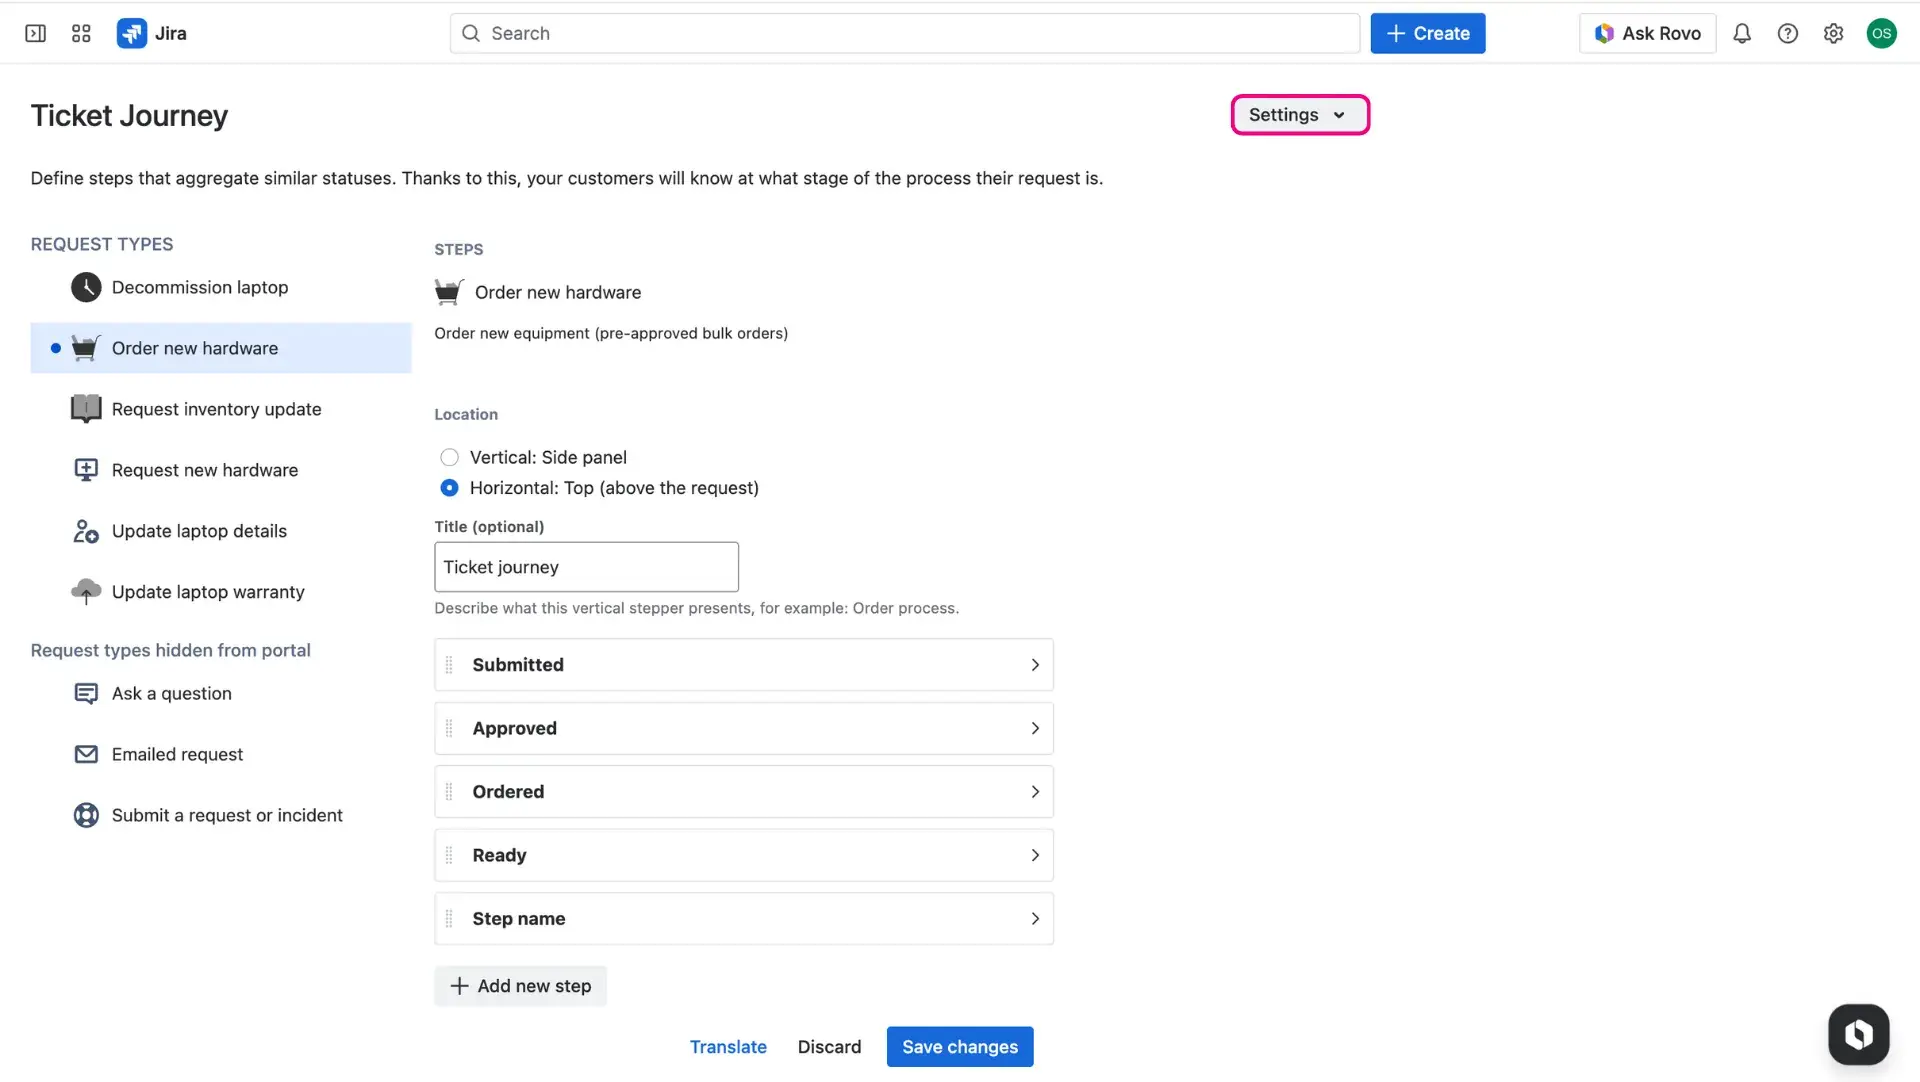
Further customization options are available via the Settings icon in the top right corner of the configuration page.
Branding & colors
The journey can be styled to match the overall branding of the Jira Service Management help desk.
- In Ticket Journey configuration page, navigate to Settings > Configure colors.
- Use HEX codes to define colors for the title, previous steps, active steps, and upcoming steps.
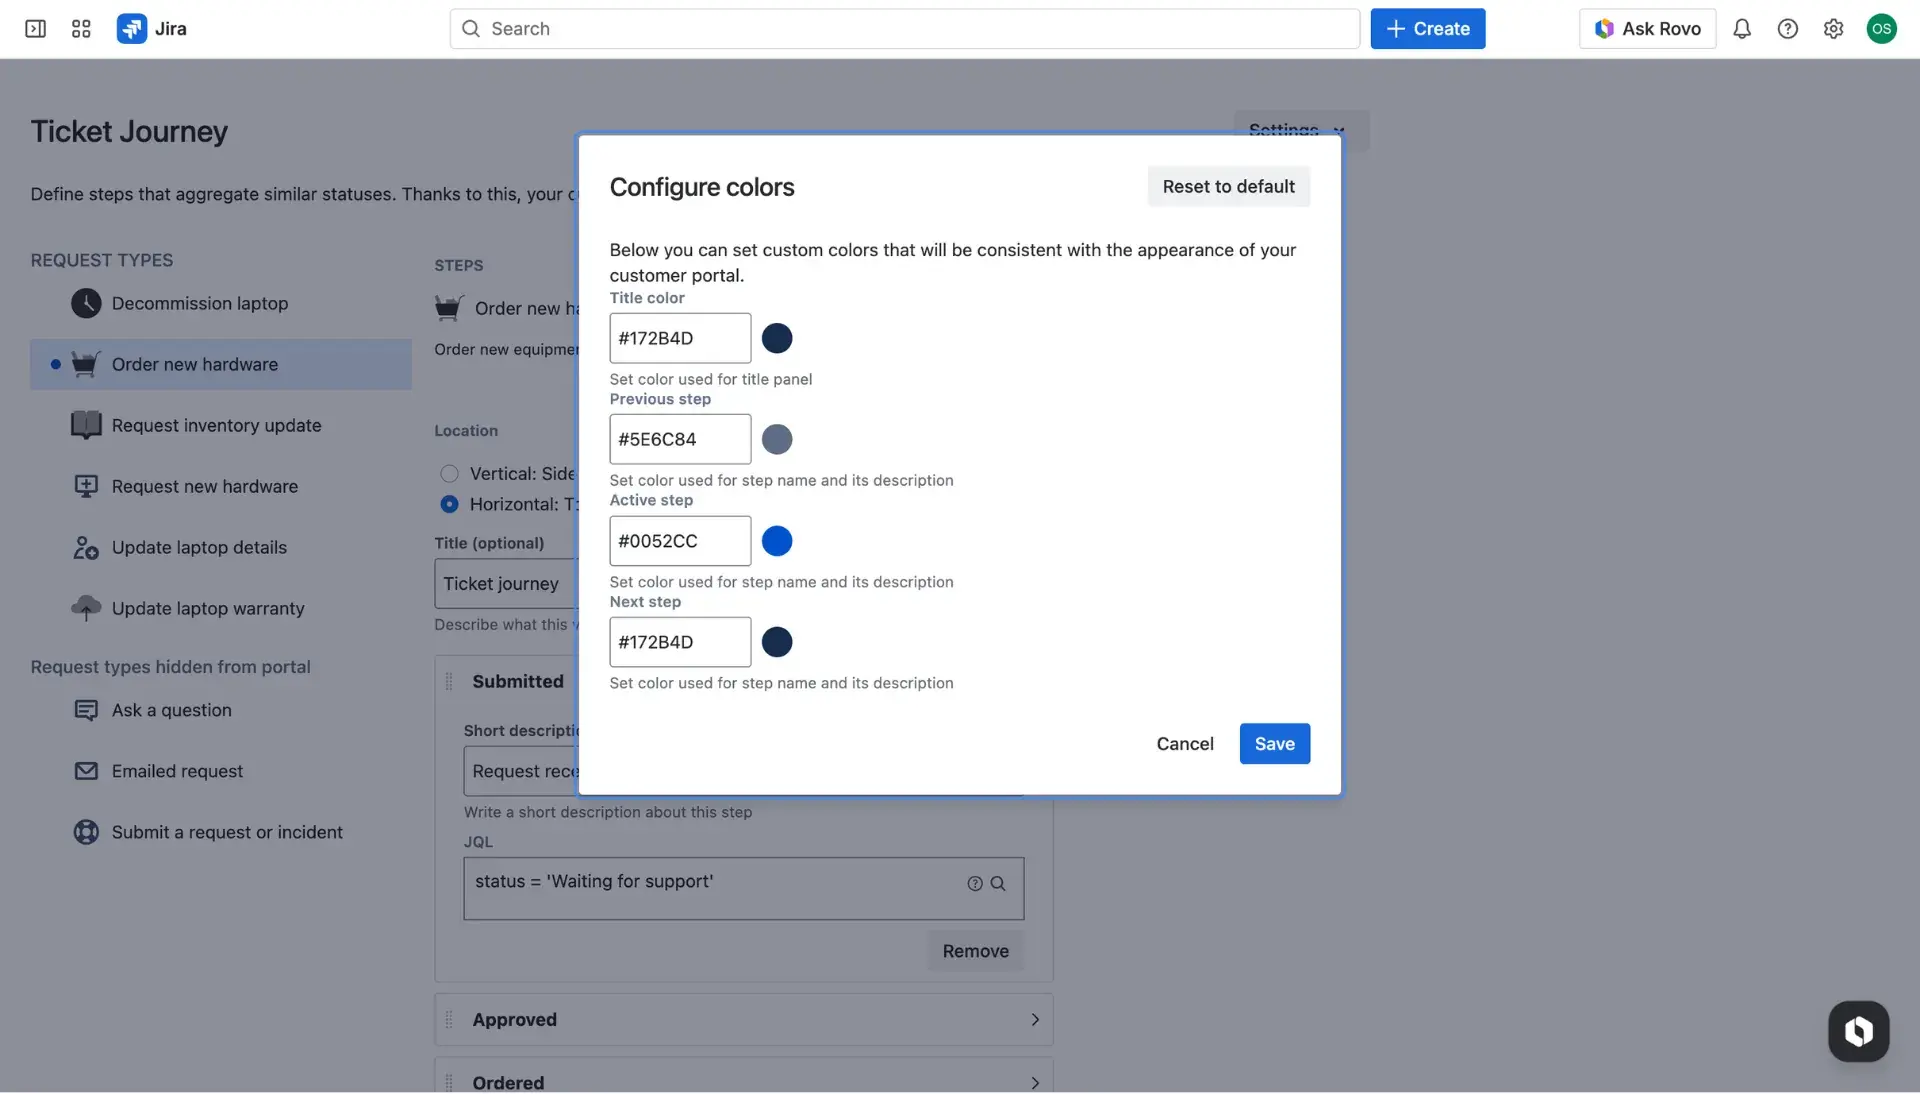
- The Reset to default option is available to revert to the original theme at any time.
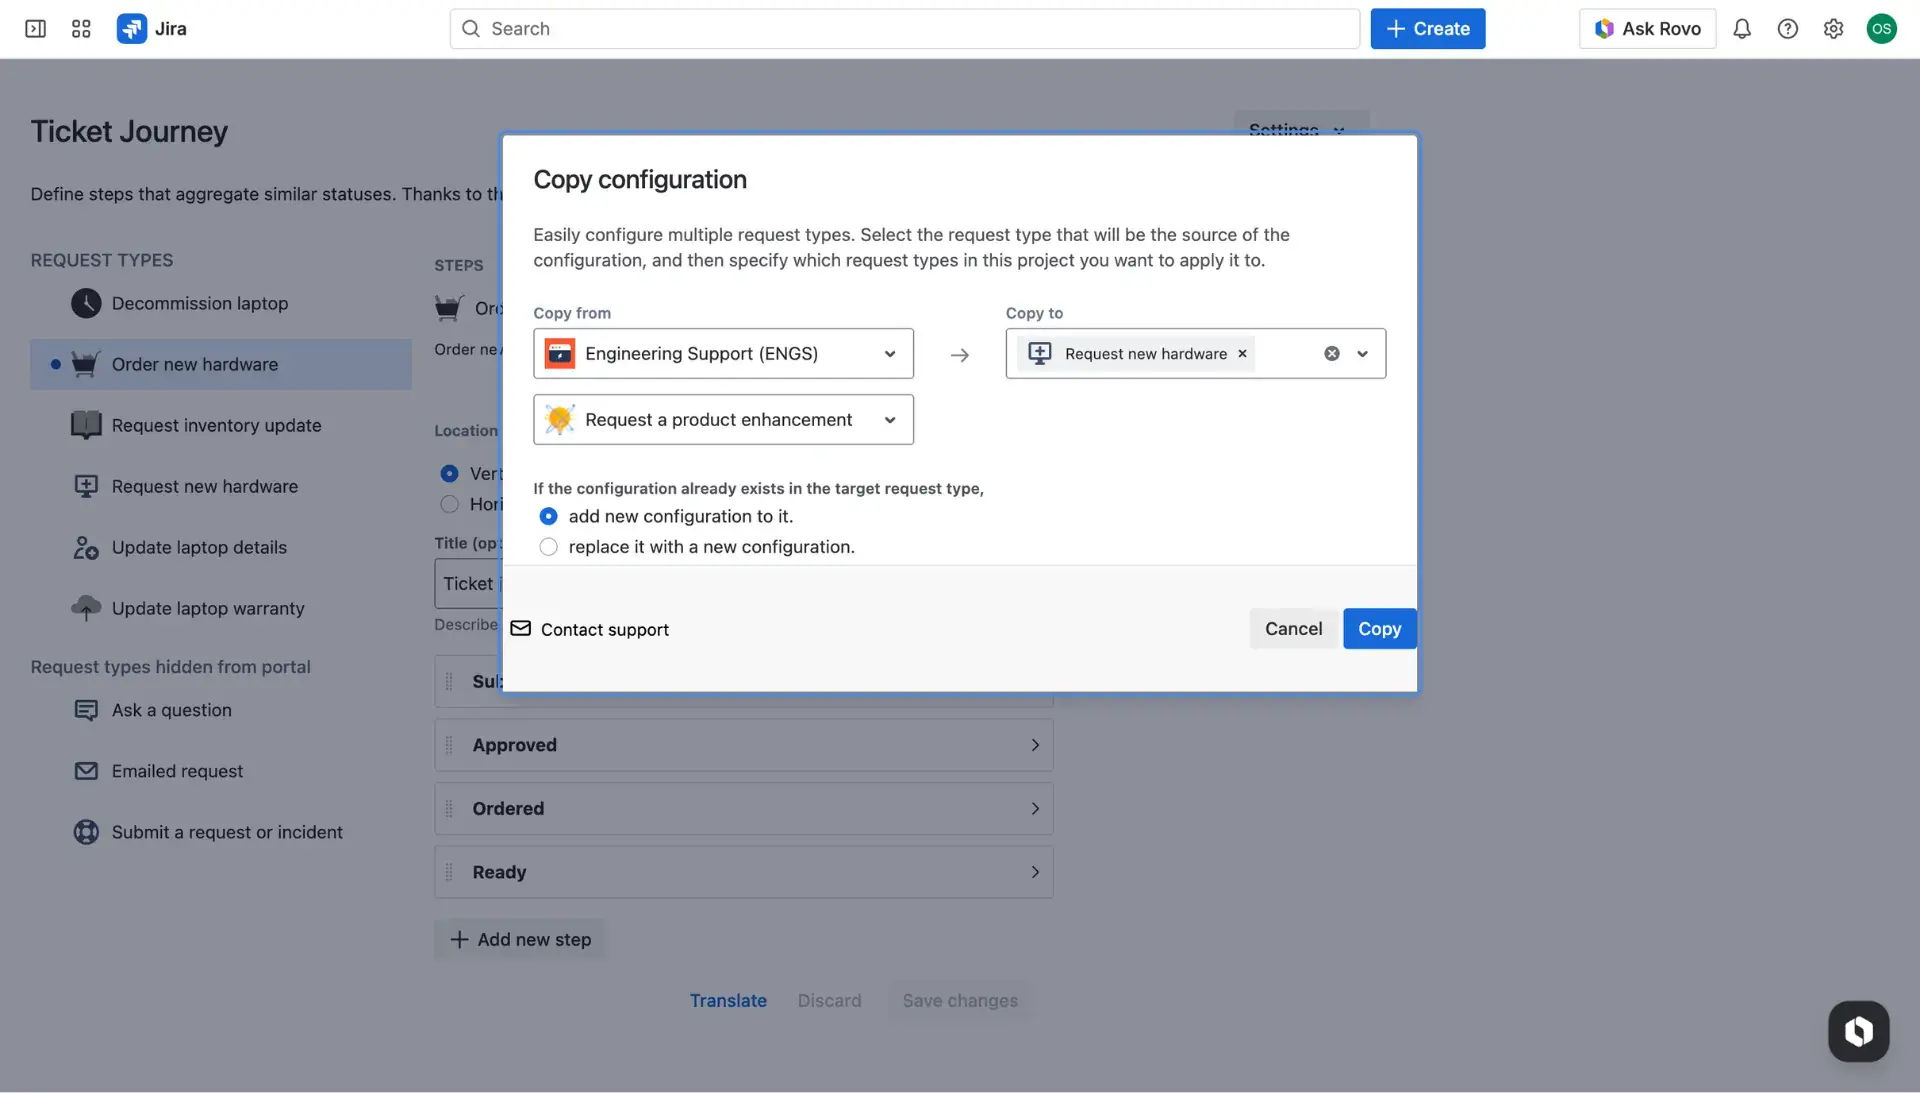
Copy configuration
To streamline the setup process, existing configurations can be shared between different request types and projects.
Go to Settings > Copy configuration and select the source and target projects, along with request types.
- If a setup already exists in the target, choose to either append the new steps or replace the existing configuration entirely.
Ticket Journey in practice
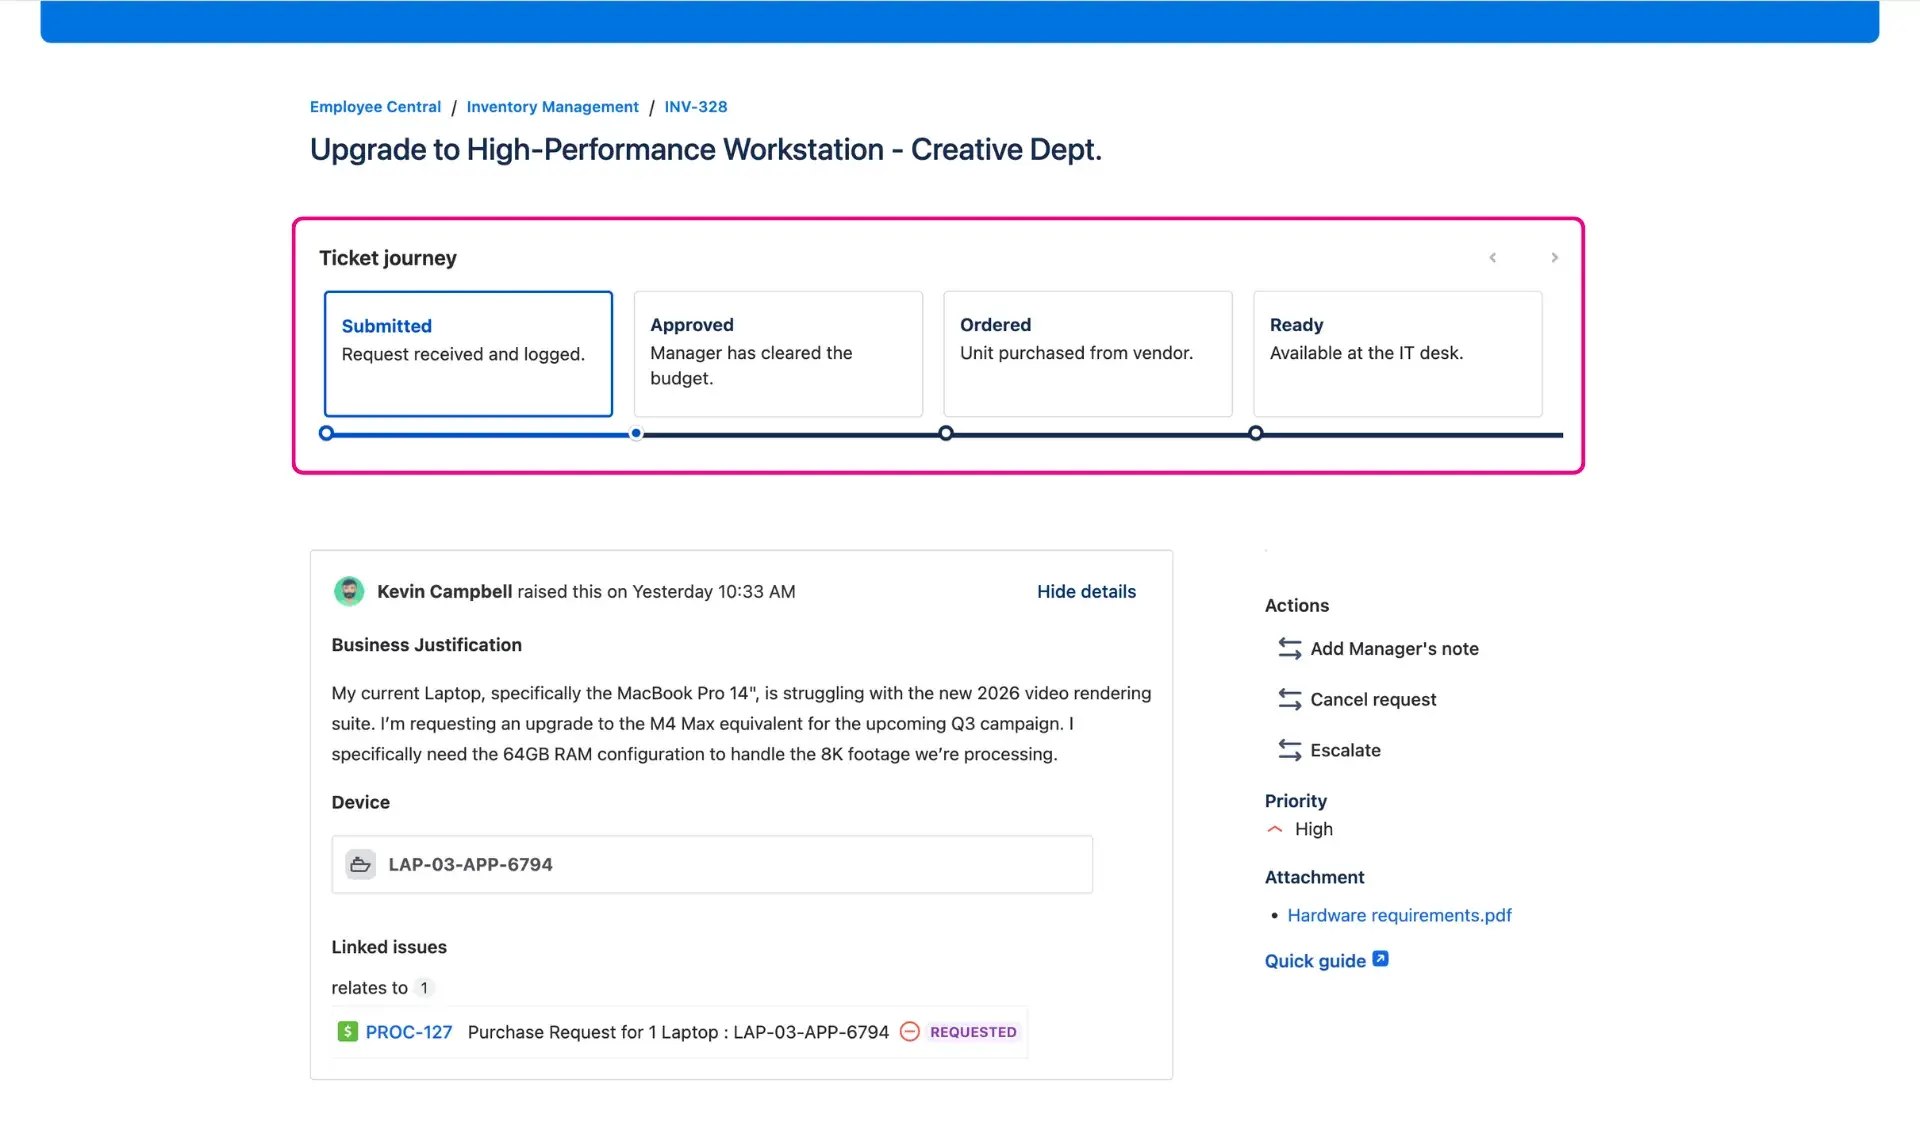
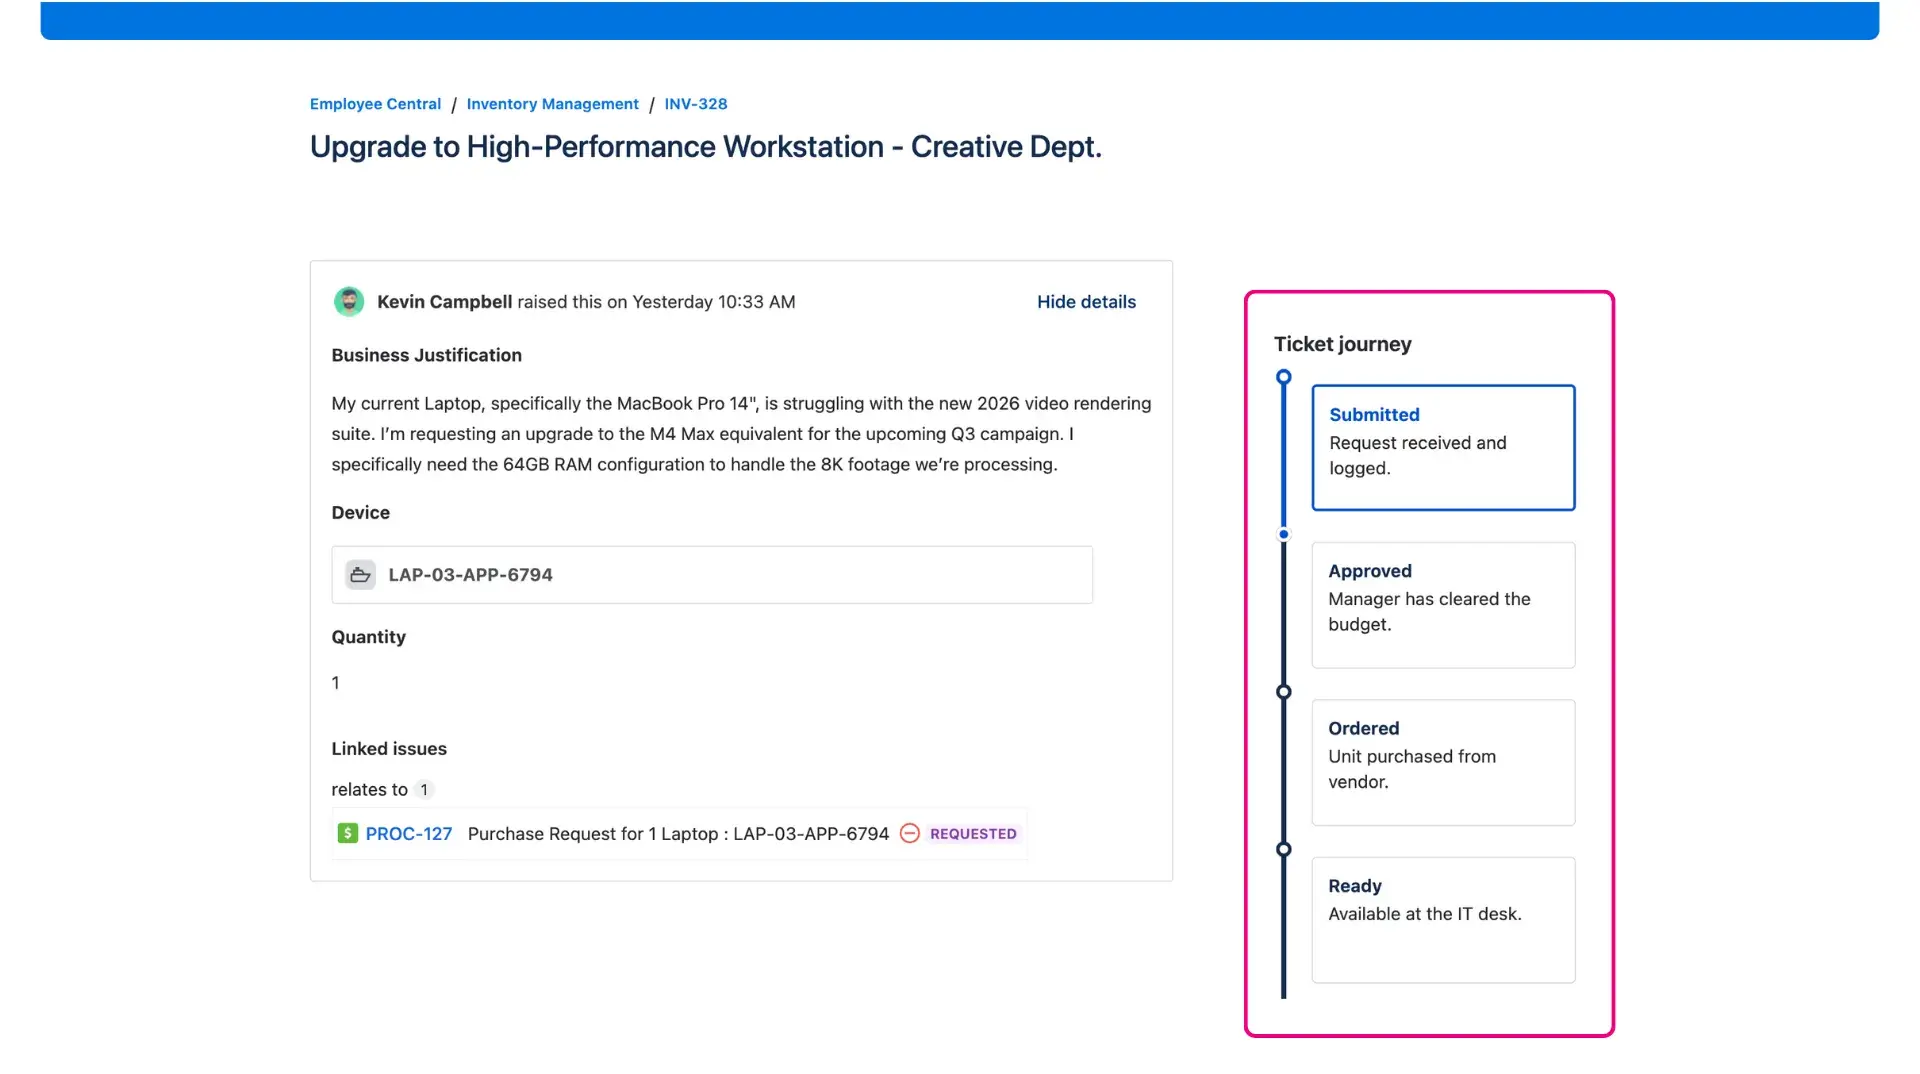
Once active, the Ticket Journey becomes a crucial point on the Jira customer portal. As a request moves through the workflow, the timeline updates automatically based on the pre-set JQL conditions and steps are highlighted as the ticket progresses. This way, the communication gap during incident management in Jira is bridged, as users can see exactly which stages are complete and what remains. Technical statuses turn into a clear steps, making the provided support feel more reliable within any Jira Service Management setup.
Below, we provide examples of Ticket Journey in horizontal (first image) and (second image) positions in the request detail view in customer portal.