Create a form
A form is what customers open from a link on the request view of the customer portal to change their request. A form needs a name and a link name, a place, a time and an audience on the Availability tab, at least one Field object on the Design tab, and the settings for what happens after a save on the Post actions tab, so you set up the tabs before you save.
Before you start
- You are both an administrator of the service space and a service desk agent in it.
- Feature Bundle is installed. See Install Feature Bundle.
Steps
Set the availability
Go to Space settings > Apps > Feature Bundle > Customer Actions. The list of forms opens.
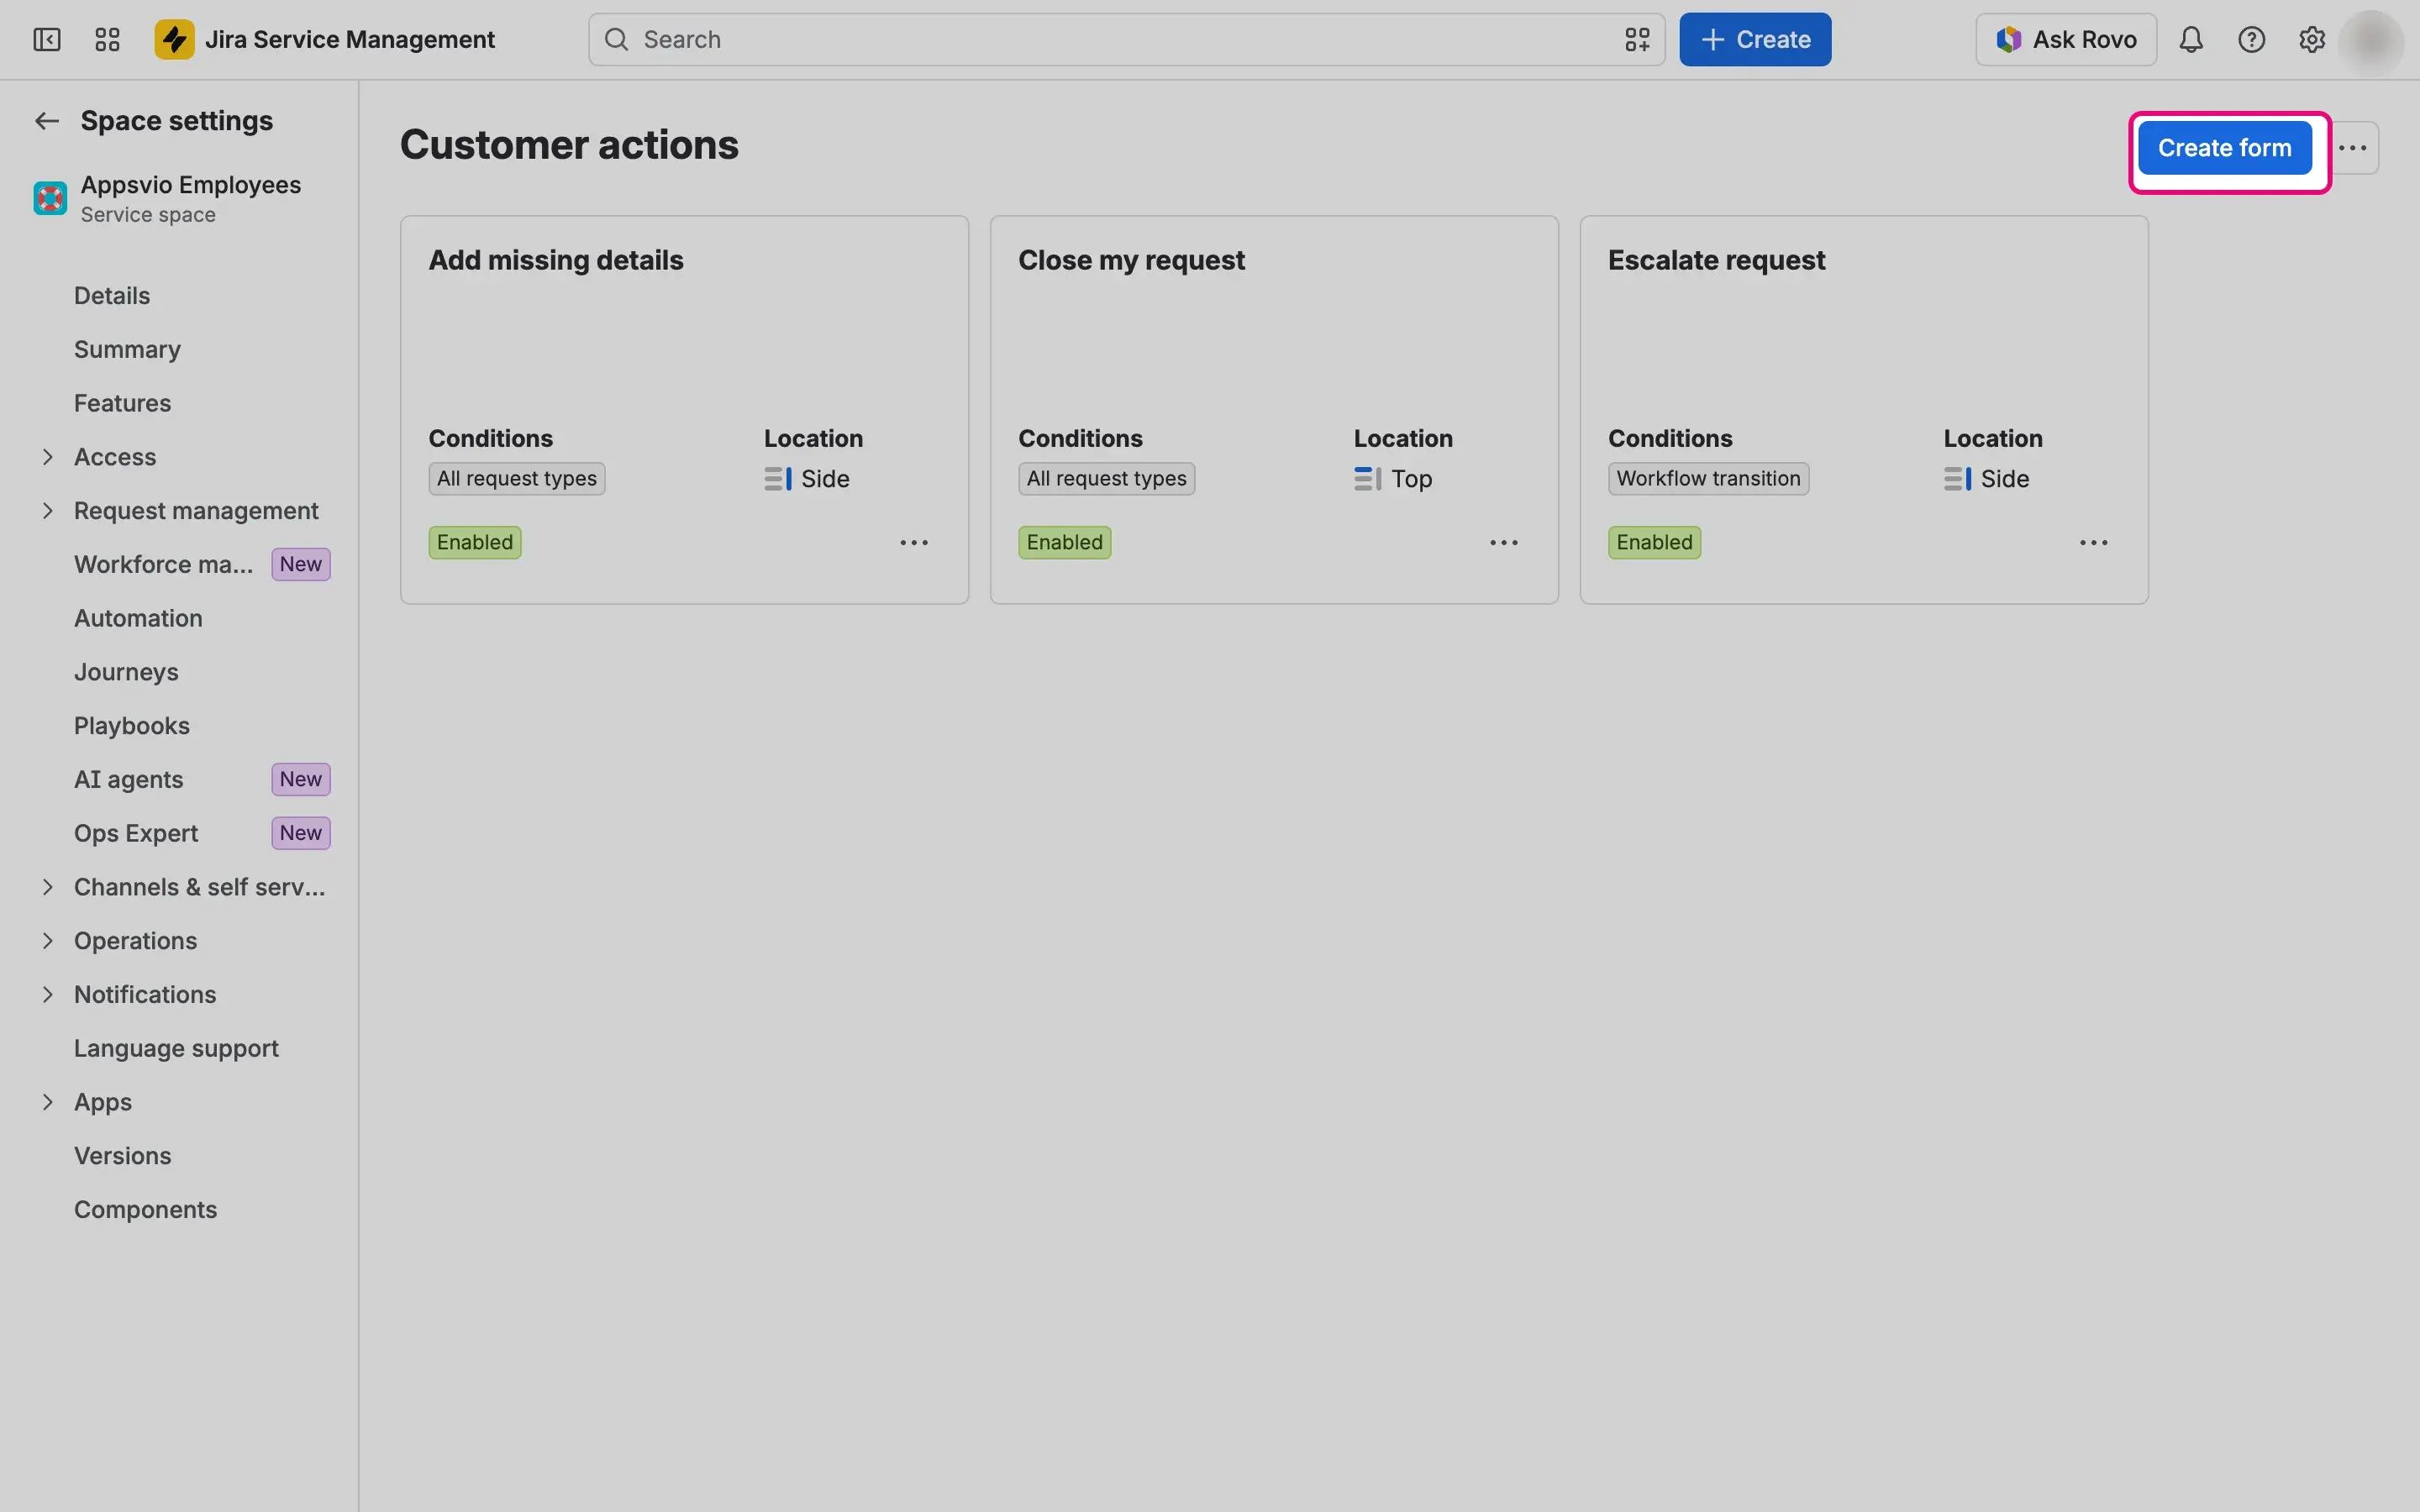
Select Create form. The form page opens with the Availability, Design, and Post actions tabs.
At the top of the form, select the name New form and type a name. The name is required. Optionally, add a description under it. The name and the description take up to 70 characters each.
Leave the toggle at ENABLED to make the form available as soon as you save it. Switch it to DISABLED to keep it hidden for now.
On the Availability tab, in Location, select where the link of the form appears on the request view: Side (the default), Top, or Center.
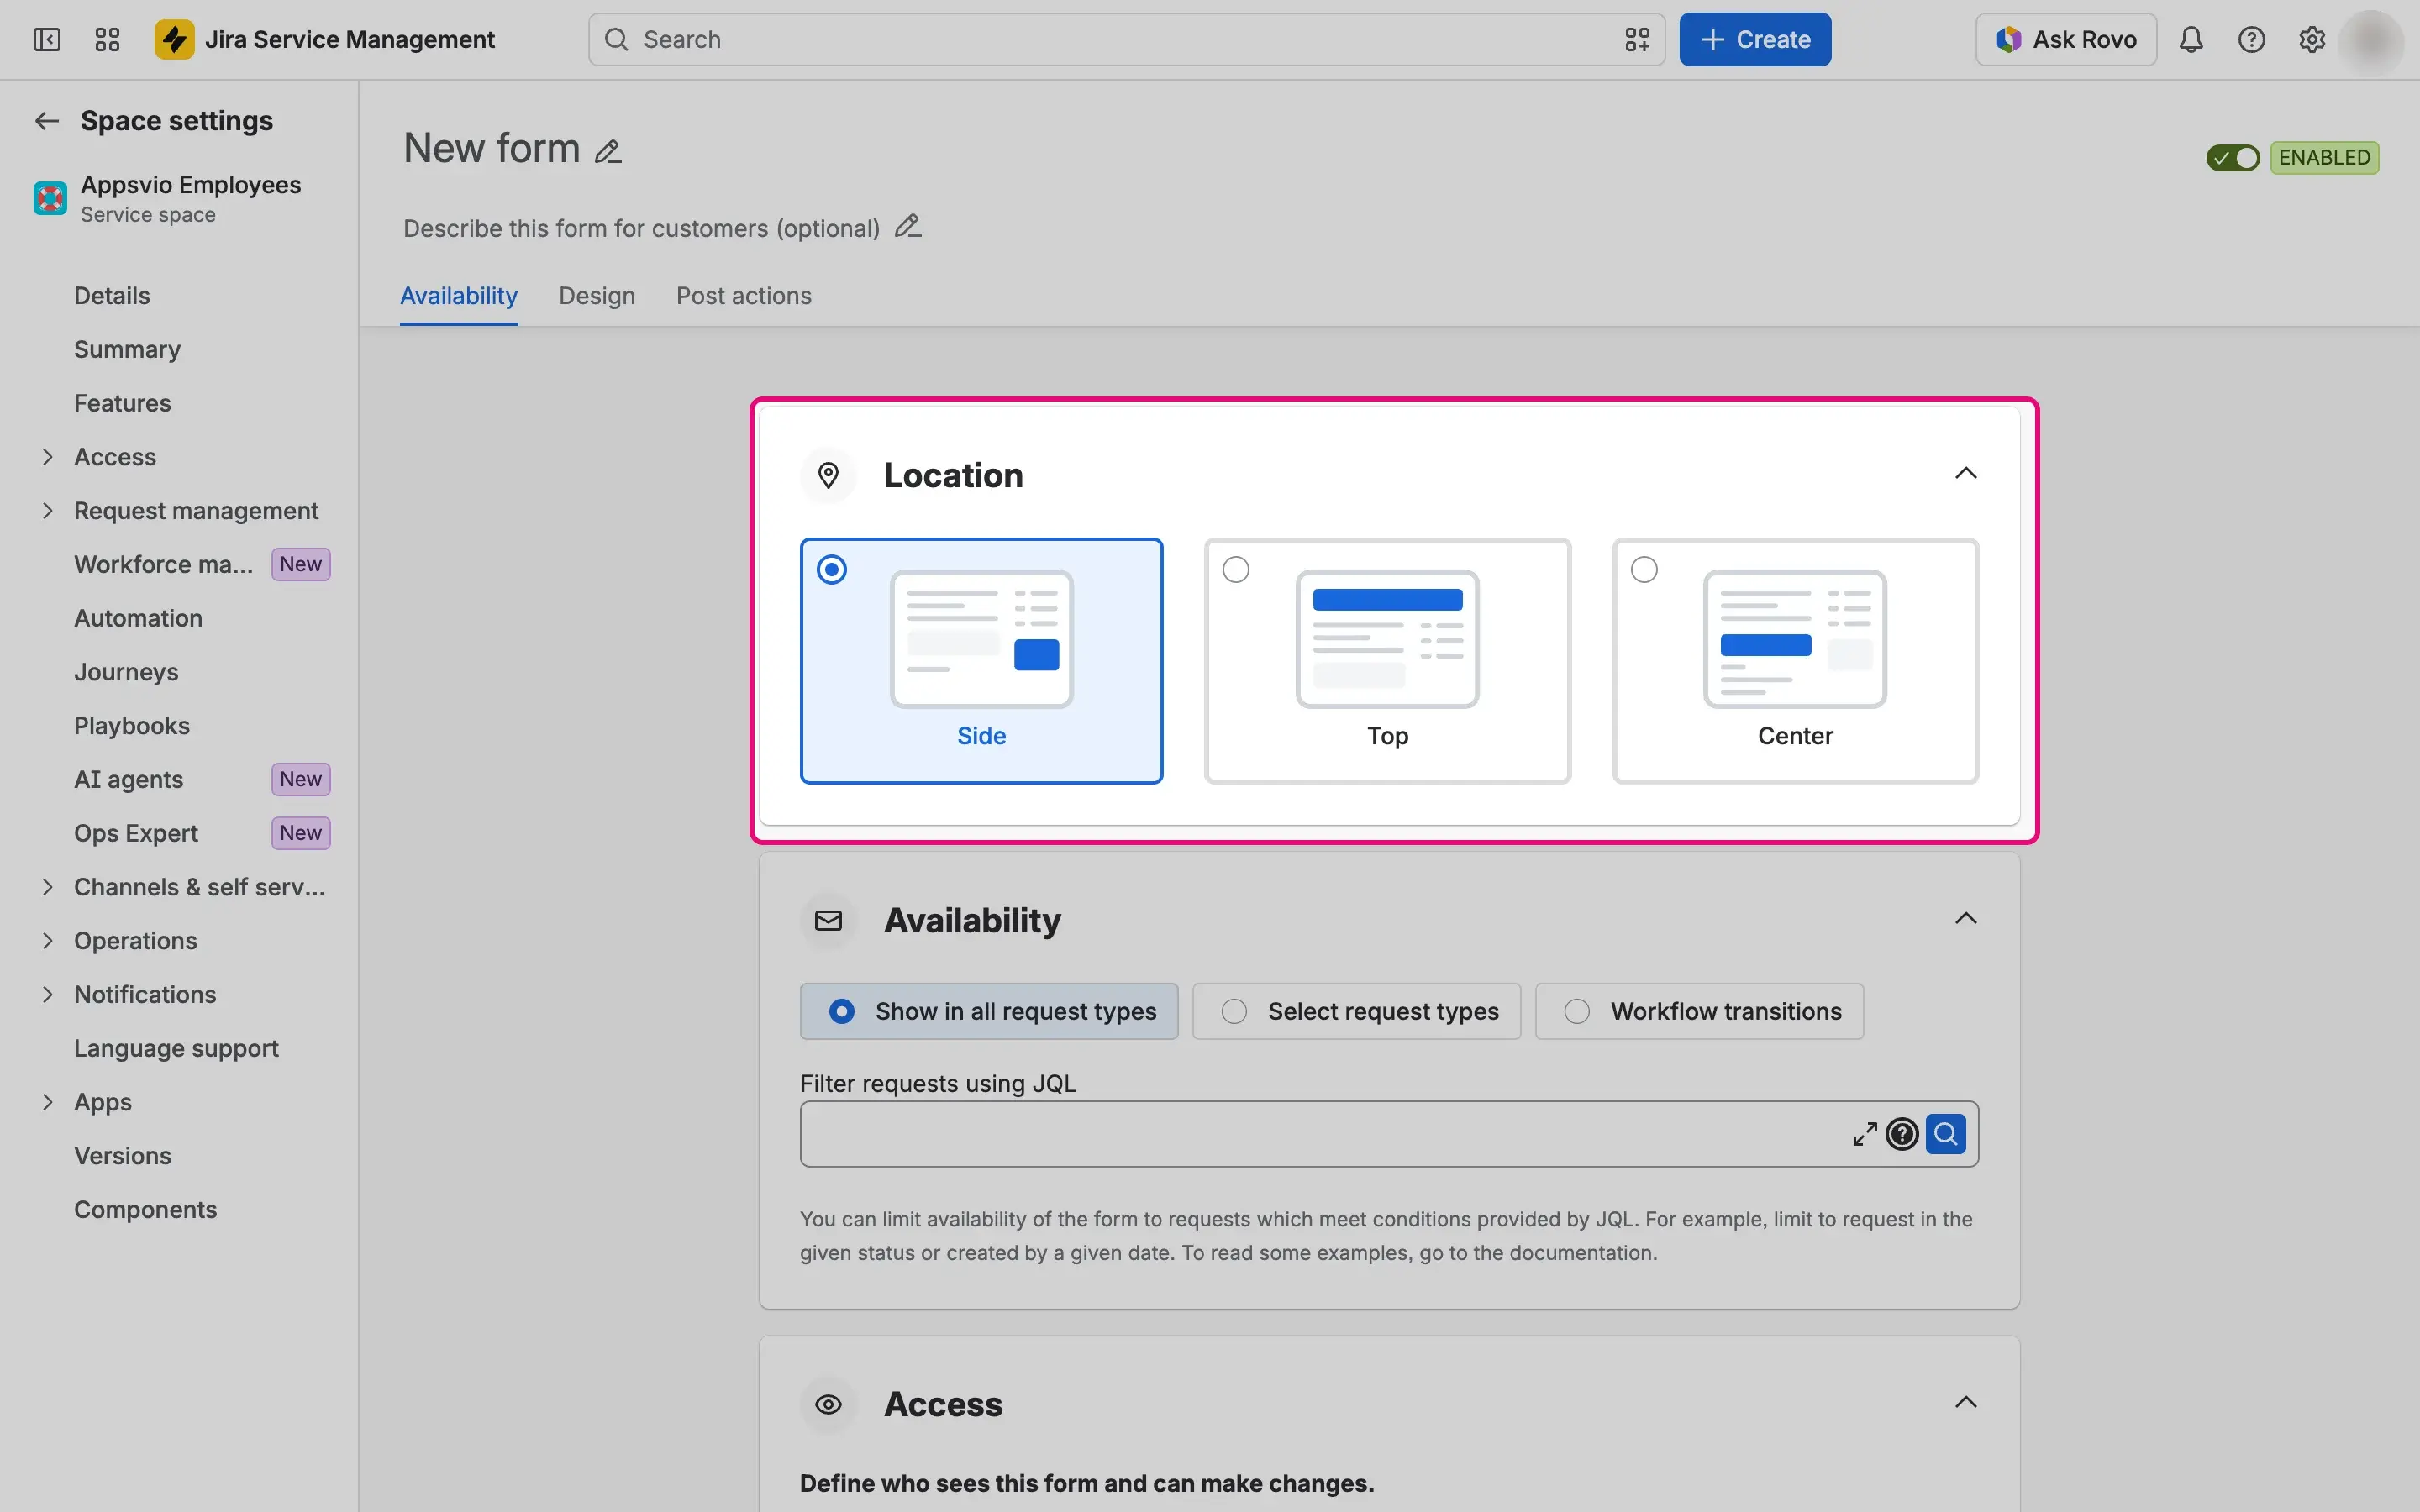
In Availability, choose when the form can be used:
- Show in all request types: the default.
- Select request types: select at least one request type of the space.
- Workflow transitions: select a workflow transition. The form is available only while the request is in a status from which the transition can be performed, and saving the form moves the request to the target status of the transition. Select Show diagram to see the workflow. Without a transition you can’t save the form. For the details, see Status changes.
When you switch to another option, its selection starts empty. Choose the request types or the transition again before you save.
Optionally, in Filter requests using JQL, enter a JQL query to limit the form to matching requests, with every option above, including Workflow transitions. The query stays when you change the option. The control shows how many requests match. A query can have up to 6,000 characters, and an invalid query blocks saving.
currentUser()stands for the customer who views the request.If the transition has conditions, Feature Bundle shows a blue banner: the conditions must take the
atlassian-addons-project-accessapp role into account, or the link of the form doesn’t appear and the form doesn’t work correctly. A form on a transition is hidden when the request type no longer uses the workflow of that transition in this space.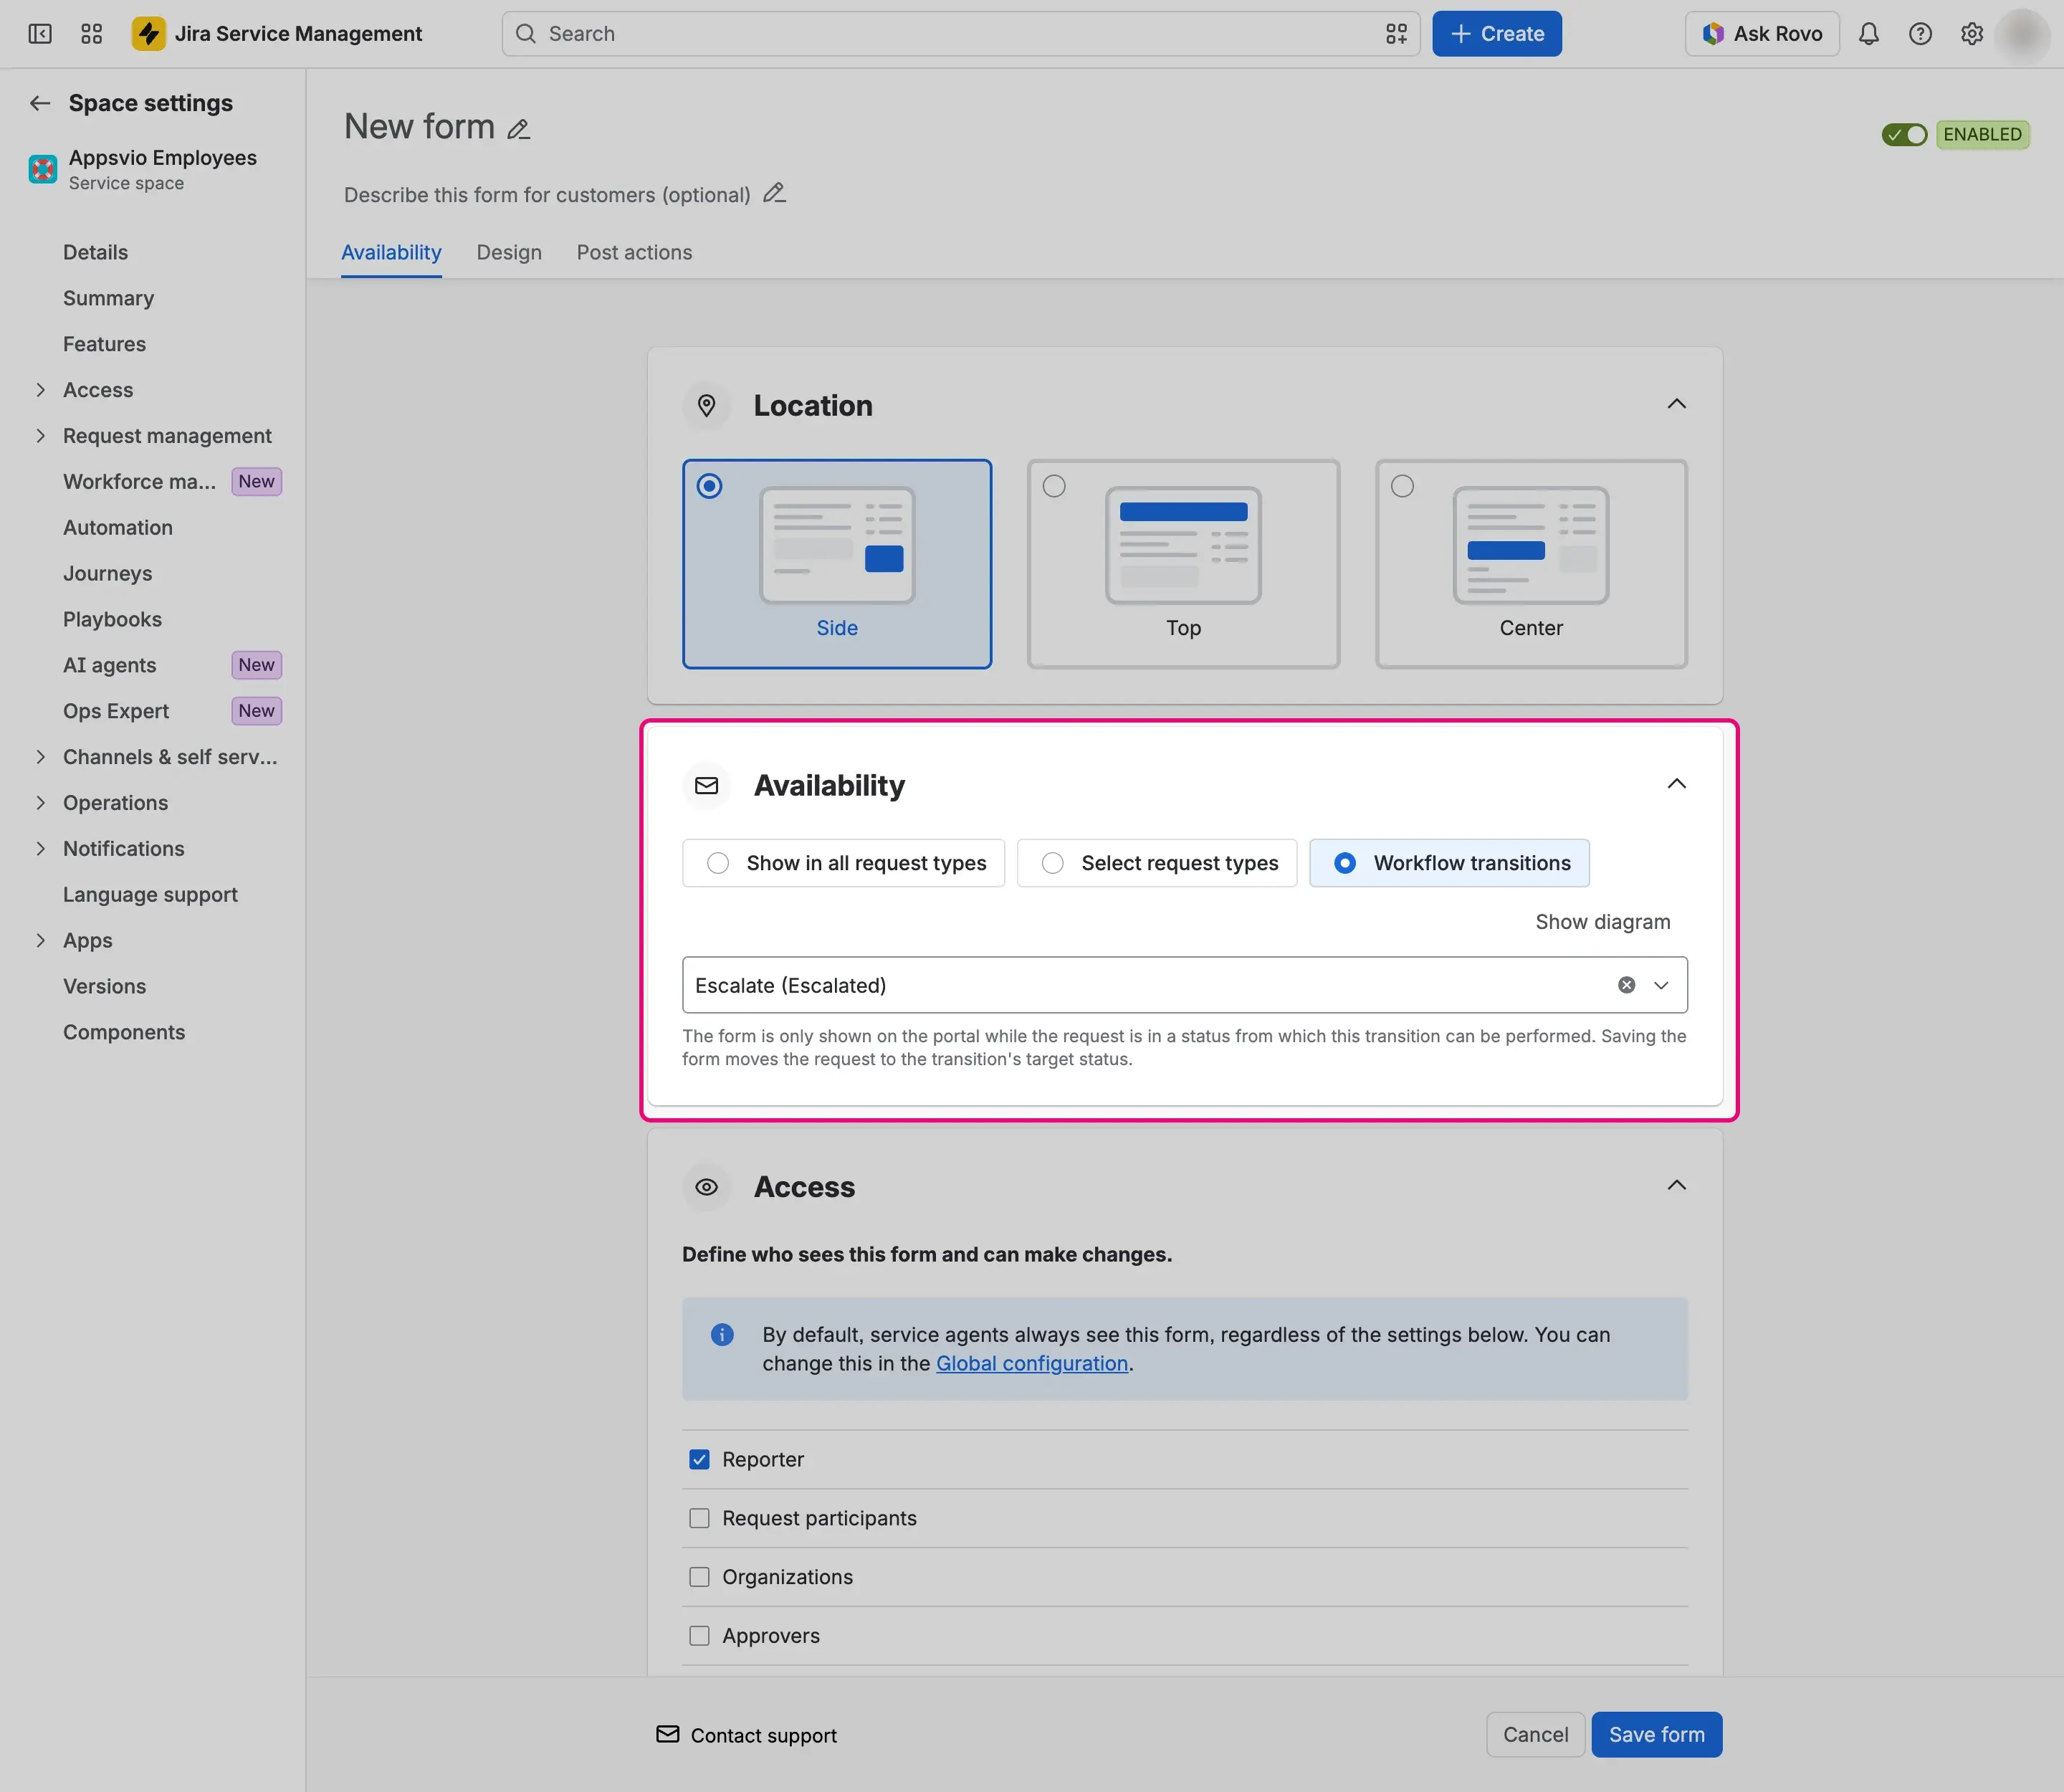
In Access, check the roles that can open and use the form. A customer sees the form when at least one checked role applies to them. A new form starts with Reporter checked, and you need at least one role to save.
- Reporter: the reporter of the request.
- Request participants: everyone listed as a participant of the request.
- Organizations: members of the organizations you select. If you select none, members of the organizations the request belongs to. The selector shows the text “All organizations”, but an empty selection works this way.
- Approvers: approvers of the request, including approvers of finished approvals. Turn on Ignore approvers from previous approval sessions to limit access to approvers of the current, open approval. Without an open approval, nobody qualifies.
- Jira groups: members of the groups you select. If you select none, every viewer sees the form.
- Custom field: users named in the user picker fields you select, and members of groups named in the group picker fields you select. With no fields selected, nobody qualifies.
Info
Service agents always see the form, whatever you set for request types, JQL, and access. The form still has to be enabled and available for the request, and the saving limit, the location, and the workflow transition apply to agents too. A Jira administrator can change this in Global configuration.
In Display names, enter the Link name. It is required. Customers see it as the text of the link and as the title of the dialog.
In Appearance, set the limit: Limit to maximum a number of savings per user (the default) or per request. The default is 100, and you can enter a whole number from 1 to 100. You can’t turn the limit off.
- Per user counts the saves of one customer on one request.
- Per request counts all saves on the request, whoever makes them.
- Every successful save counts as one, whatever the number of changed fields. When the limit is reached, the link is hidden, for agents as well.


Design the form
Open the Design tab and select Select object to add. Choose an object, in this order in the list:
- Field: a Jira field the customer can edit.
- Section message: a colored message.
- Divider: a line that separates objects.
- Custom text: formatted text with links.
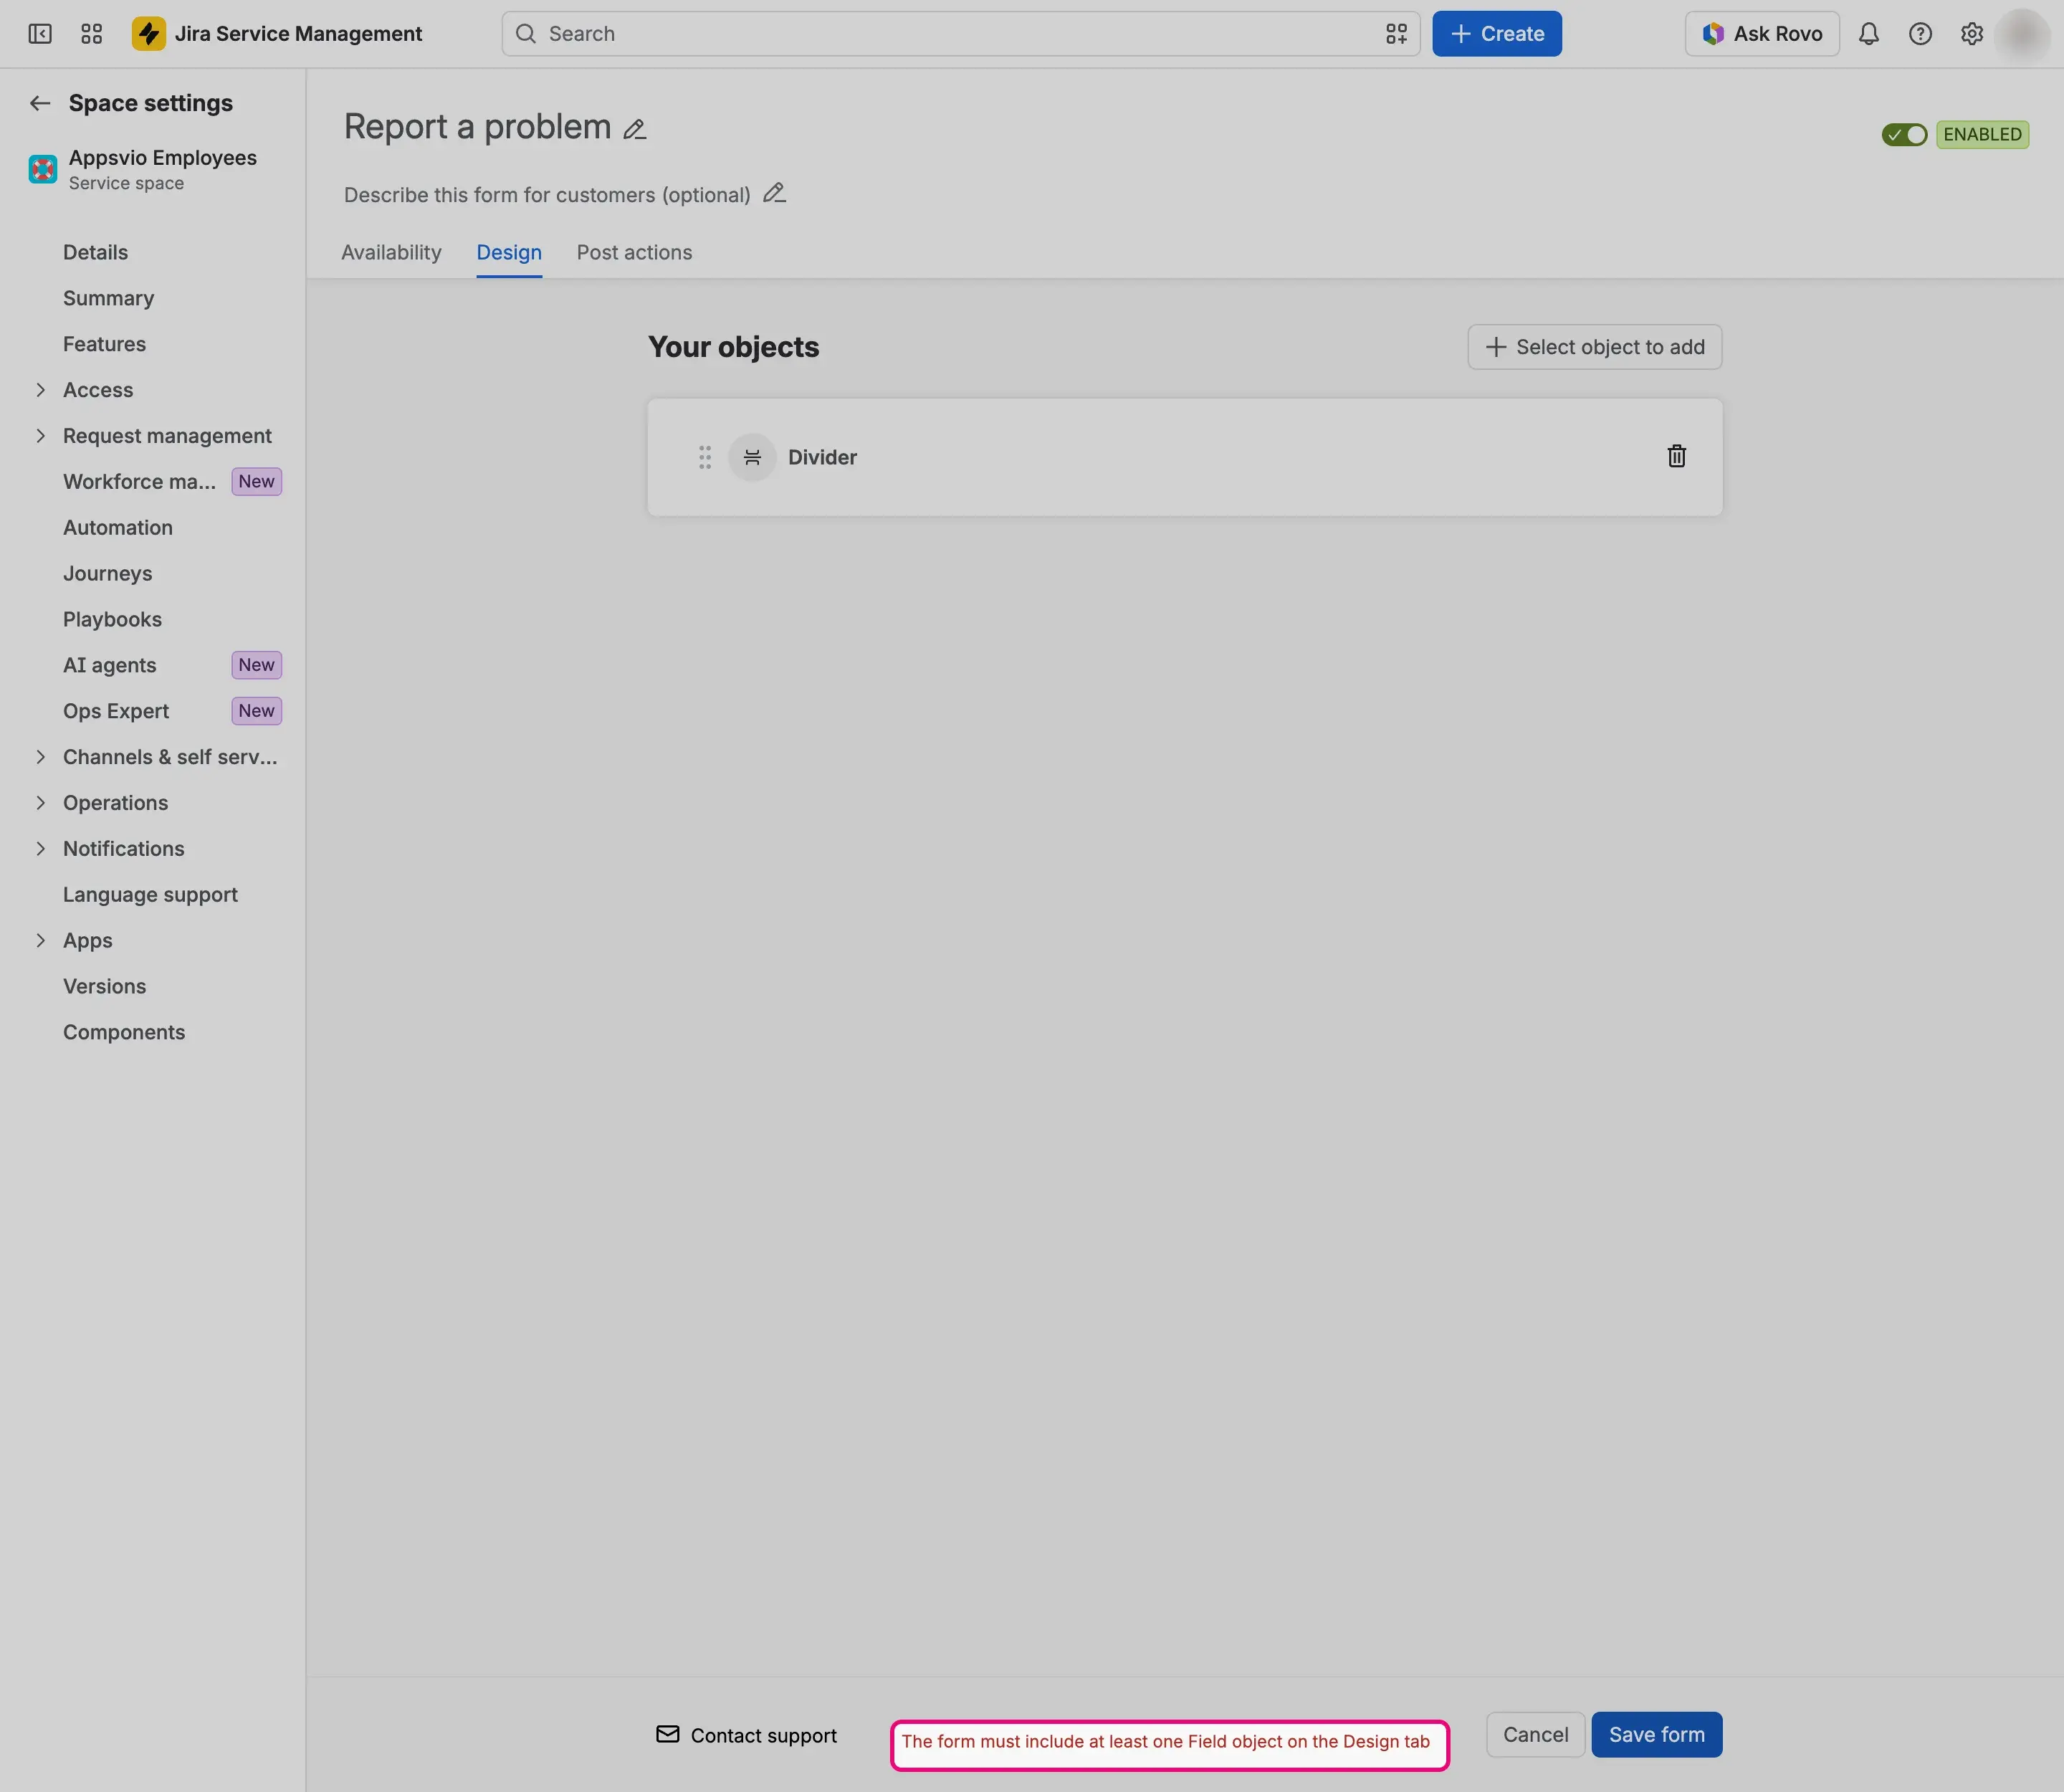
A form needs at least one Field object. A form with only messages, texts, and dividers can’t be saved.
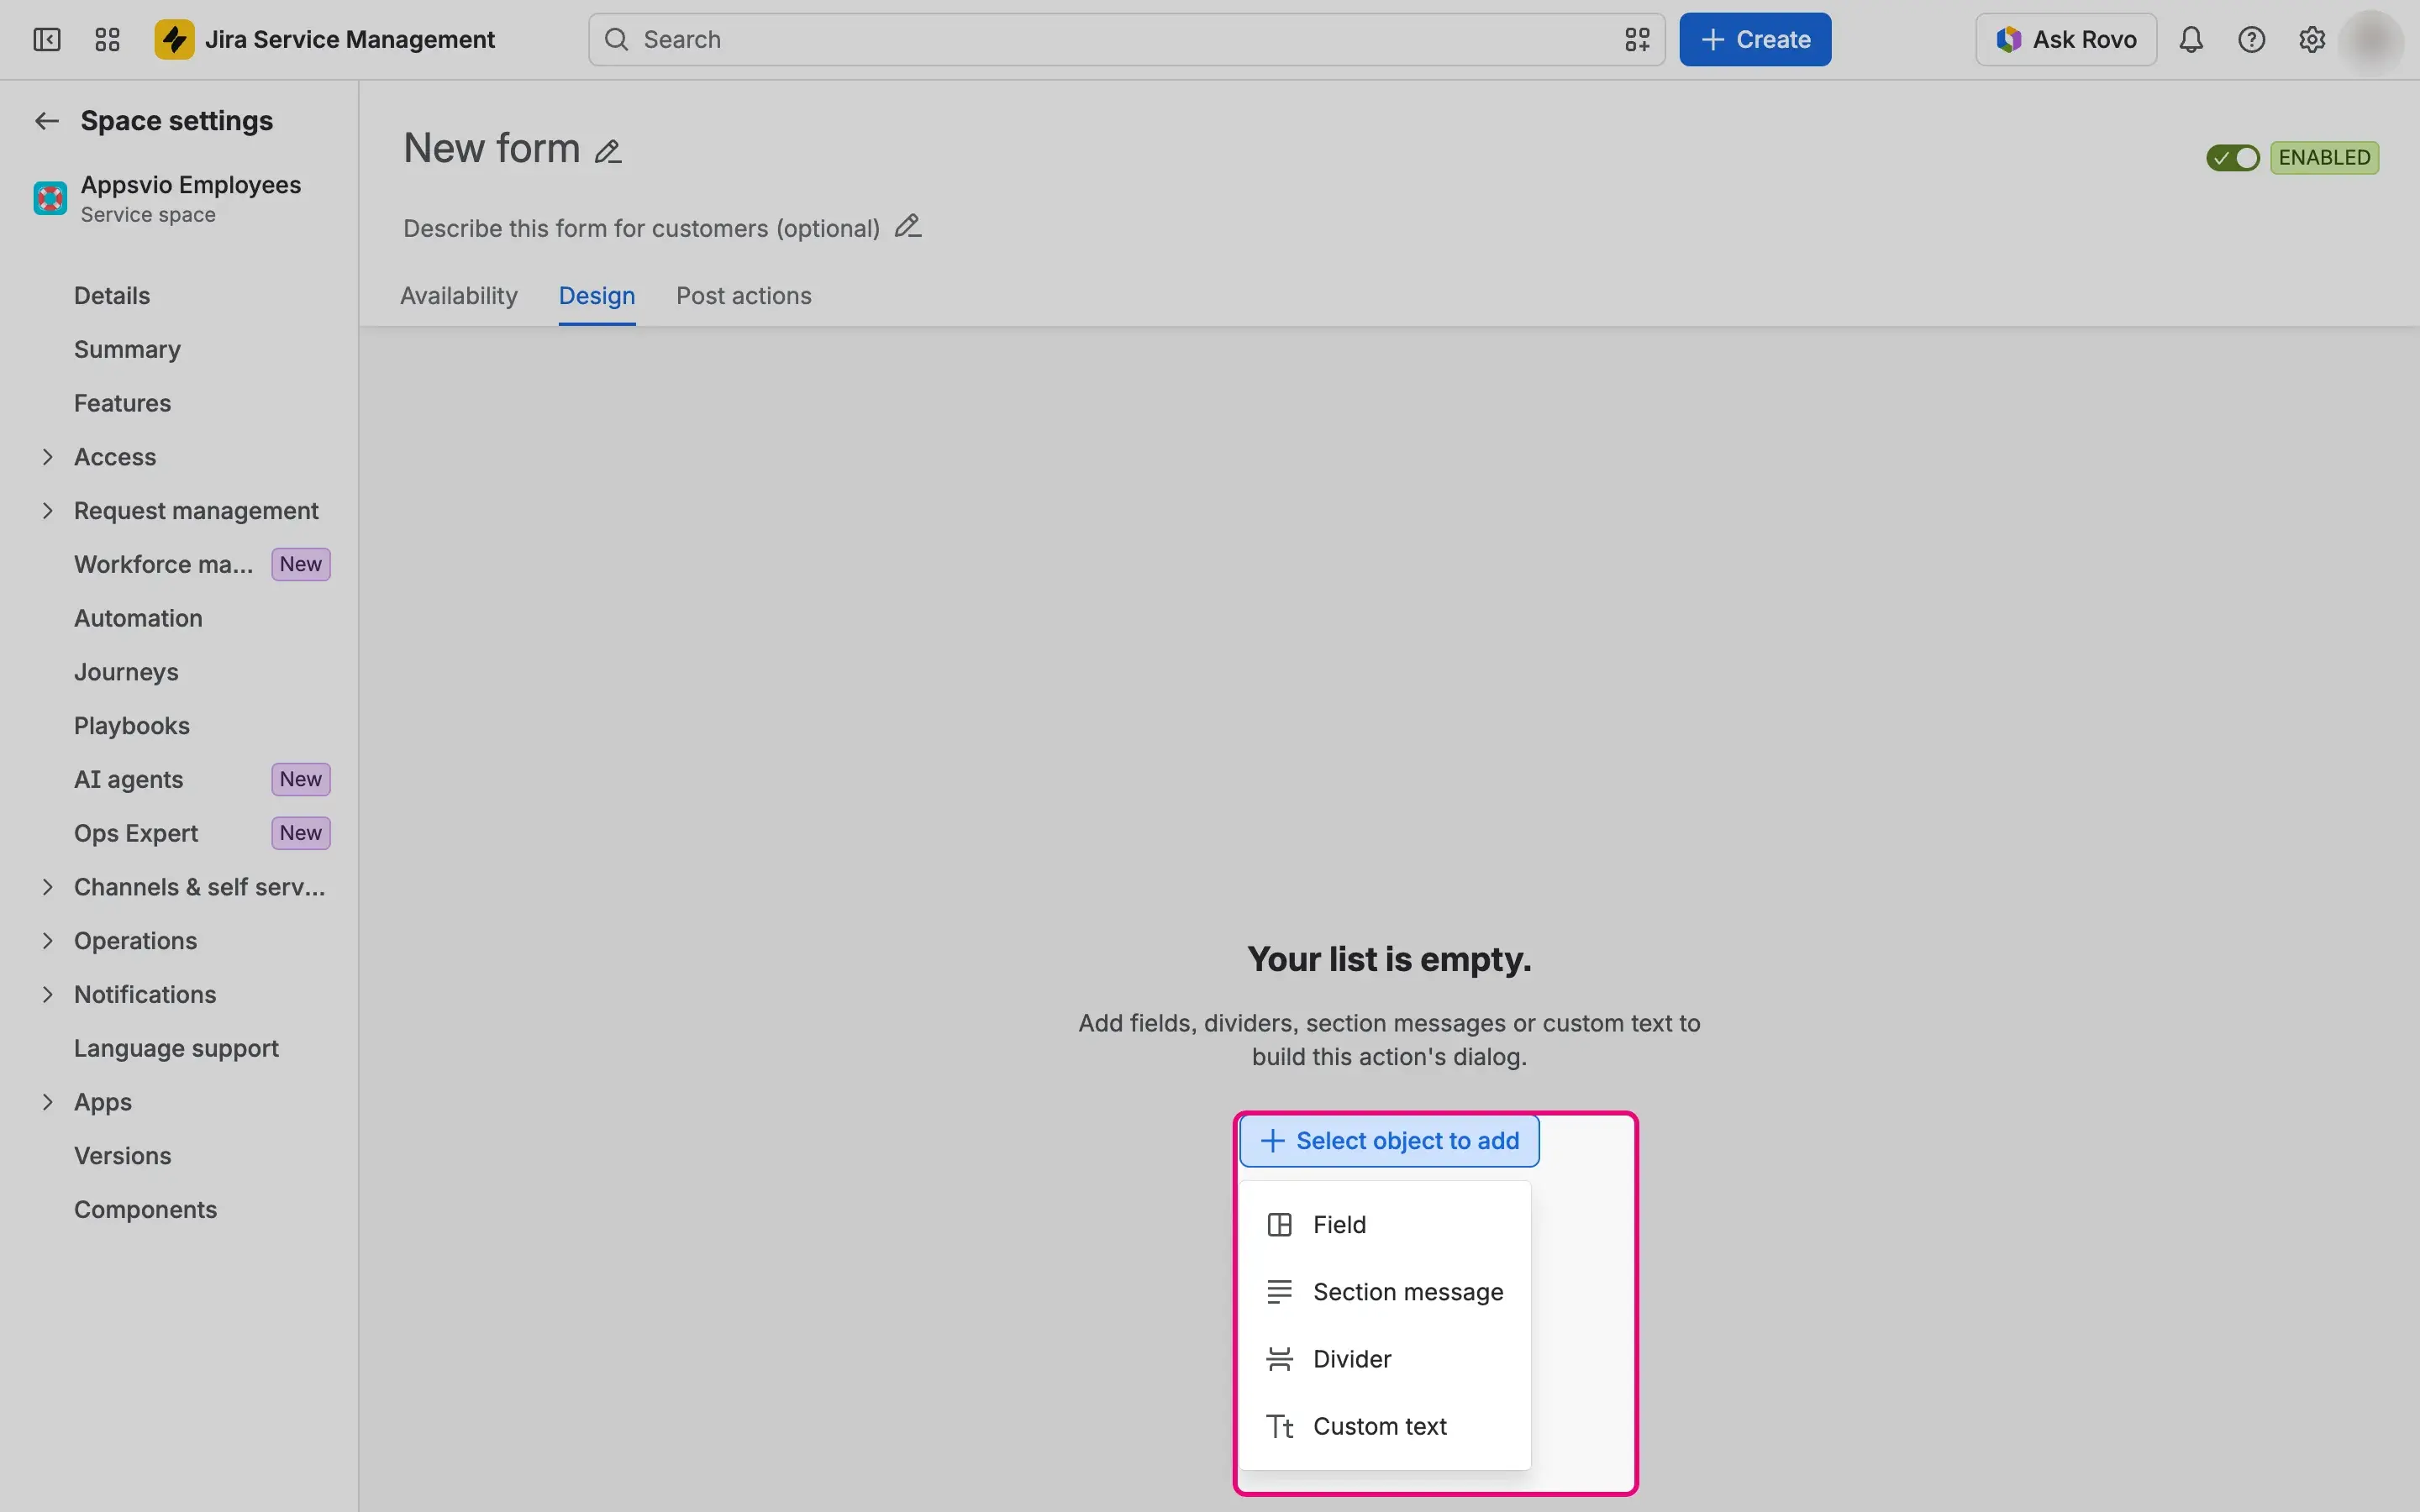
Expand the card of the object and set it up:

In the Select field type dialog, search with Type to search or open the list All fields, select the field, and select Add field. The list shows the fields that are associated with at least one project in your Jira site. If you can’t find your field, it isn’t associated with any project yet. In Jira, select the cog icon, go to Work items > Fields, select the three dots next to the field, and select Add field to screen. A field that is already on the form isn’t offered again. For the fields you can choose, see Supported fields.
Expand the card of the field and set:
- JQL: the field shows to the customer only when the request matches the query. A query can use
currentUser()for the customer who views the request. An invalid query blocks saving. If JQL hides every object of the form, the form isn’t shown at all. - Description: a text shown under the field on the portal.
- Allow to browse users from Jira: for Assignee, Reporter, user pickers, and Request participants. The customer searches for users instead of typing a complete email address. This setting overrides the global Browse users and groups permission for all user types. For user pickers, you can also limit the search to members of the Jira groups you select in Limit search to Jira groups. The selector shows only while Allow to browse users from Jira is on. With no group selected, the search finds all users.
- Required: the customer has to fill the field.
- Display as read-only field: the customer sees the current value but can’t change it. Comment doesn’t have this option.
You can select only one of Required and Display as read-only field: when you select one, the other is disabled. A form that already has both selected keeps both.
- JQL: the field shows to the customer only when the request matches the query. A query can use
Comment field
The Comment field lets the customer add a new comment to the request. It can’t be used to edit existing comments.

- In Title, enter the heading of the message.
- In Content, enter the text. Line breaks are kept.
- In Appearance, choose Discovery, Error, Information, Success, or Warning. A new message has no appearance until you choose one.

- In Text, enter the content with the rich-text editor. You can format the text and add links.

A divider has no settings. Customers see it as a line.
- To change the order of the objects, drag their cards. Customers see the objects in this order. To remove an object, expand its card and select Remove object. For a divider, select the trash icon. The removal takes effect when you save the form.
Set what happens after a save
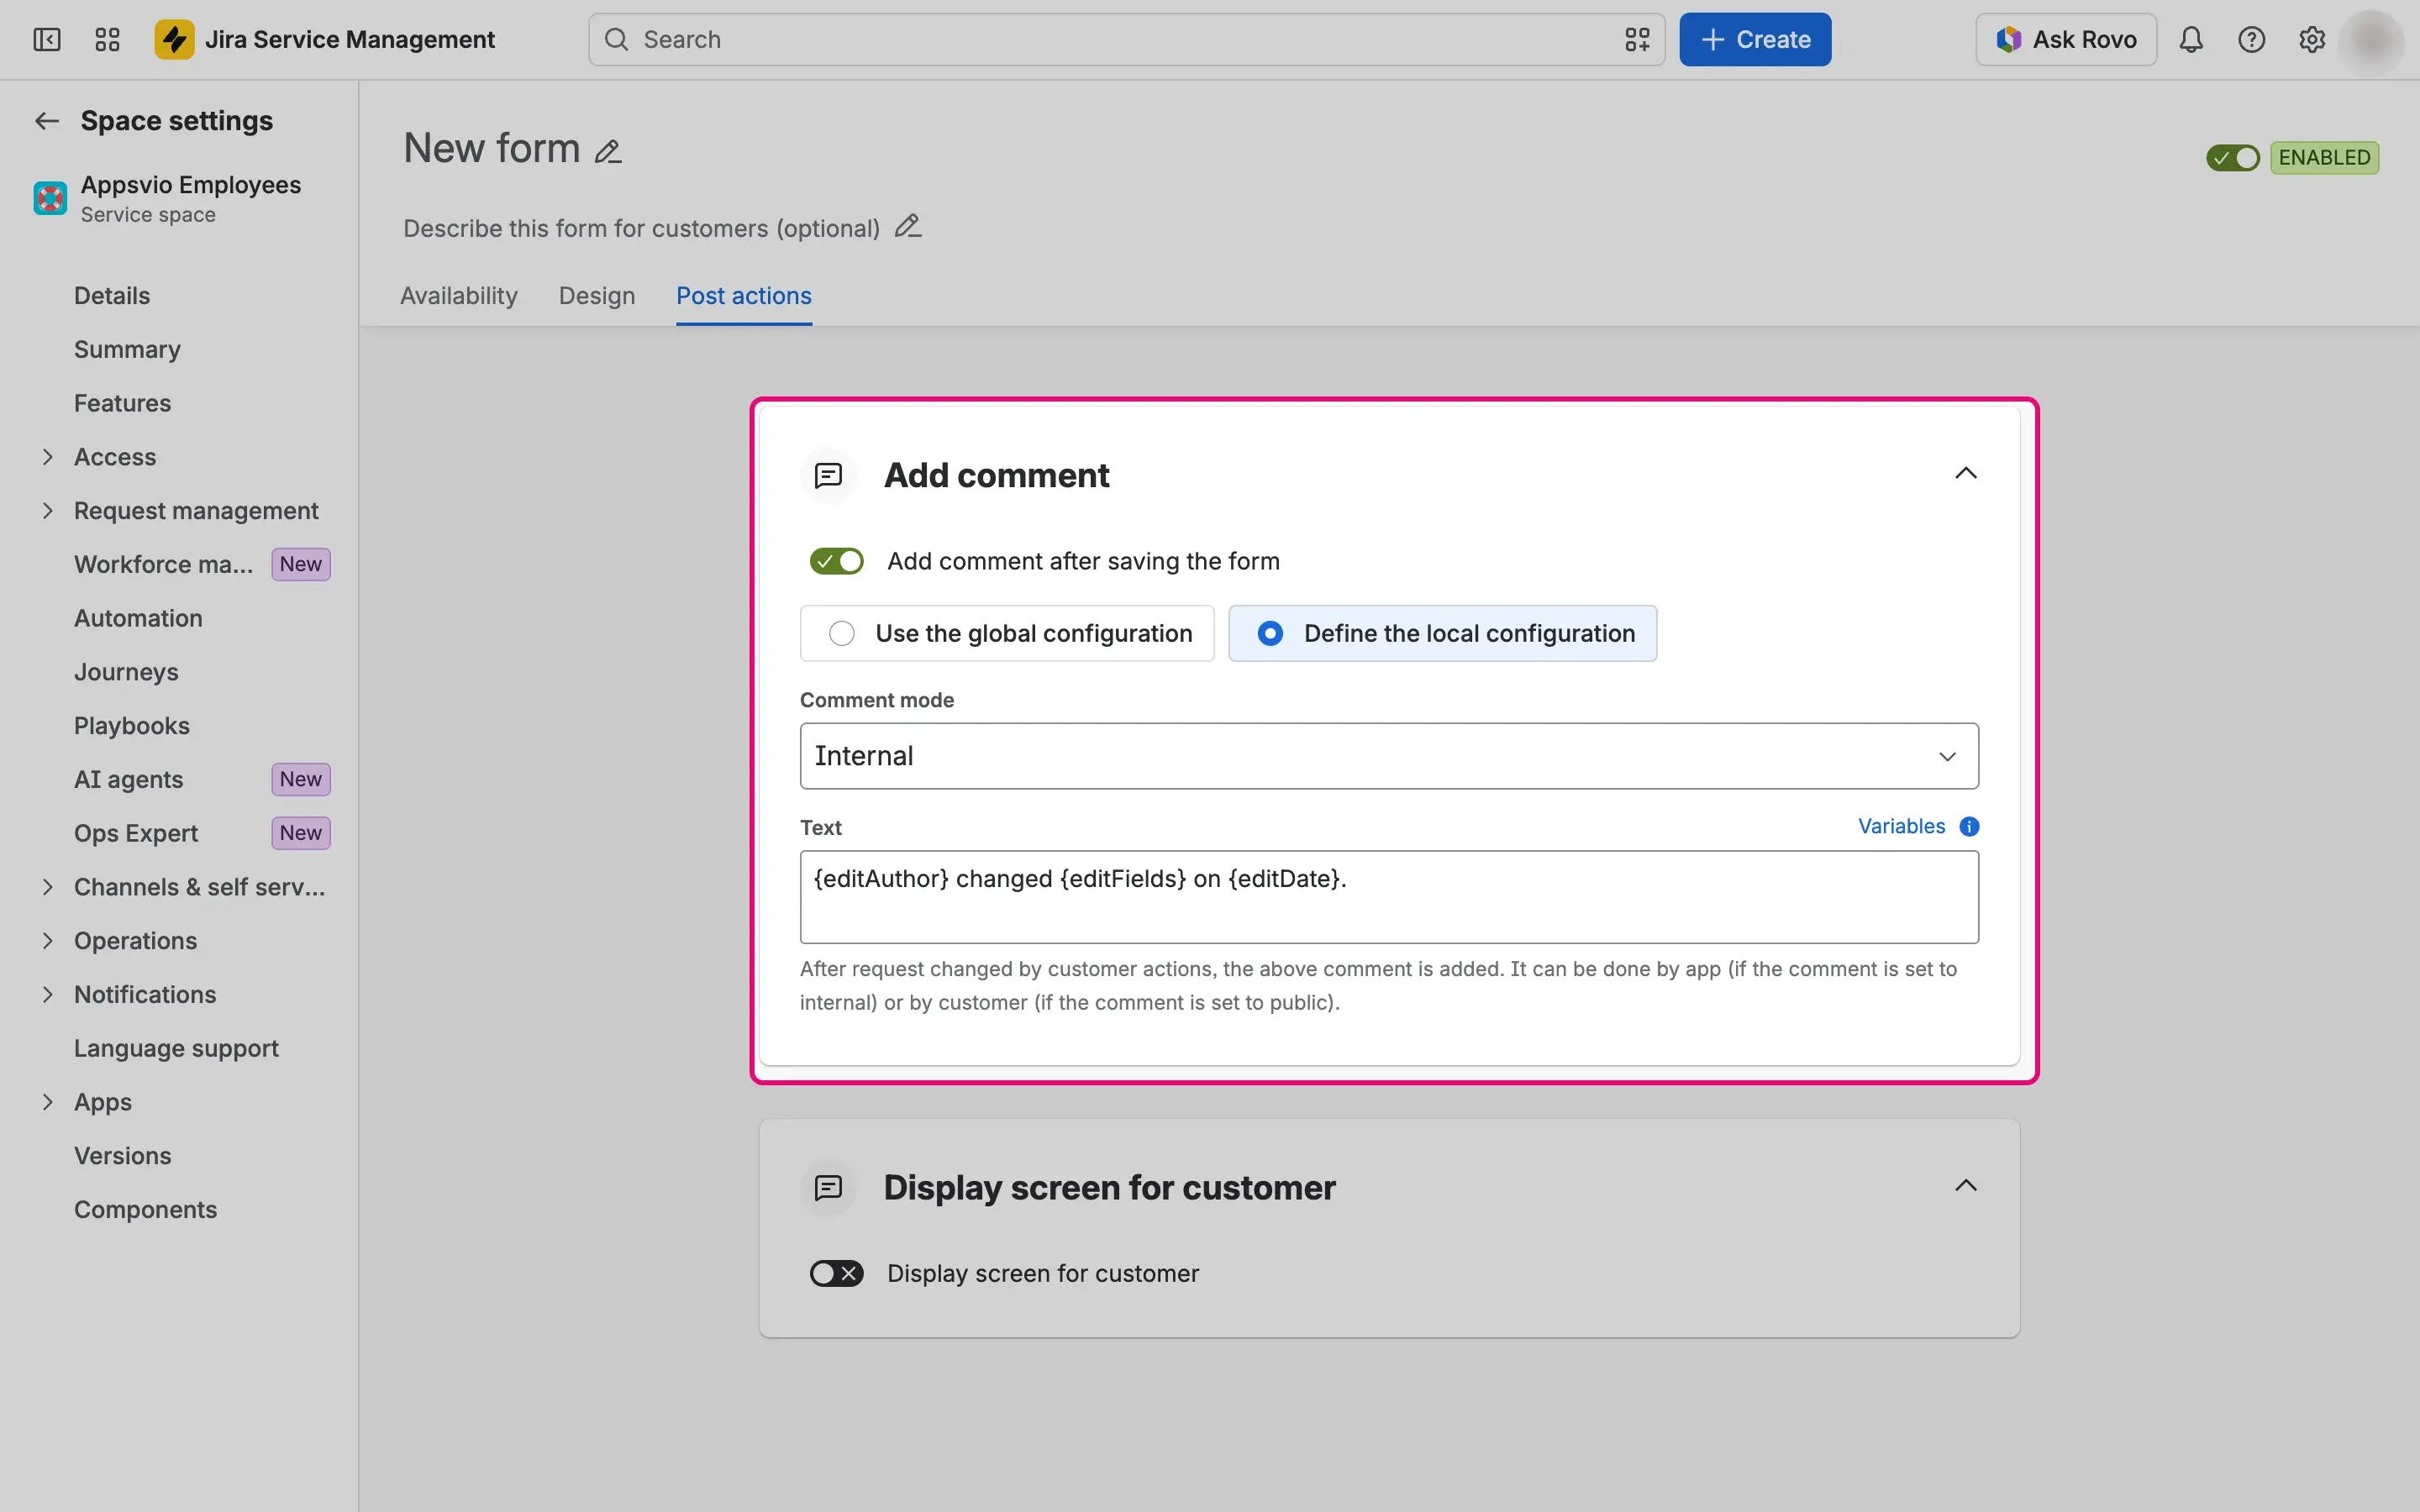
Open the Post actions tab. In Add comment, choose whether Feature Bundle adds a comment to the request after each save. The switch Add comment after saving the form is on by default.
- Choose Use the global configuration to use the comment settings from Global configuration, which you see here as read-only. Choose Define the local configuration to set the mode and the text only for this form.
- Comment mode: Internal hides the comment from customers and adds it in the name of the app. Public adds it in the name of the customer.
- Text: up to 500 characters. With more, you can’t save. Use these variables:
{editFields}for the names of the edited fields,{editAuthor}for the display name of the customer, and{editDate}for the date and time in UTC. The field starts with the default text{editAuthor} edited this request on {editDate}. The following fields have been changed: {editFields}.An empty text uses it.
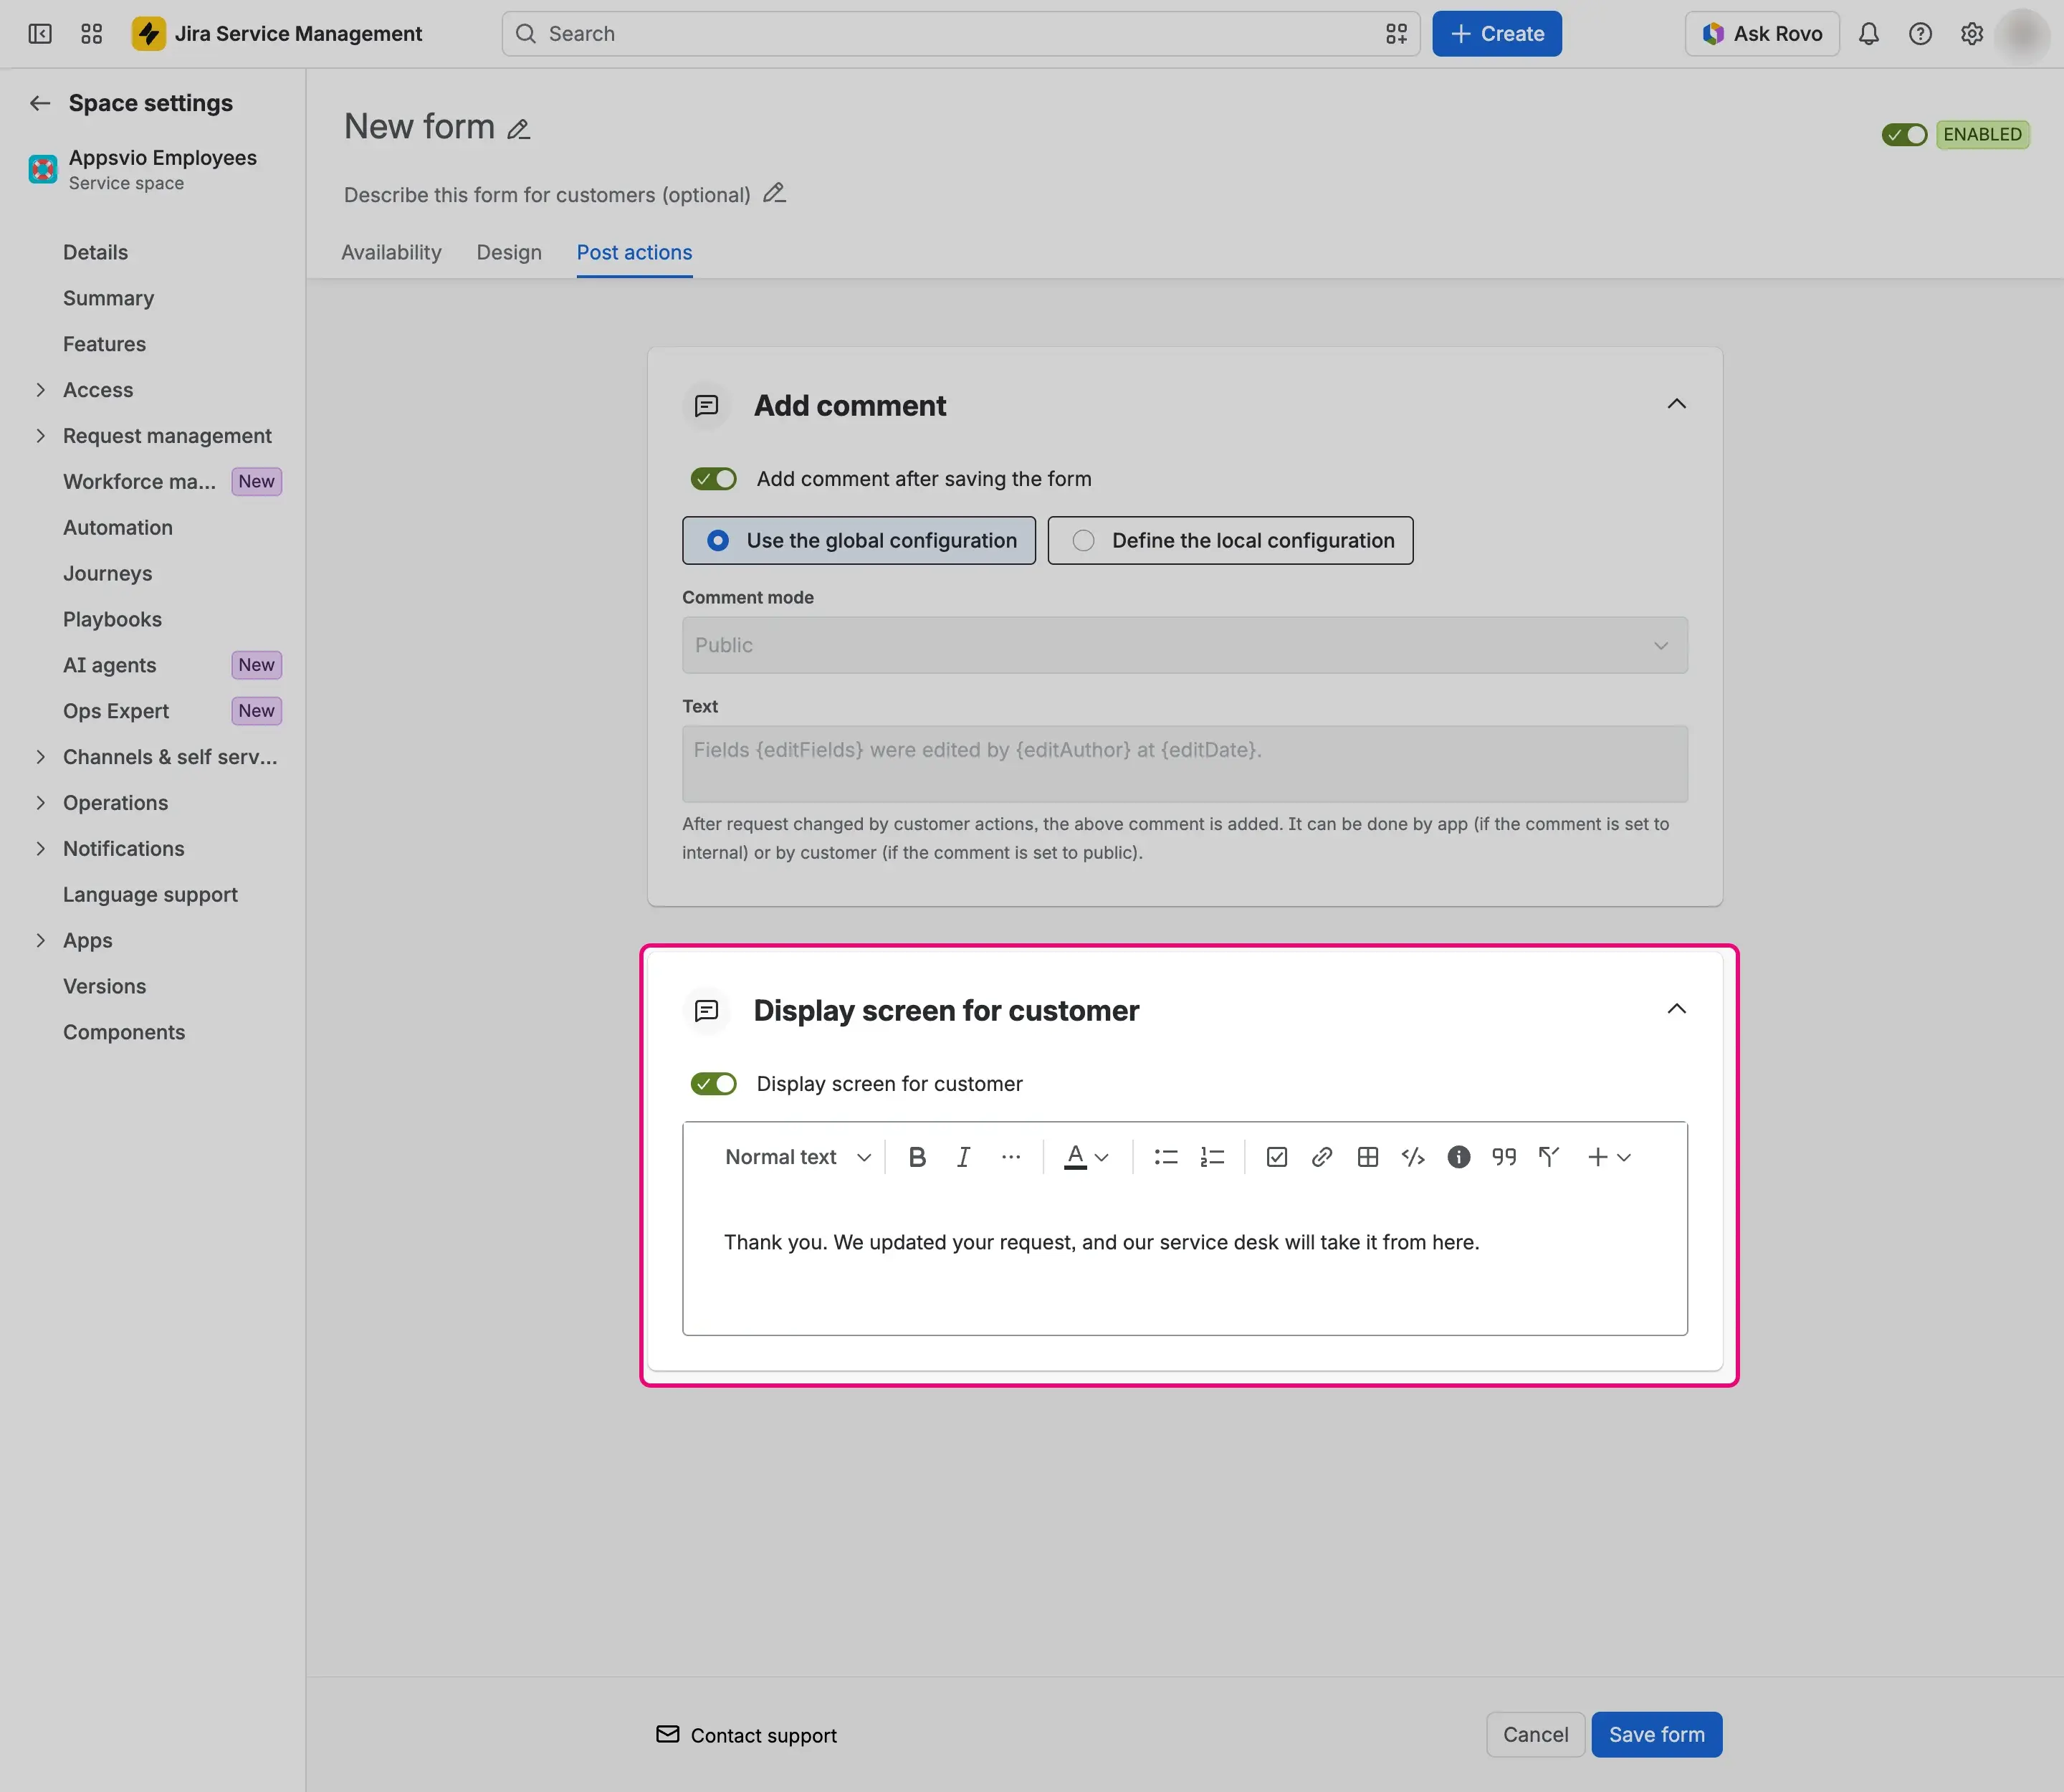
Optionally, in Display screen for customer, switch it on and enter a message. After a successful save, the customer sees this message with a Close button instead of the dialog closing at once. The message is required when the switch is on. Closing reloads the request page.


Save the form
Select Save form. A message confirms that the form has been created. If a required setting is missing or invalid, the page shows only the first problem under the buttons and doesn’t save the form. To leave without saving, select Cancel.

Result
The form is on the list as a card with the status Enabled. Customers see its link on matching requests, in the zone you chose. The dialog that opens from the link shows the objects in the order of the cards on the Design tab. See Forms on the portal.

Deleted fields
If a field was deleted in Jira, its card stays on the form with a BROKEN label and the message “Field … was not found.” Remove it from the form.
Advanced edition
The Assets field is available only in the Advanced edition. See App Editions.
To edit, disable, or delete forms later, see Manage forms.