Let customers add and remove files
The Attachment field lets customers add files to their request from the form on the customer portal. They can also remove the files they added themselves.
Before you start
- You are both an administrator of the service space and a service desk agent in it.
- You have a form. See Create a form.
Steps
Go to Space settings > Apps > Feature Bundle > Customer Actions and open the form.
Open the Design tab, select Select object to add, and then select Field.
In the Select field type dialog, select Attachment and select Add field.
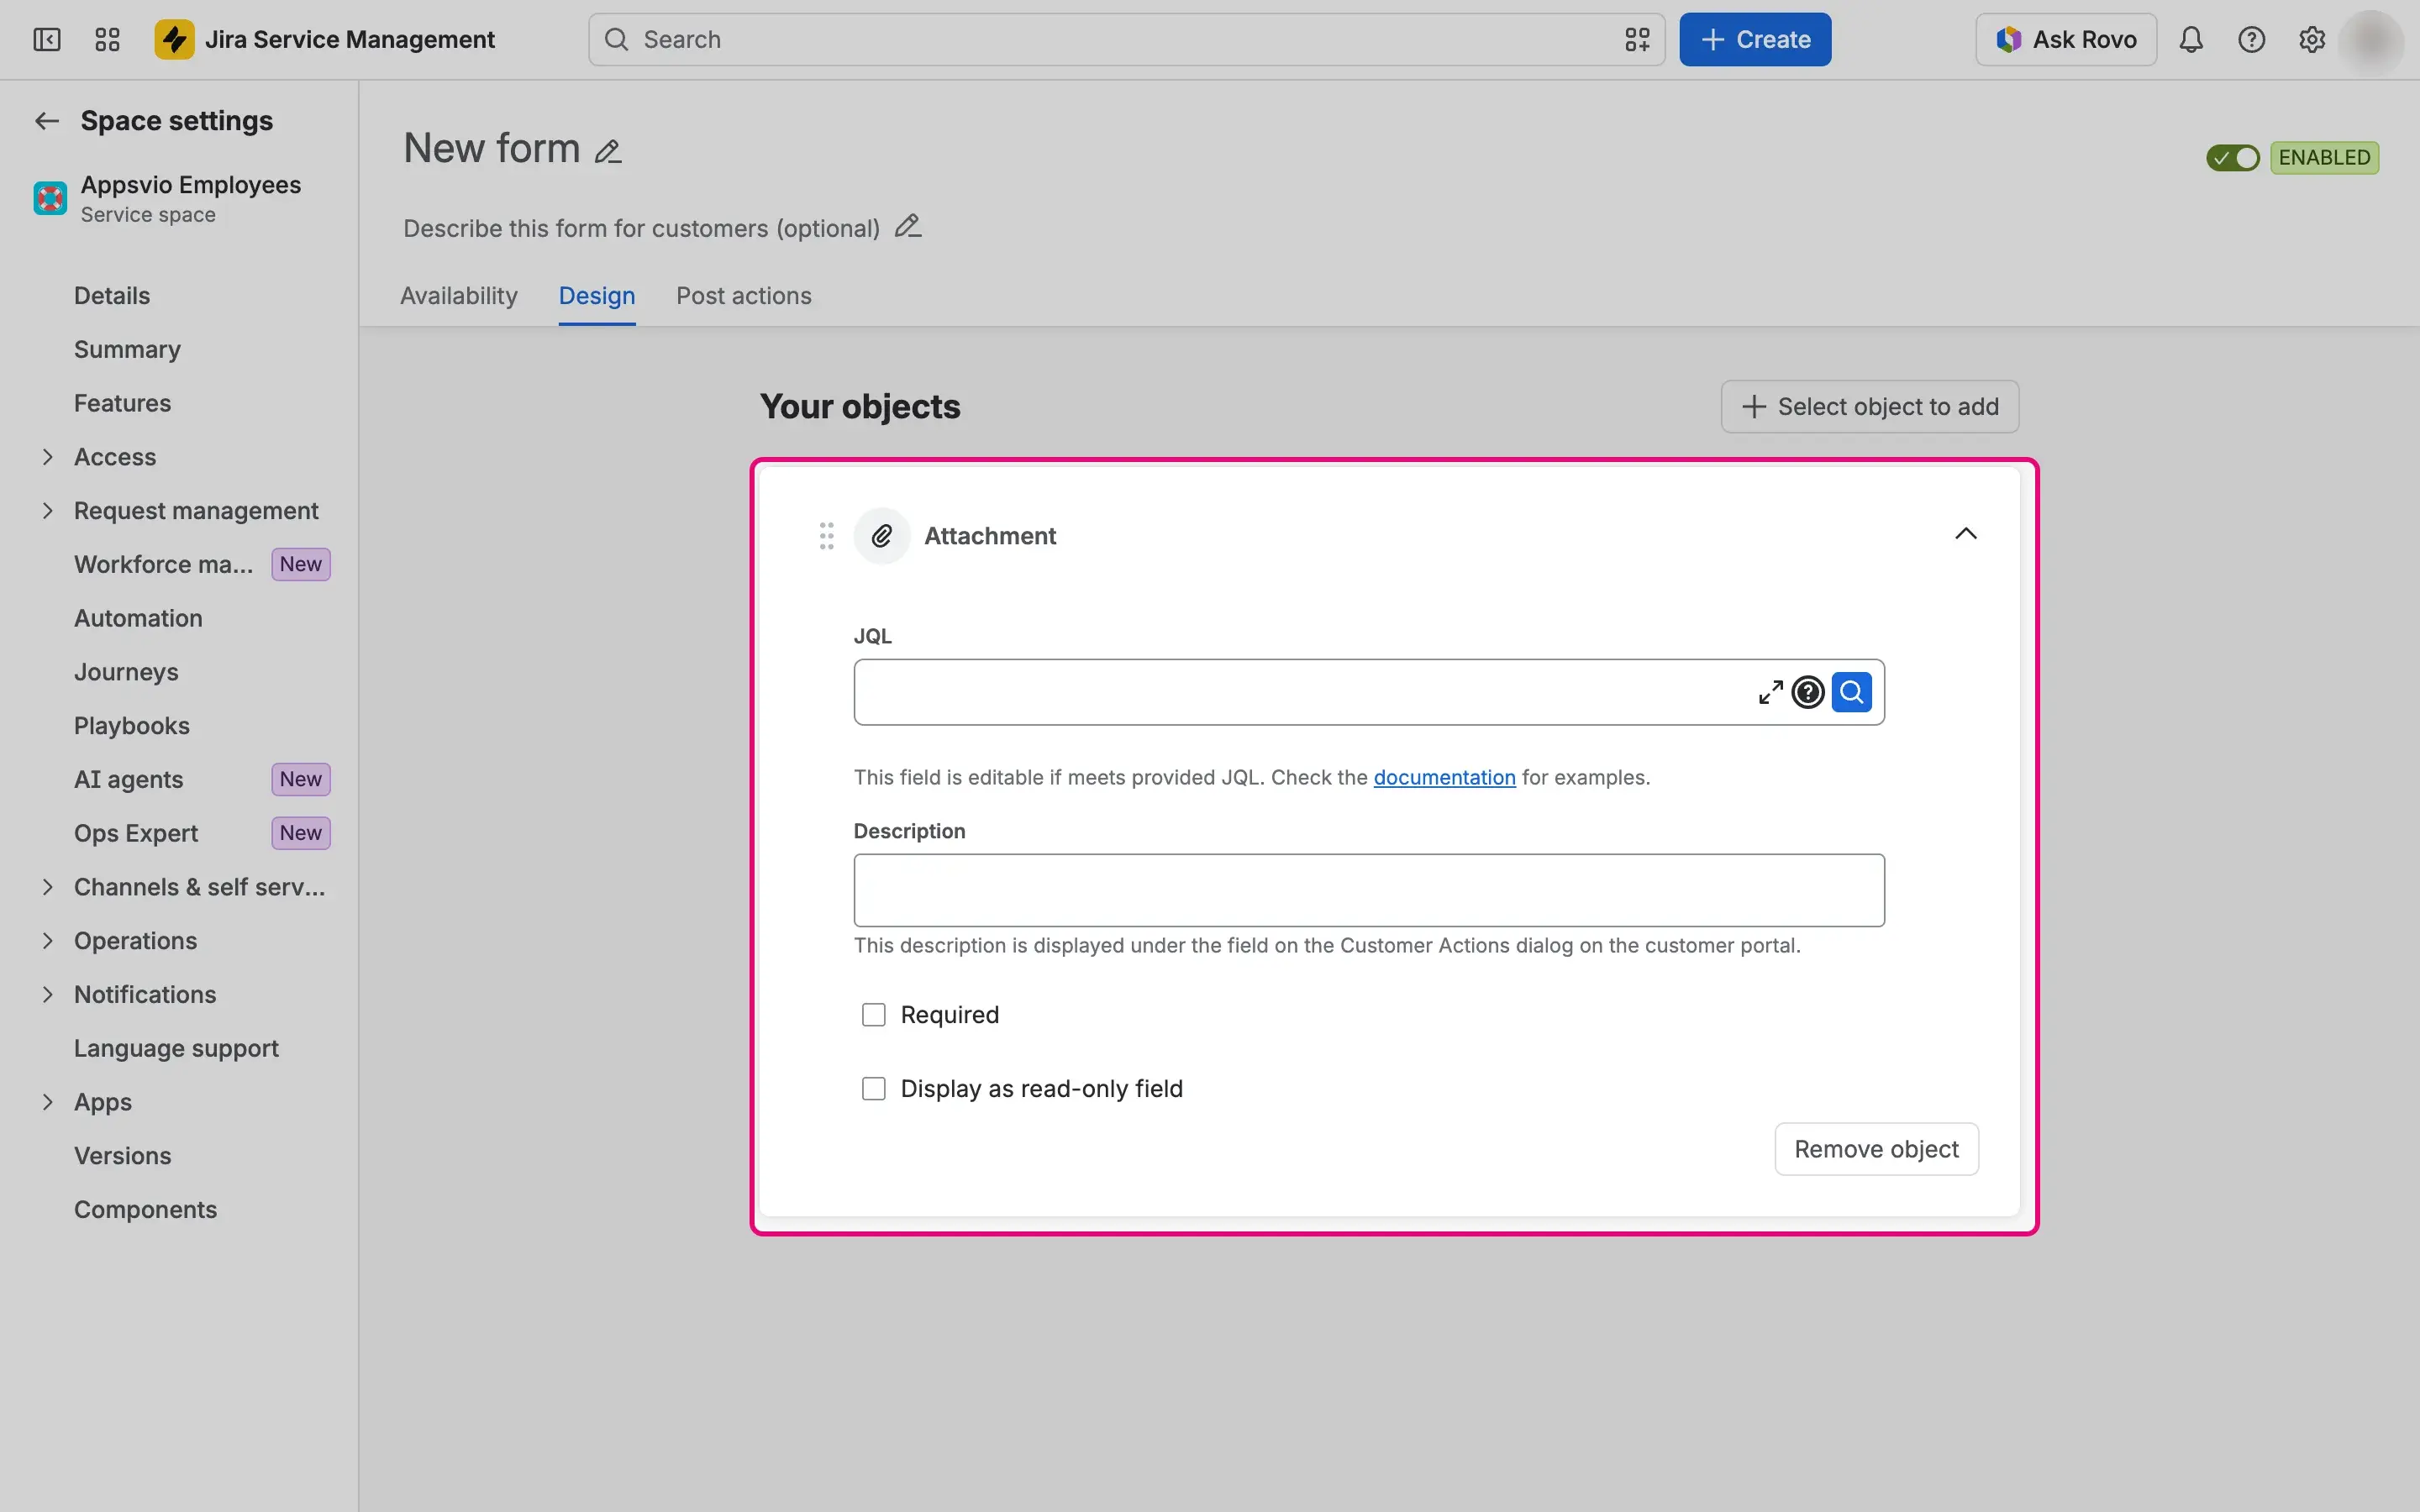
Optionally, expand the card of the field and set JQL, Description, Required, and Display as read-only field:
- With Required, the customer can save the form only when the request has at least one attachment after their changes. Attachments already on the request count, and so do files they add. Attachments they mark for removal don’t count. Otherwise the field shows “This field is required”.
- With Display as read-only field, the dialog shows the attachments of the request as in an Additional Fields panel, newest first, with Download All. The customer can’t add or remove files.
- You can turn on only one of Required and Display as read-only field.
Select Save form.

Result
In the dialog of the form, customers see the field with these parts:
- Drop zone: the text “Drag and drop a file here, max. size is 100 MB per file” and the button Add attachment. Customers can add several files. A larger file is refused with a message that names the file and the maximum size.
- List of attachments: the attachments of the request with their size. New files are marked Pending, and customers can remove a pending file before they save.
- Removing files: customers can remove an attachment only if they added it themselves. Files added by agents or by other people stay and have no remove icon.
- Saving: new files and removals take effect when the customer selects Save. Feature Bundle adds the new files to the request as public attachments in the name of the customer.
