Arrange panels on the request view
App Configuration decides which features of Feature Bundle appear in each zone of the request view on the customer portal, and in what order. The setting applies to the whole space and to every request type.
What the panels are
Each row is one panel for a whole feature:
- Customer Actions: the links of all forms whose location is that zone.
- Additional Fields: all panels of that zone.
- Ticket Journey: the journey. It is not available in the Center zone.
- Announcement Banners: shown always first in the Top zone. You can’t drag, hide, or move it.
A new space starts with this arrangement, with every panel visible:
- Top: Announcement Banners, Customer Actions, Additional Fields, Ticket Journey.
- Center: Customer Actions, Additional Fields.
- Side: Customer Actions, Additional Fields, Ticket Journey.
Before you start
- You are both an administrator of the service space and a service desk agent in it.
- Feature Bundle is installed. See Install Feature Bundle.
Steps
Go to Space settings > Apps > Feature Bundle > App Configuration. The page shows a model of the request view with three lists:
- Top: above the request summary.
- Center: the main column.
- Side: the right column.
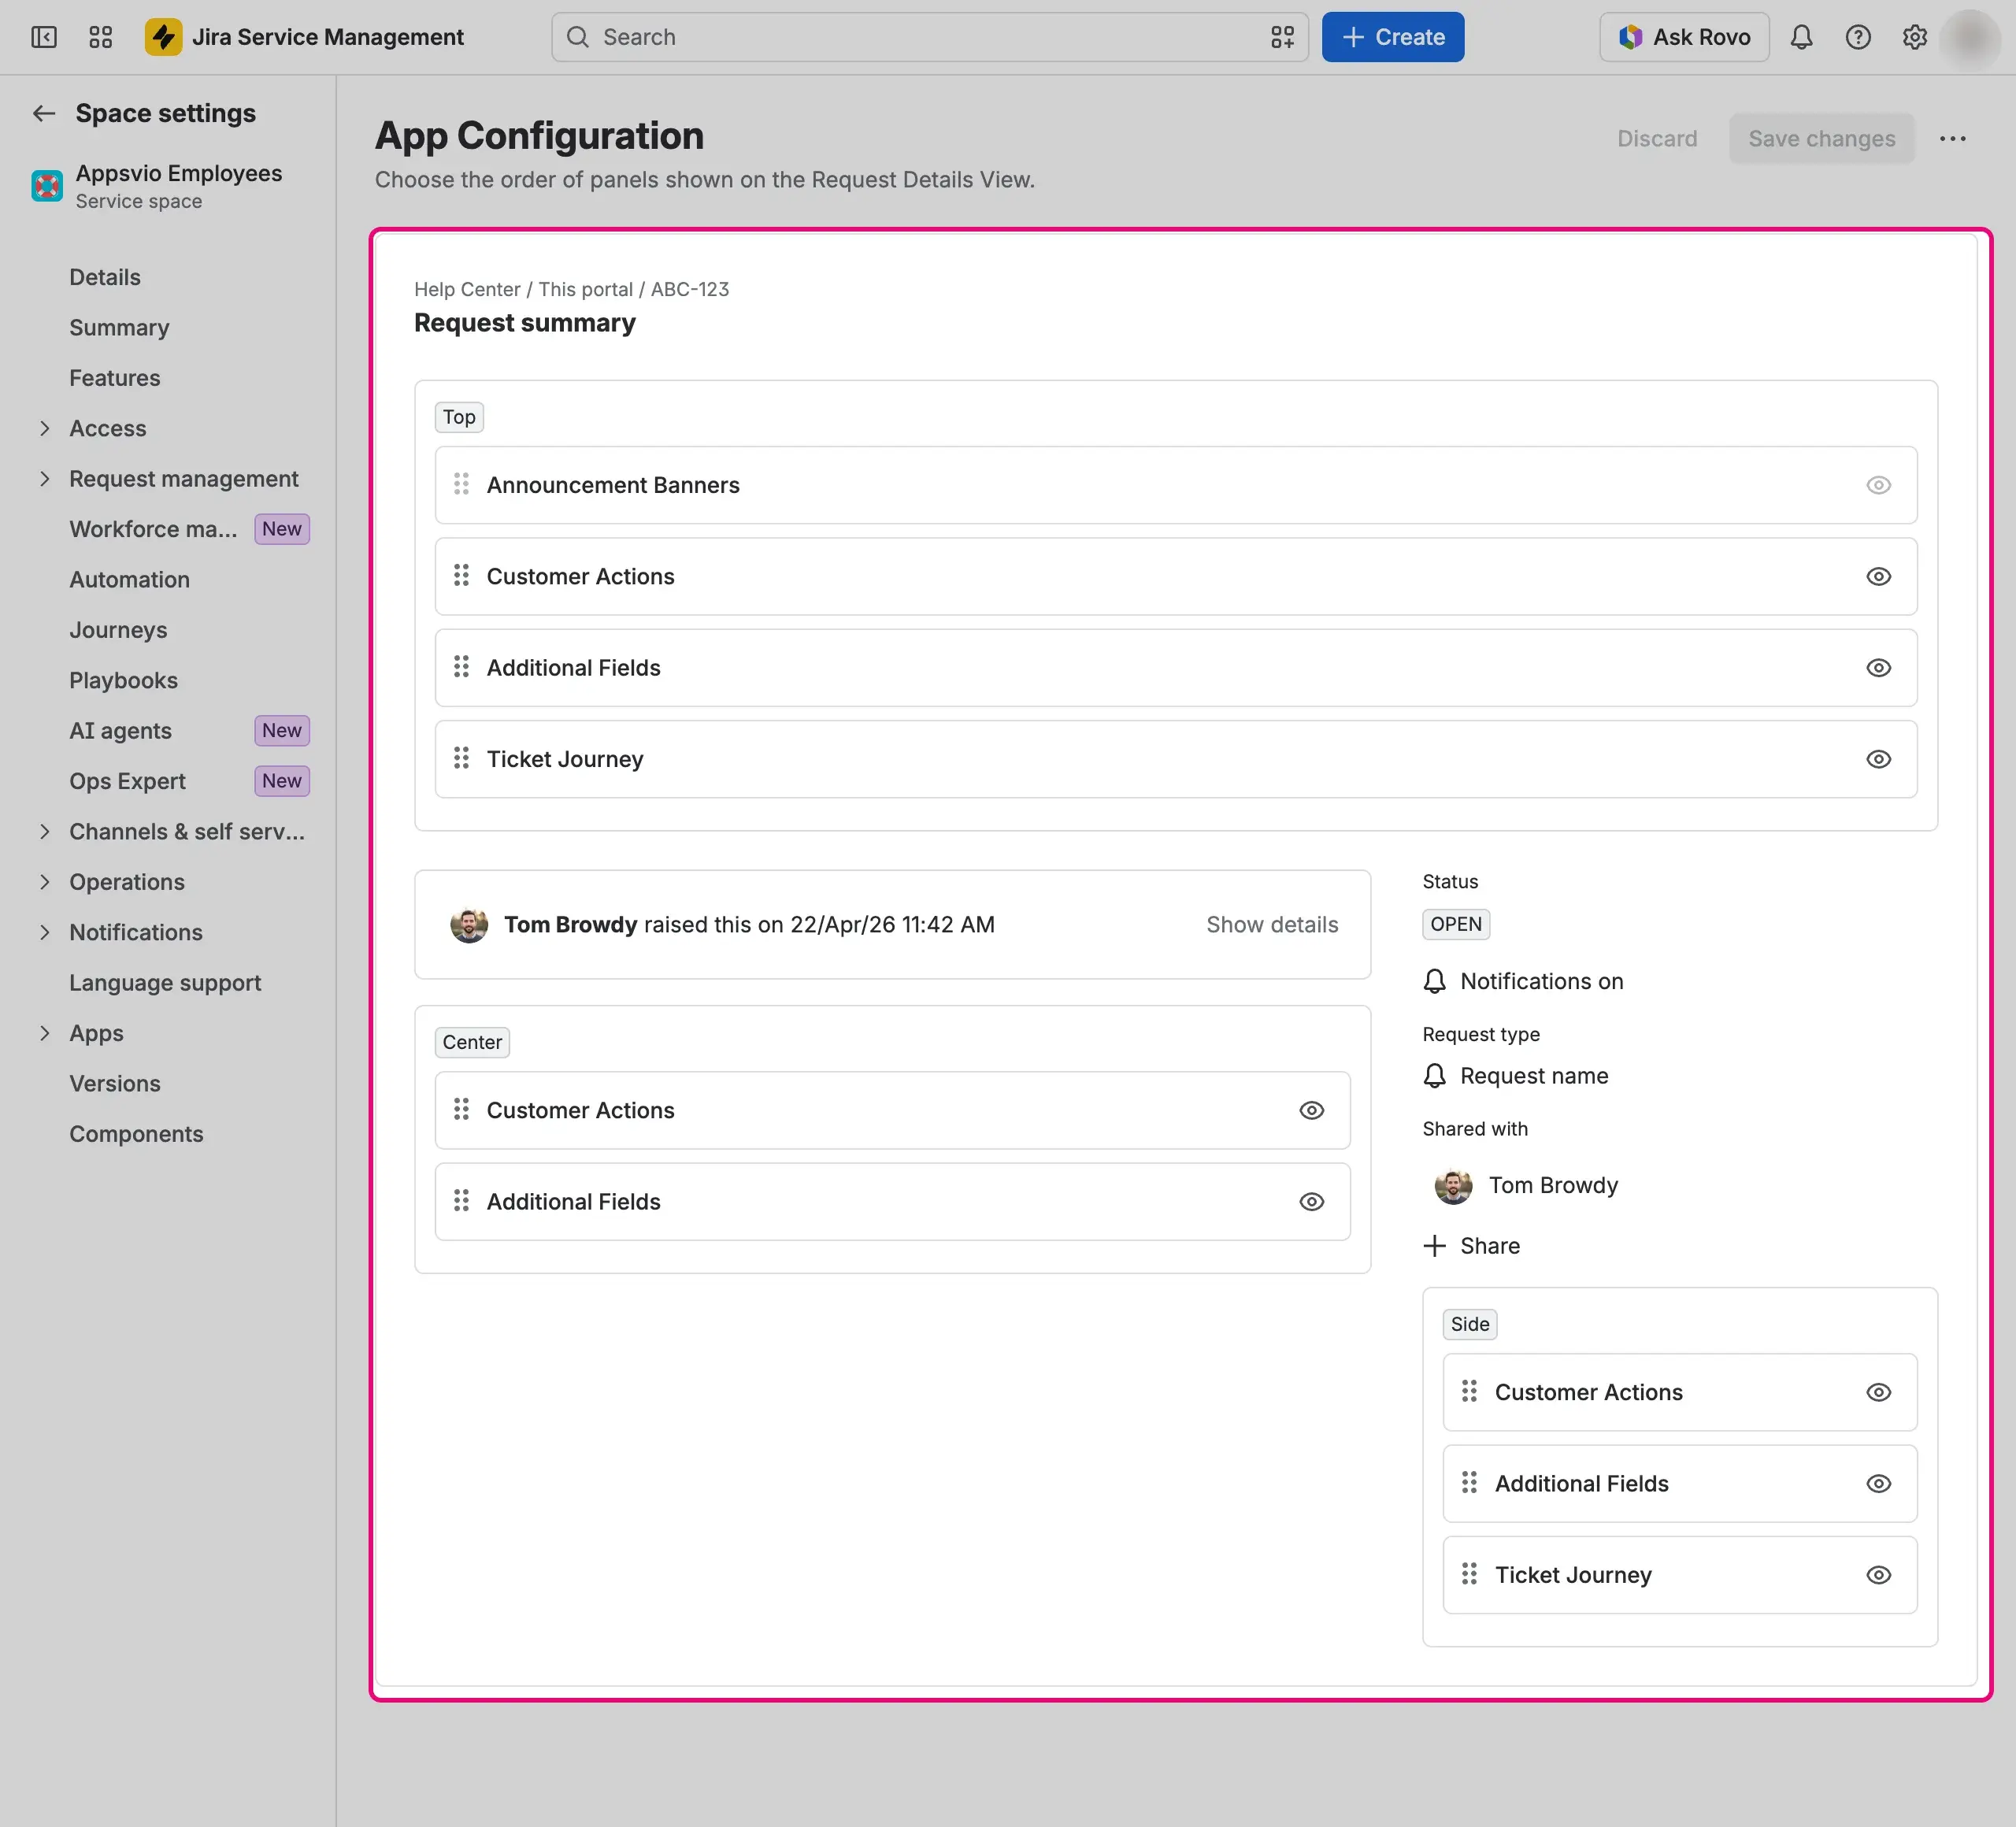
To change the order of the panels in a zone, drag them. You can reorder panels only inside their own zone.
To hide a panel in a zone, select the eye button Hide panel in its row. To show it again, select Show panel. Hidden panels are greyed out.
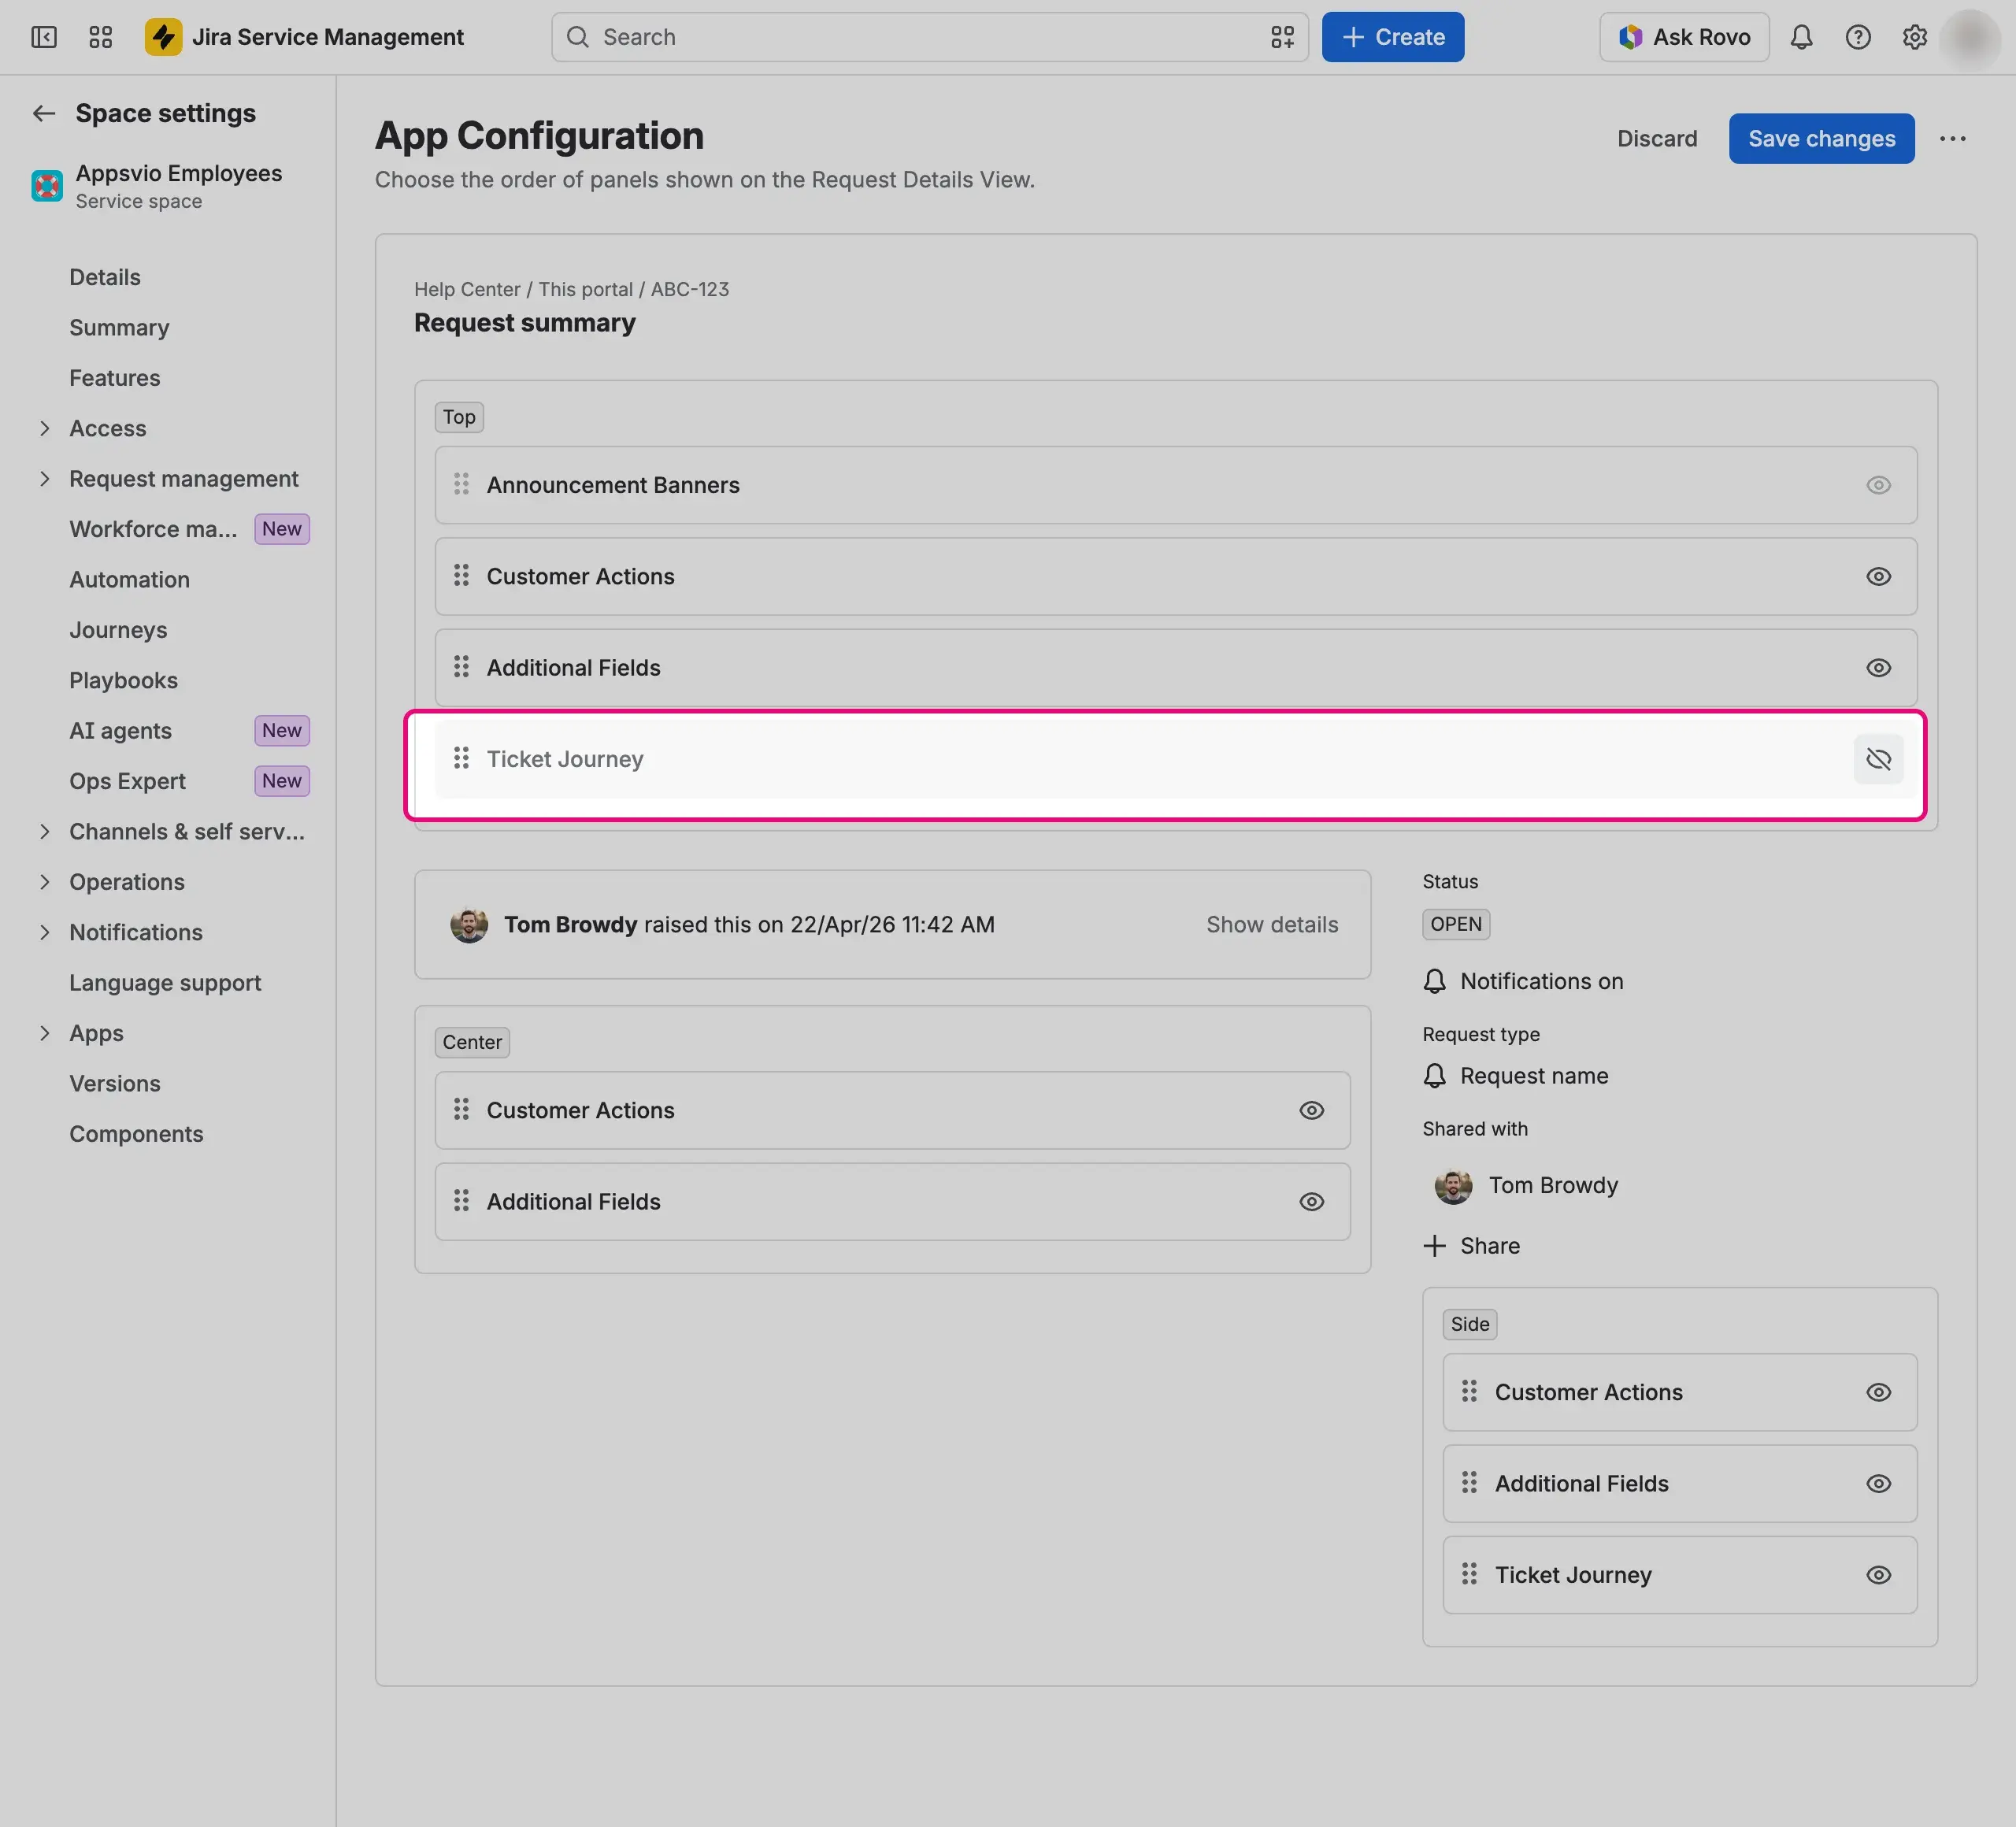
Select Save changes. To go back to the last saved arrangement, select Discard.


Result
Each zone of the request view shows only the visible panels, in the order you saved, and only when a feature is configured for the request type of the request. Customers see the change after they reload the page. For what customers see in each feature, see: