Manage panels
Use the panel list of a space to open, copy, disable, or delete its Additional Fields panels.
The panel list
The list shows each panel as a card with its name, description, the conditions (All request types or Conditions applied), the location, and the status. Panels are listed from the oldest to the newest.

Before you start
- You are both an administrator of the service space and a service desk agent in it.
Steps
Edit a panel
- Go to Space settings > Apps > Feature Bundle > Additional Fields.
- Select the card of the panel. The panel page opens.
- Change the settings, then select Save. For the settings, see Create a panel.
Copy a panel
On the card, select More actions > Copy panel. The copy opens for editing.
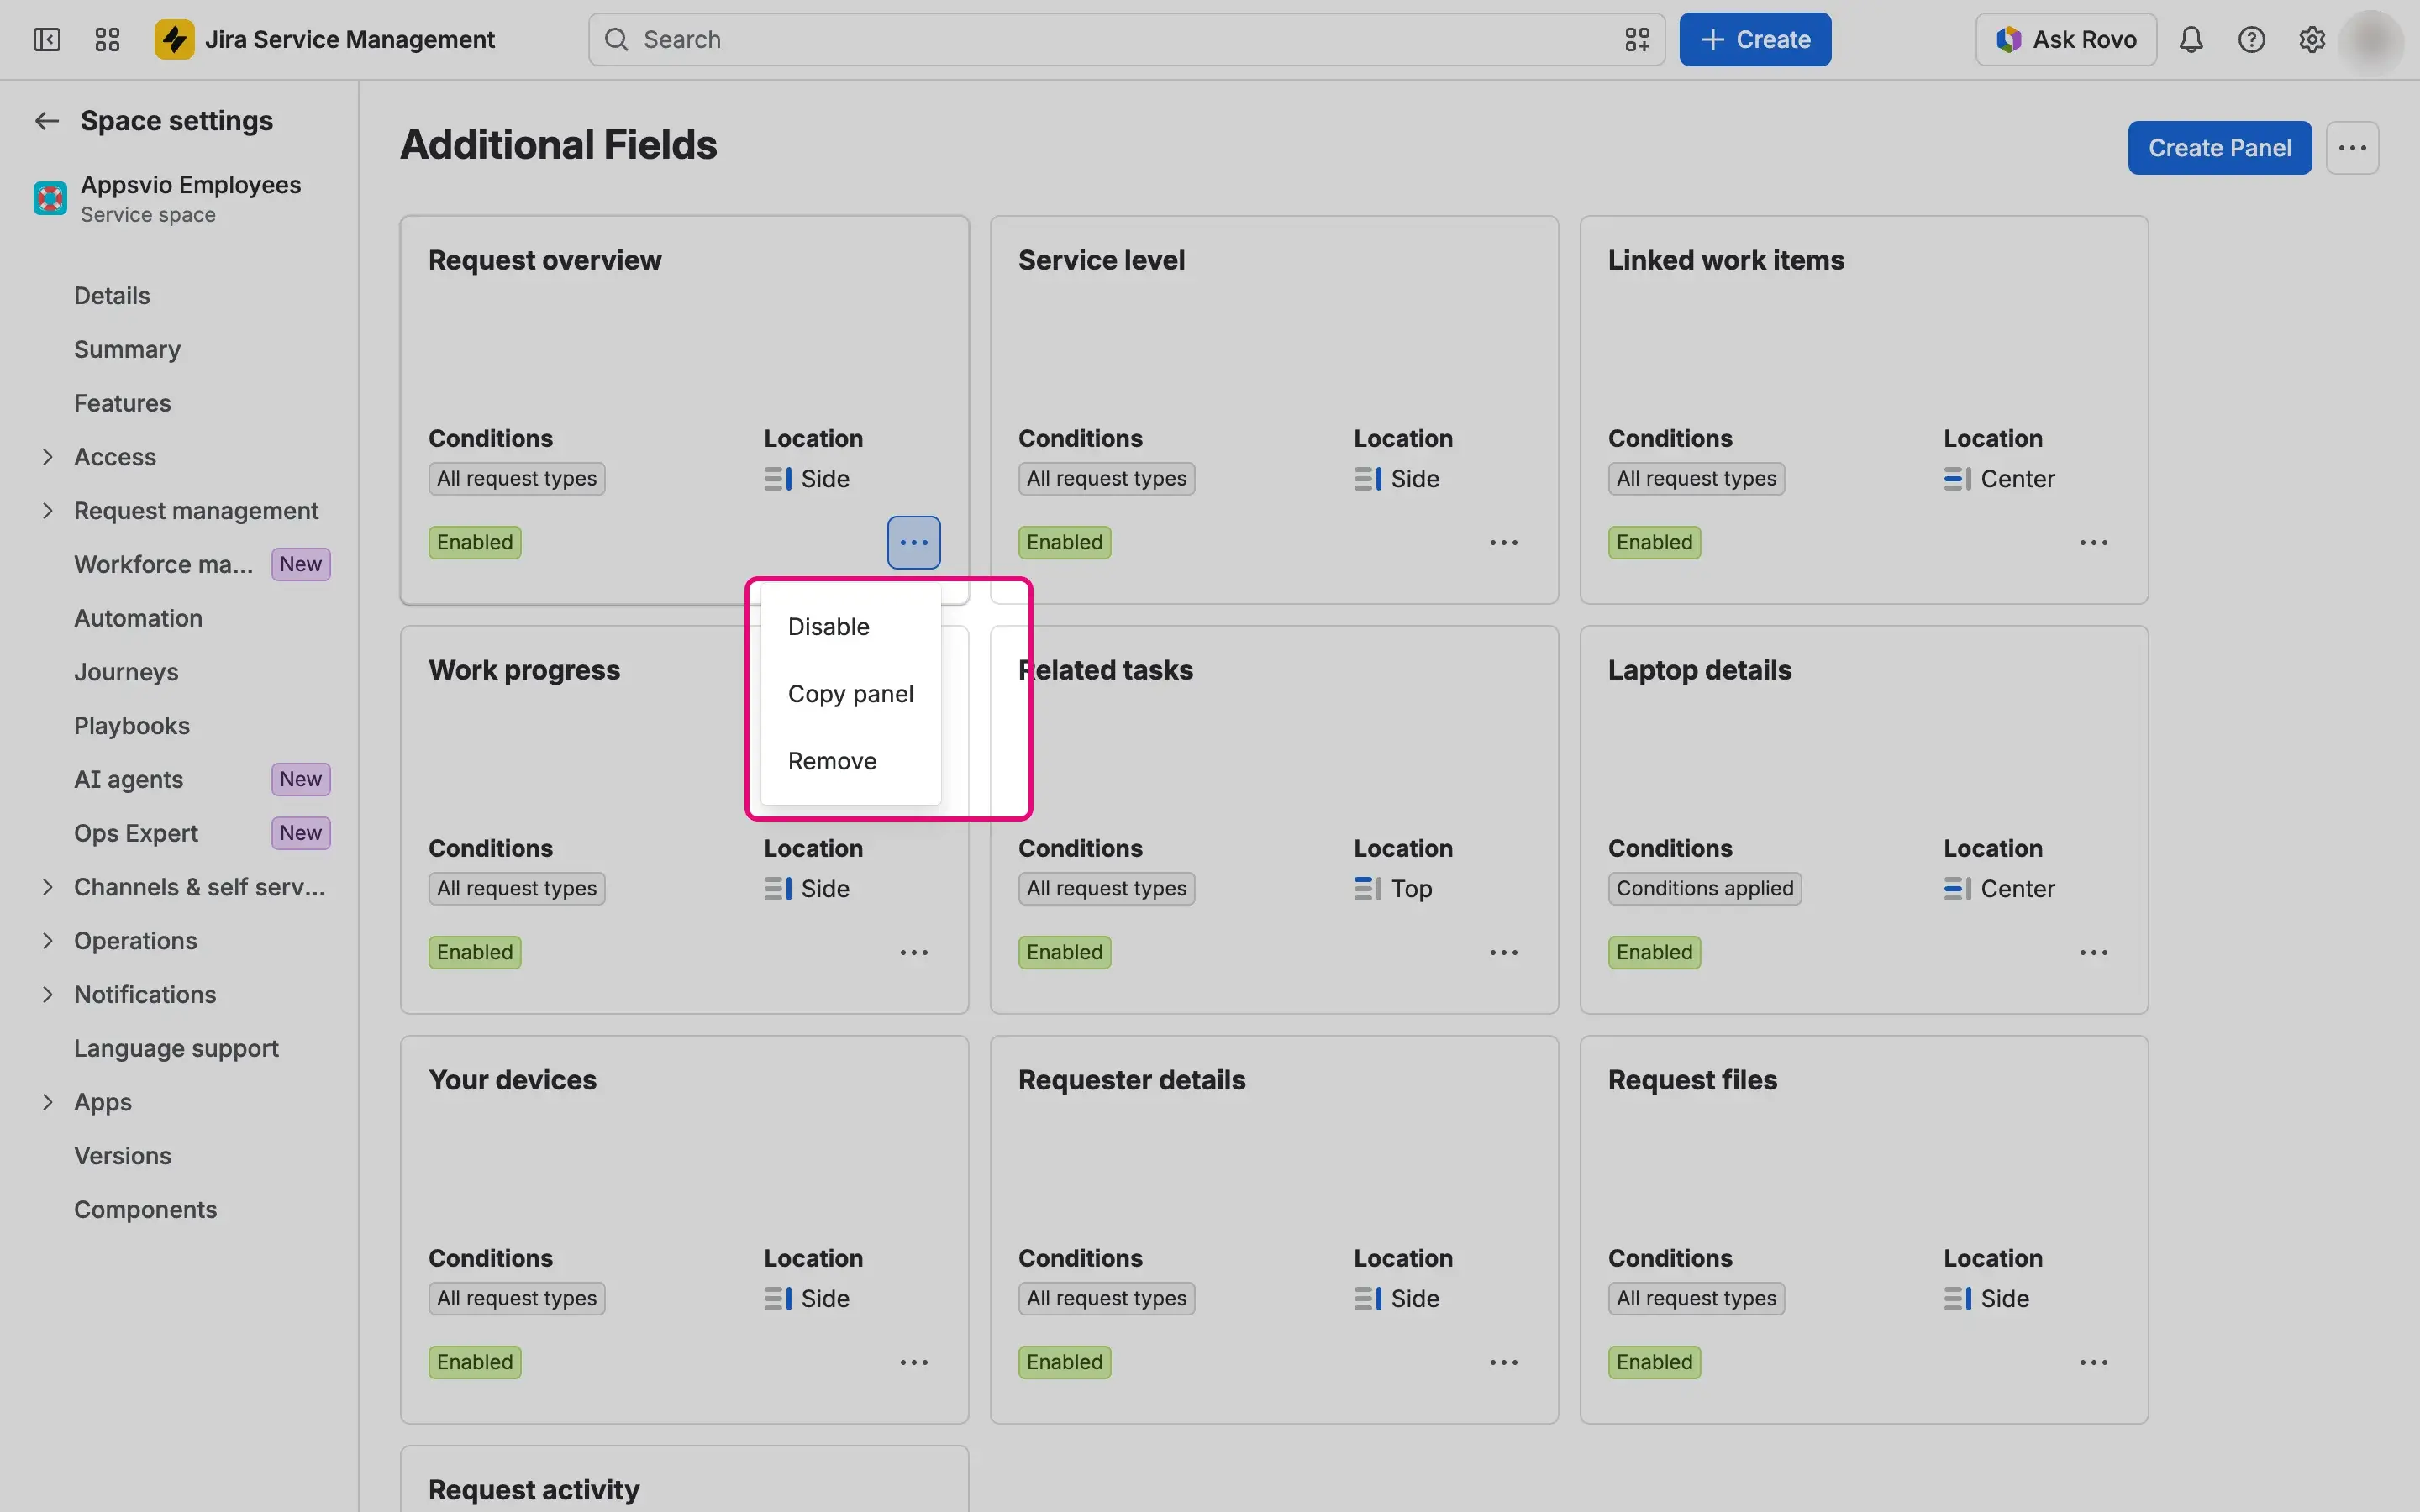
Edit the copy, then select Save.

Enable or disable a panel
- On the card, select More actions > Disable or More actions > Enable.
Delete a panel
On the card, select More actions > Remove.
In the Delete panel dialog, select Delete.
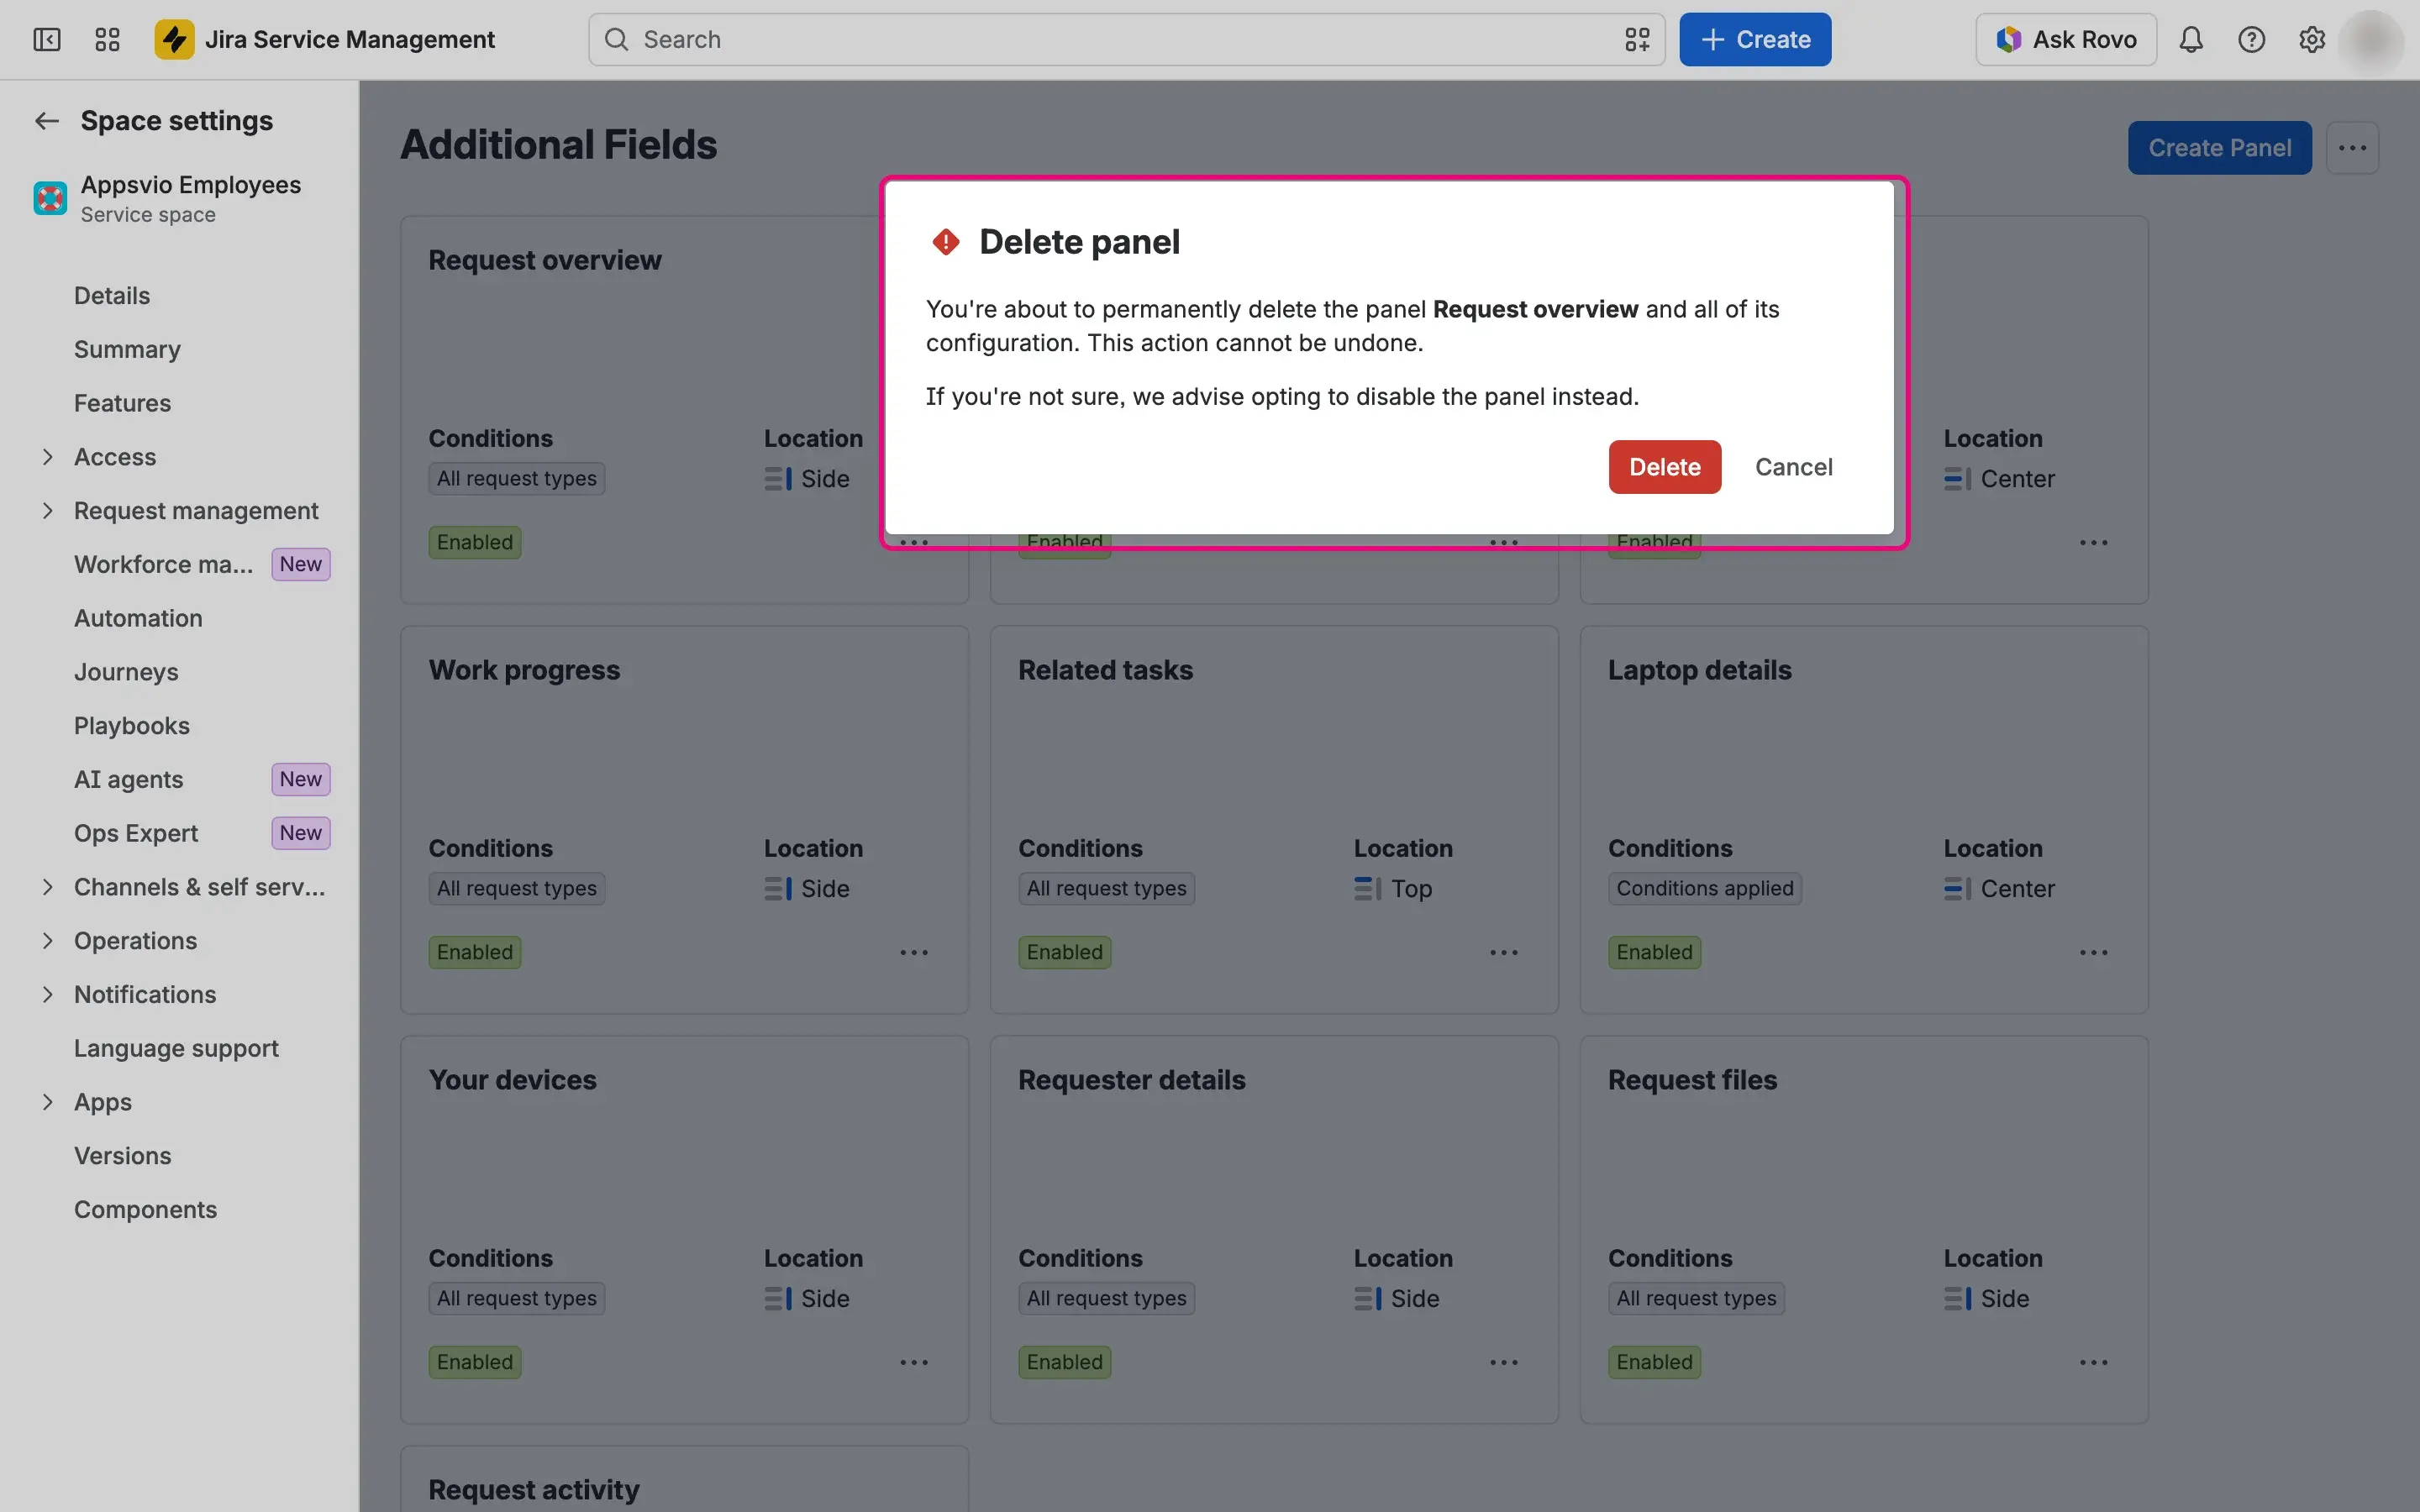

Deleting can't be undone
Delete removes the panel and all of its configuration. If you’re not sure, disable the panel instead.
Result
- Edit: Feature Bundle saves your changes and shows a message that the panel has been updated.
- Copy: Feature Bundle saves the copy at once as “Copy of” plus the original name, with all settings of the original, including its enabled state. The copy appears last on the list. If you select Cancel on the page, the copy stays on the list. The name of a copy can be longer than 70 characters.
- Enable or disable: a message confirms that the status has changed. A disabled panel never shows to customers, whatever its other settings, and its configuration stays.
- Delete: the panel and its configuration are gone, and a message confirms that the panel has been removed.