Test Repository
The ATM Repository provides a dedicated, folder-based view to help you build a clear hierarchy for your Test Cases. It is available as a separate tab in your Jira space’s horizontal navigation.
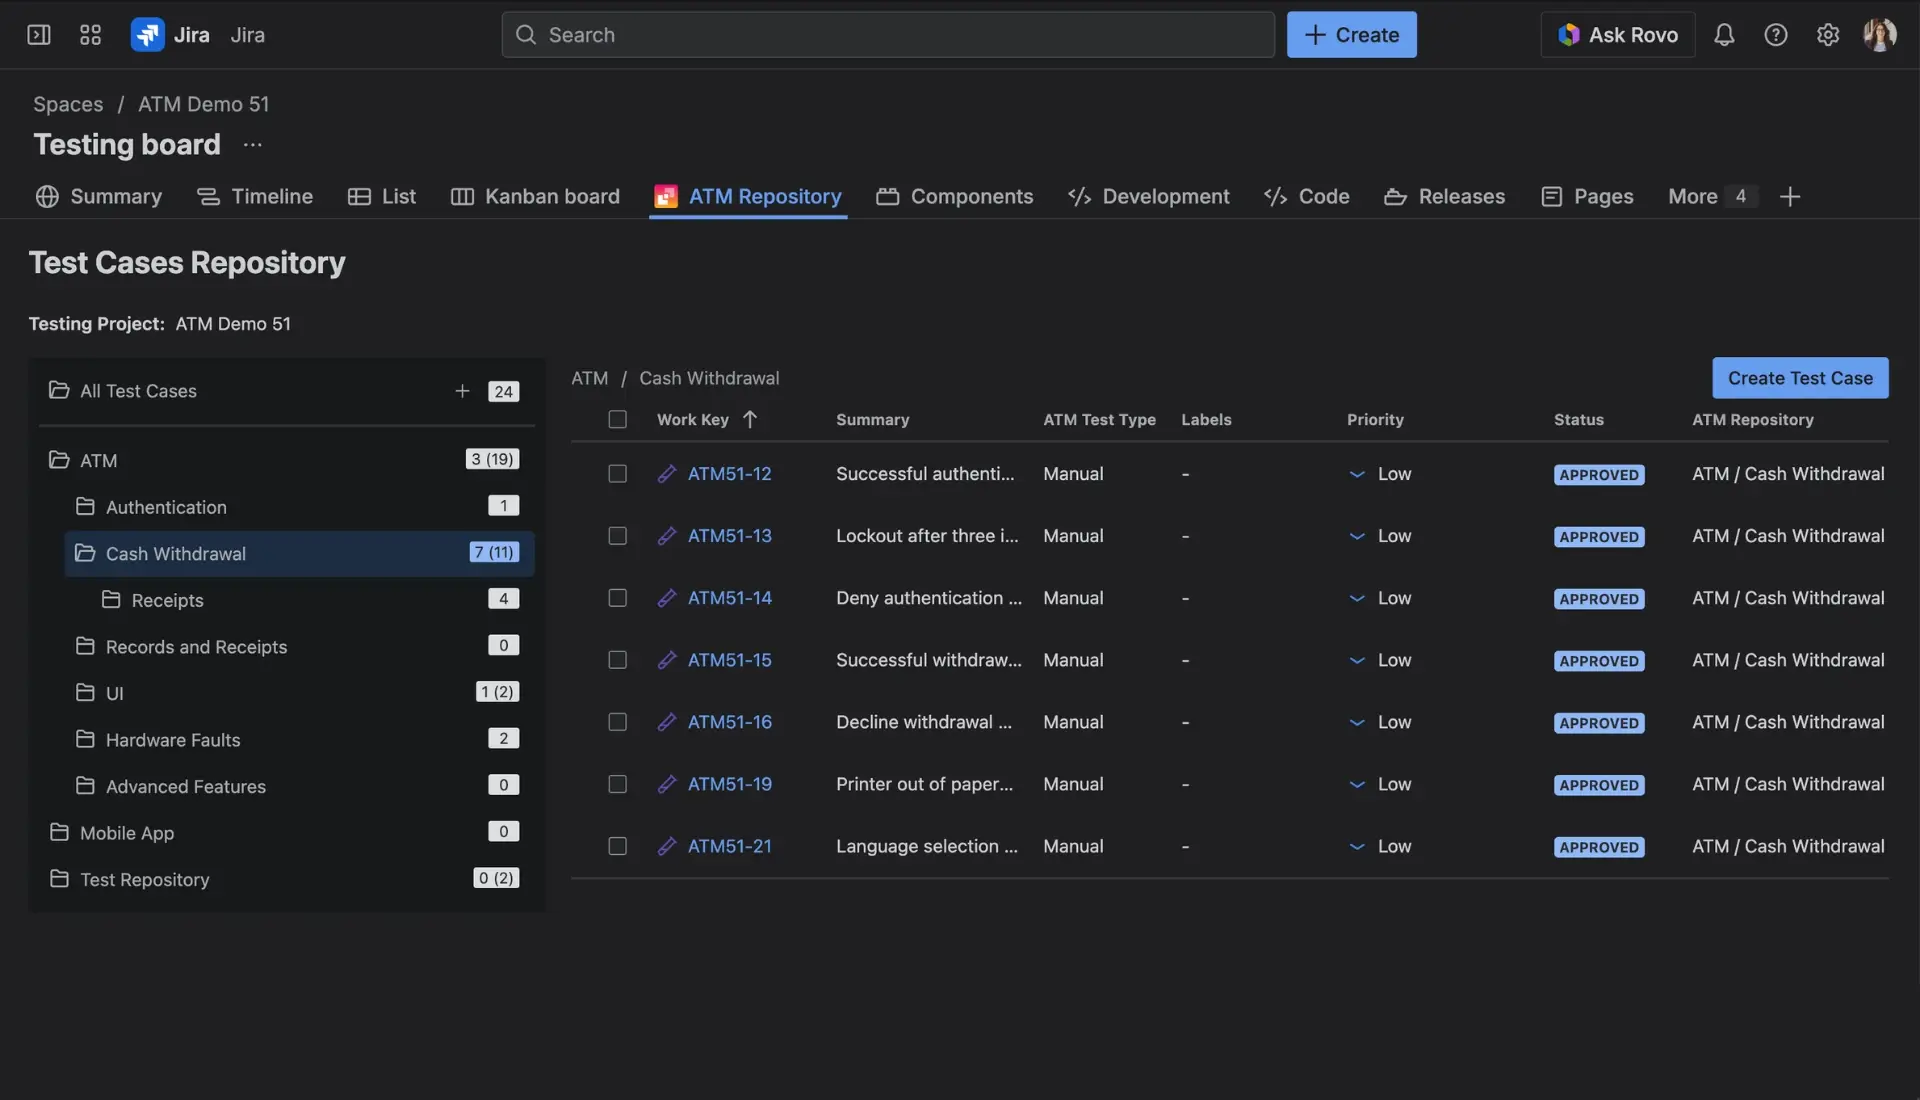
Repository Layout
The ATM Repository view is divided into two main sections:
- The Left Pane (Folder Tree): This is where you build and manage your hierarchical folder structure.
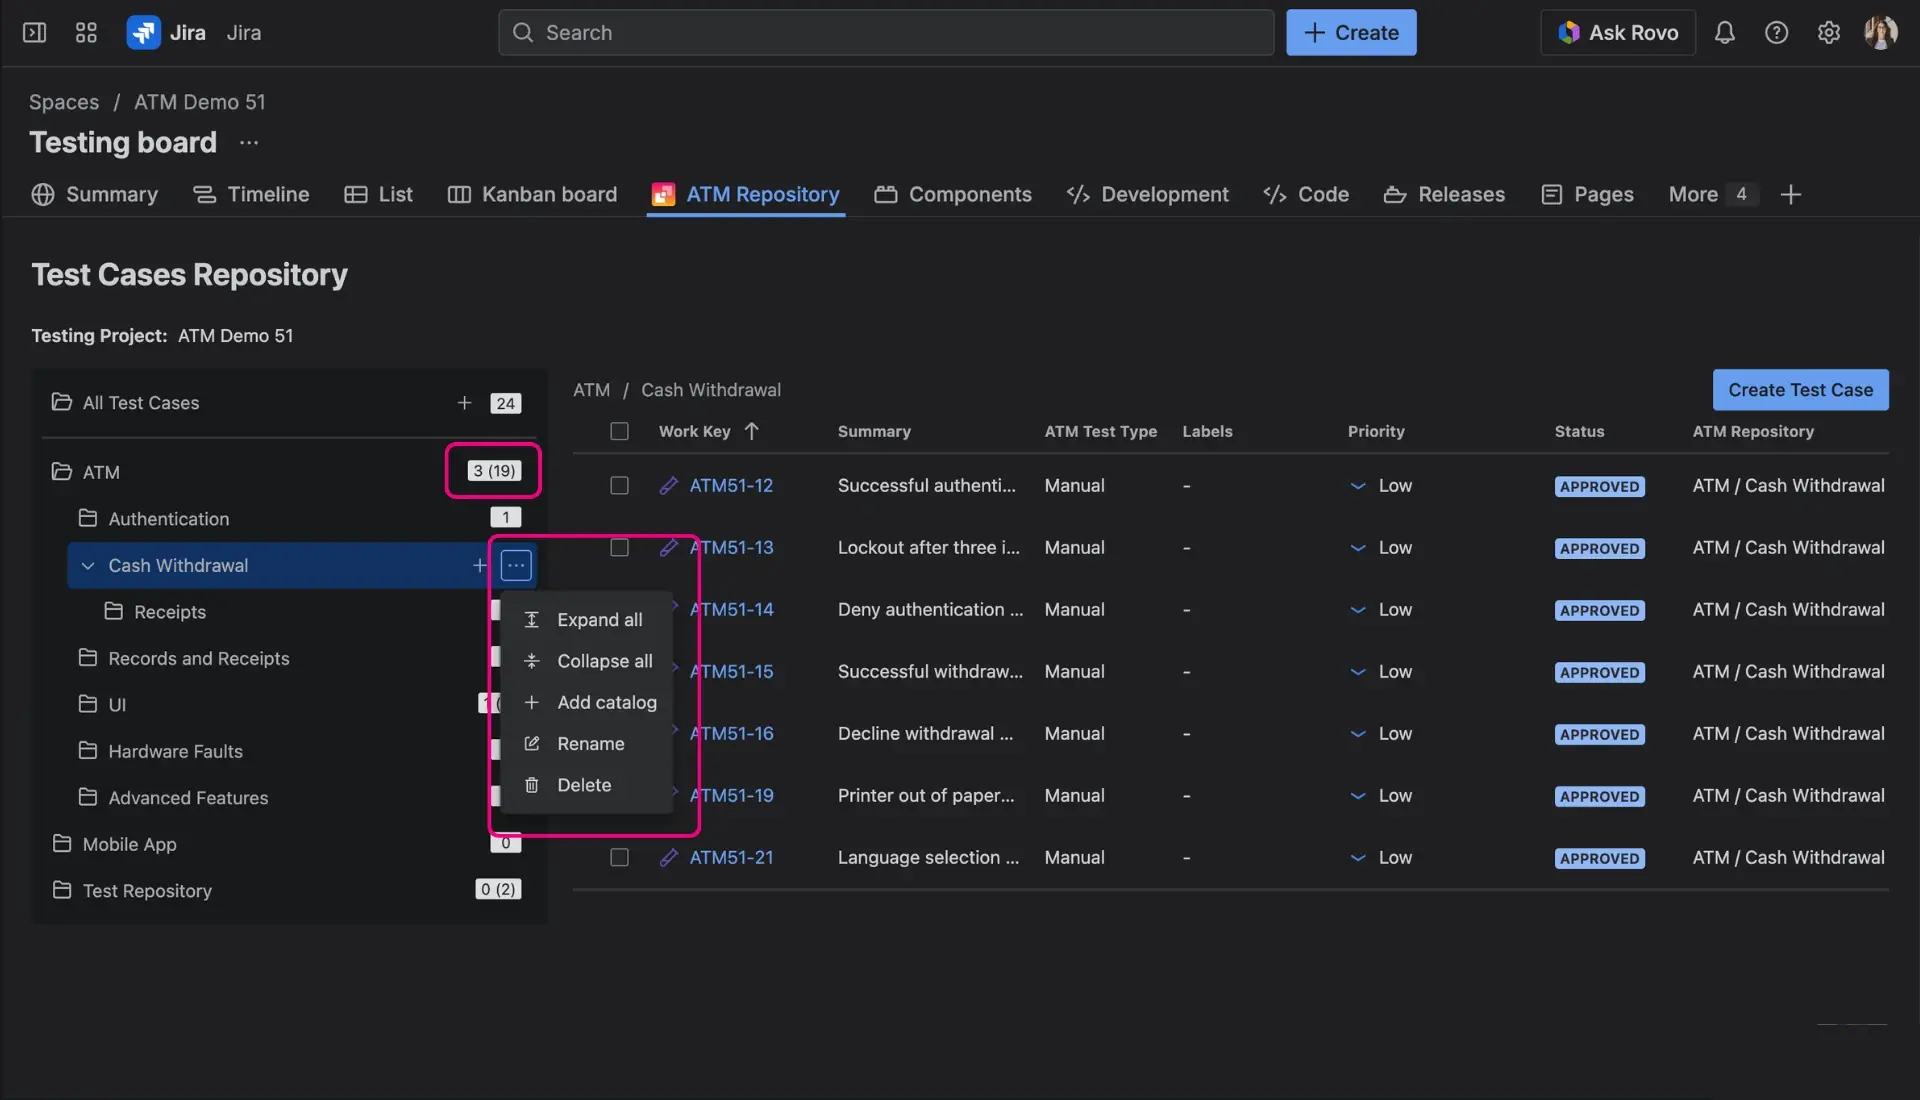
- The Right Pane (Test Case Table): This displays a list of all Test Cases located within the currently selected folder. The table includes columns for Work Key, Summary, ATM Test Type, Labels, Priority, Status, and ATM Repository (the folder path).
Above these panes, you will find a Testing Project selector. This allows you to switch contexts if multiple issue types from your current Jira project are assigned to different Testing Projects.

Folder Management
Your repository starts with a root folder named All Test Cases. Any Test Case not yet assigned to a specific folder automatically appears here. When a Test Case is located in this root folder, the ATM Repository custom field remains empty.
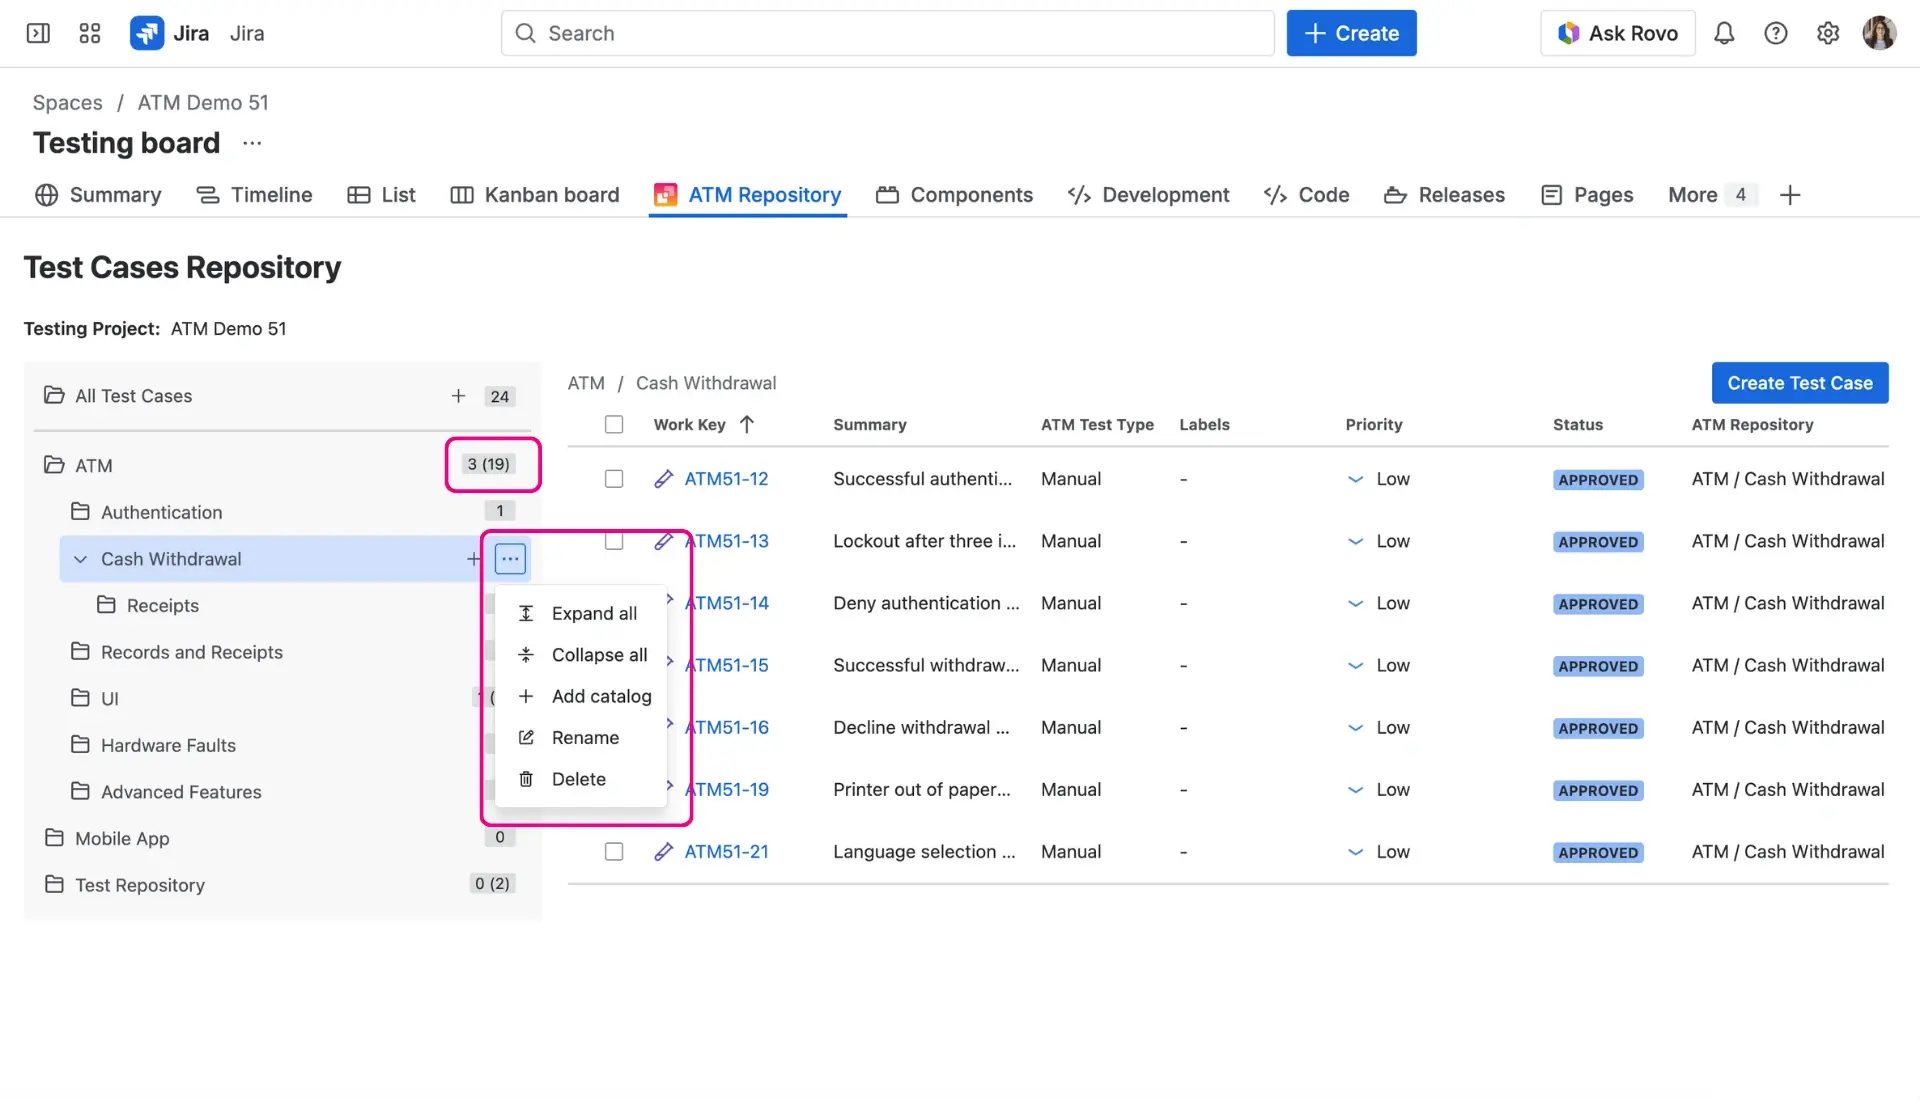
Next to any folder, you will see two numbers in the format X (Y):
- X: The number of Test Cases located directly inside this specific folder.
- Y: The total number of Test Cases in this folder and all of its subfolders.
To manage your folders, use the context menu (the three dots icon) next to a folder’s name:
- Expand all: Instantly unfolds all subfolders within the selected tree branch to show the full hierarchy.
- Collapse all: Closes all unfolded subfolders, leaving only the top-level folder visible.
- Add catalog: Creates a new subfolder nested within the current one. Alternatively, you can use the plus (+) icon. New folders are always added to the bottom of the list.
- Rename: Changes the catalog’s name.
Folder naming
Names must be unique within the same parent folder and cannot contain
/or\characters. Keep in mind that the system is case-sensitive, meaning “Login” and “login” are treated as two separate folders. - Delete: Removes the folder. Any Test Cases inside the deleted folder will not be removed from Jira; instead, they will automatically be moved back to the All Test Cases root folder.
Managing Test Cases in the Repository
A single Test Case can only belong to one folder at a time.
Moving Test Cases
You can easily reorganize your tests using drag-and-drop. Simply drag a Test Case from the right pane and drop it into the desired folder in the left pane. For bulk actions, select the checkboxes next to multiple Test Cases and drag them all at once.
Tip
If you clone a Test Case, Jira creates a completely new issue. This new cloned Test Case will automatically be placed in the exact same folder as the original one.
Creating a Test Case inside a folder
- Click the global Jira Create button.
- Select the Jira Space and the specific Work Type configured for Test Cases in your Testing Project.
- Locate the ATM Repository custom field. You can either:
- Type to search for the folder.
- Click the branch icon next to the field to open the Select tree location dialog. Choose your target folder from the visual tree and click Confirm selection.
- Once created, the Test Case will automatically appear in the chosen folder.


Use Case Example: Use the ATM Repository to mirror your application’s architecture. For an e-commerce app, you might create root folders for Frontend and Backend. Inside Frontend, you can add subfolders for Login, Shopping Cart, and Checkout. This makes it incredibly easy to find all tests related to a specific product area.
Working with Test Cases
Once you select a folder from the tree, the table on the right displays all Test Cases assigned to that folder.
Creating New Test Cases
To speed up your workflow, use the Create Test Case button located directly above the table. Clicking this button opens the native Jira Create issue dialog with the following fields already pre-selected based on your Testing Project configuration:
- Project (Space)
- Issue Type (Work Type)
- ATM Repository
This ensures you always create Test Cases in the right place without manual switching.
Sorting the Table
You can easily organize and view your Test Cases by sorting the table columns. Simply click on the header of the following columns to sort them in ascending or descending order:
- Work Key
- Summary
- Priority
- Status
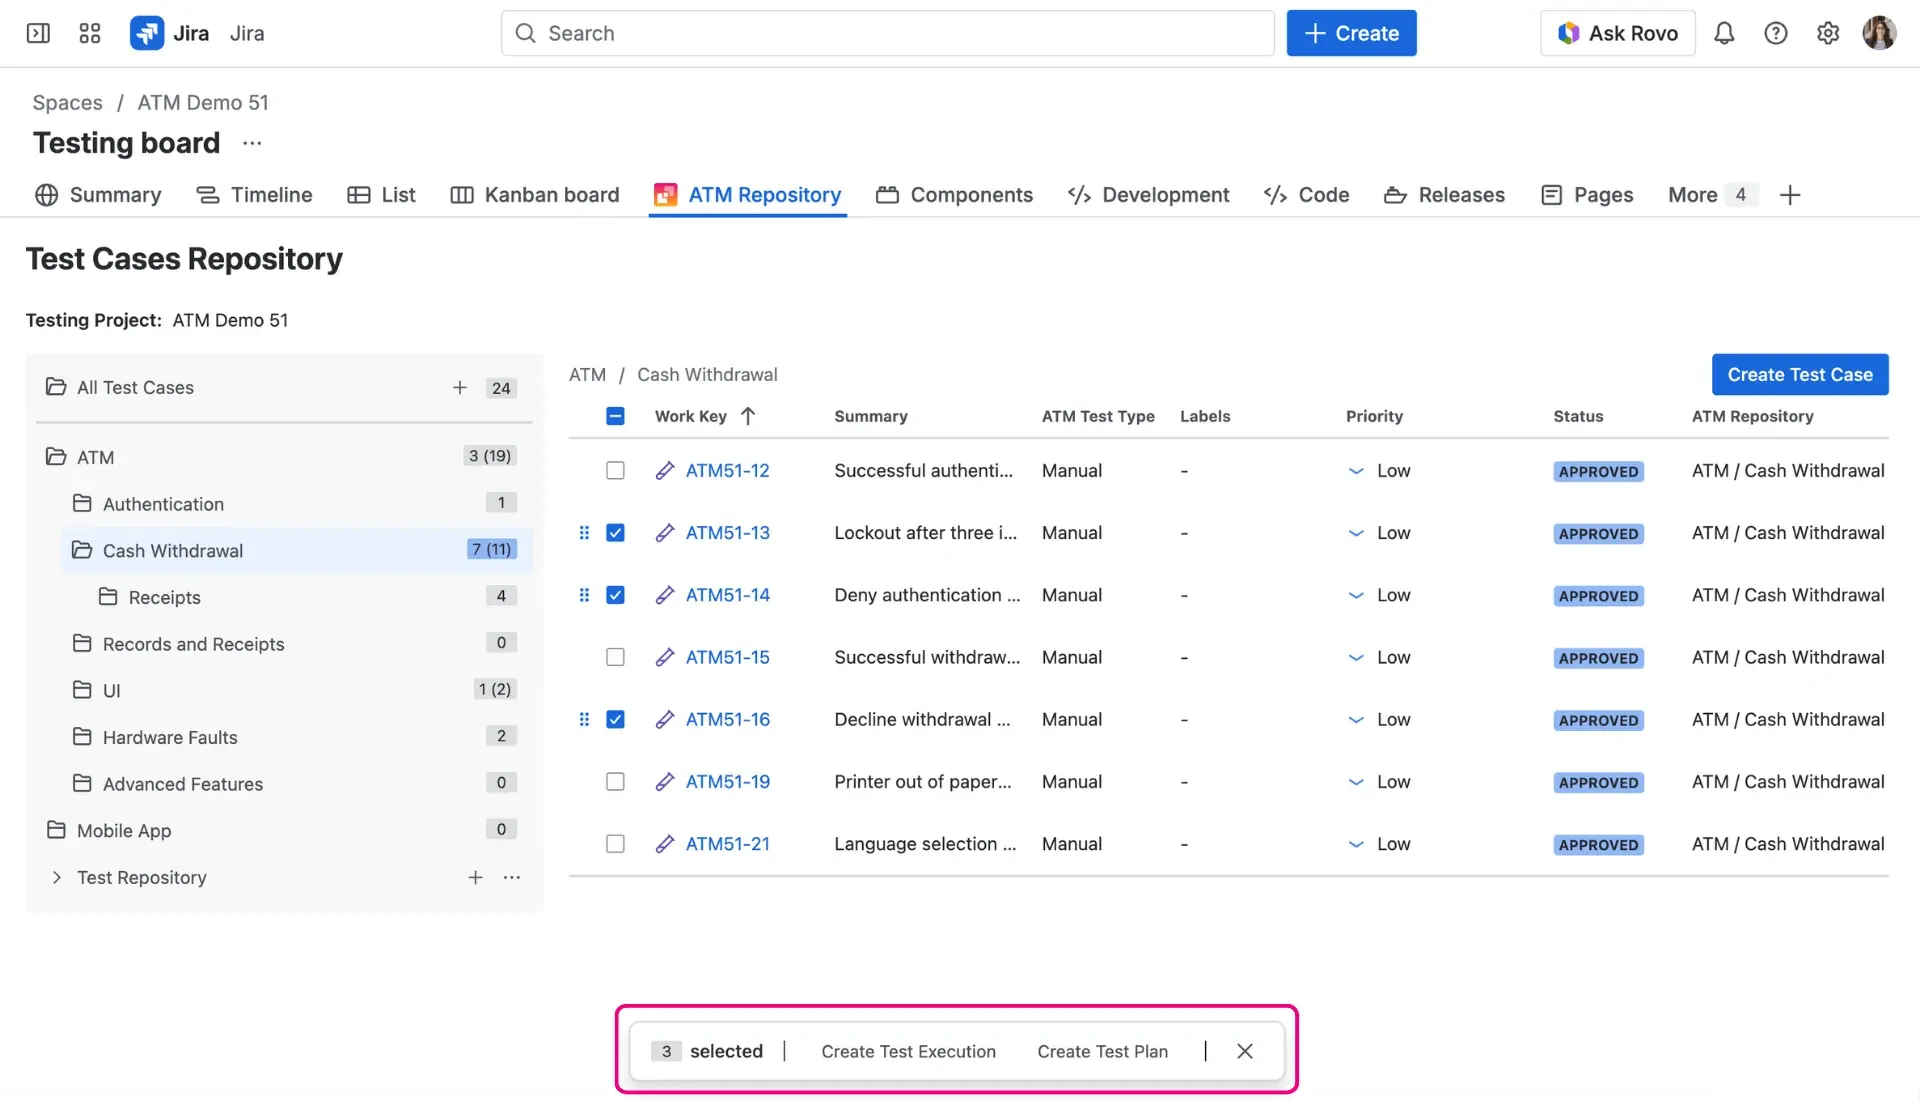
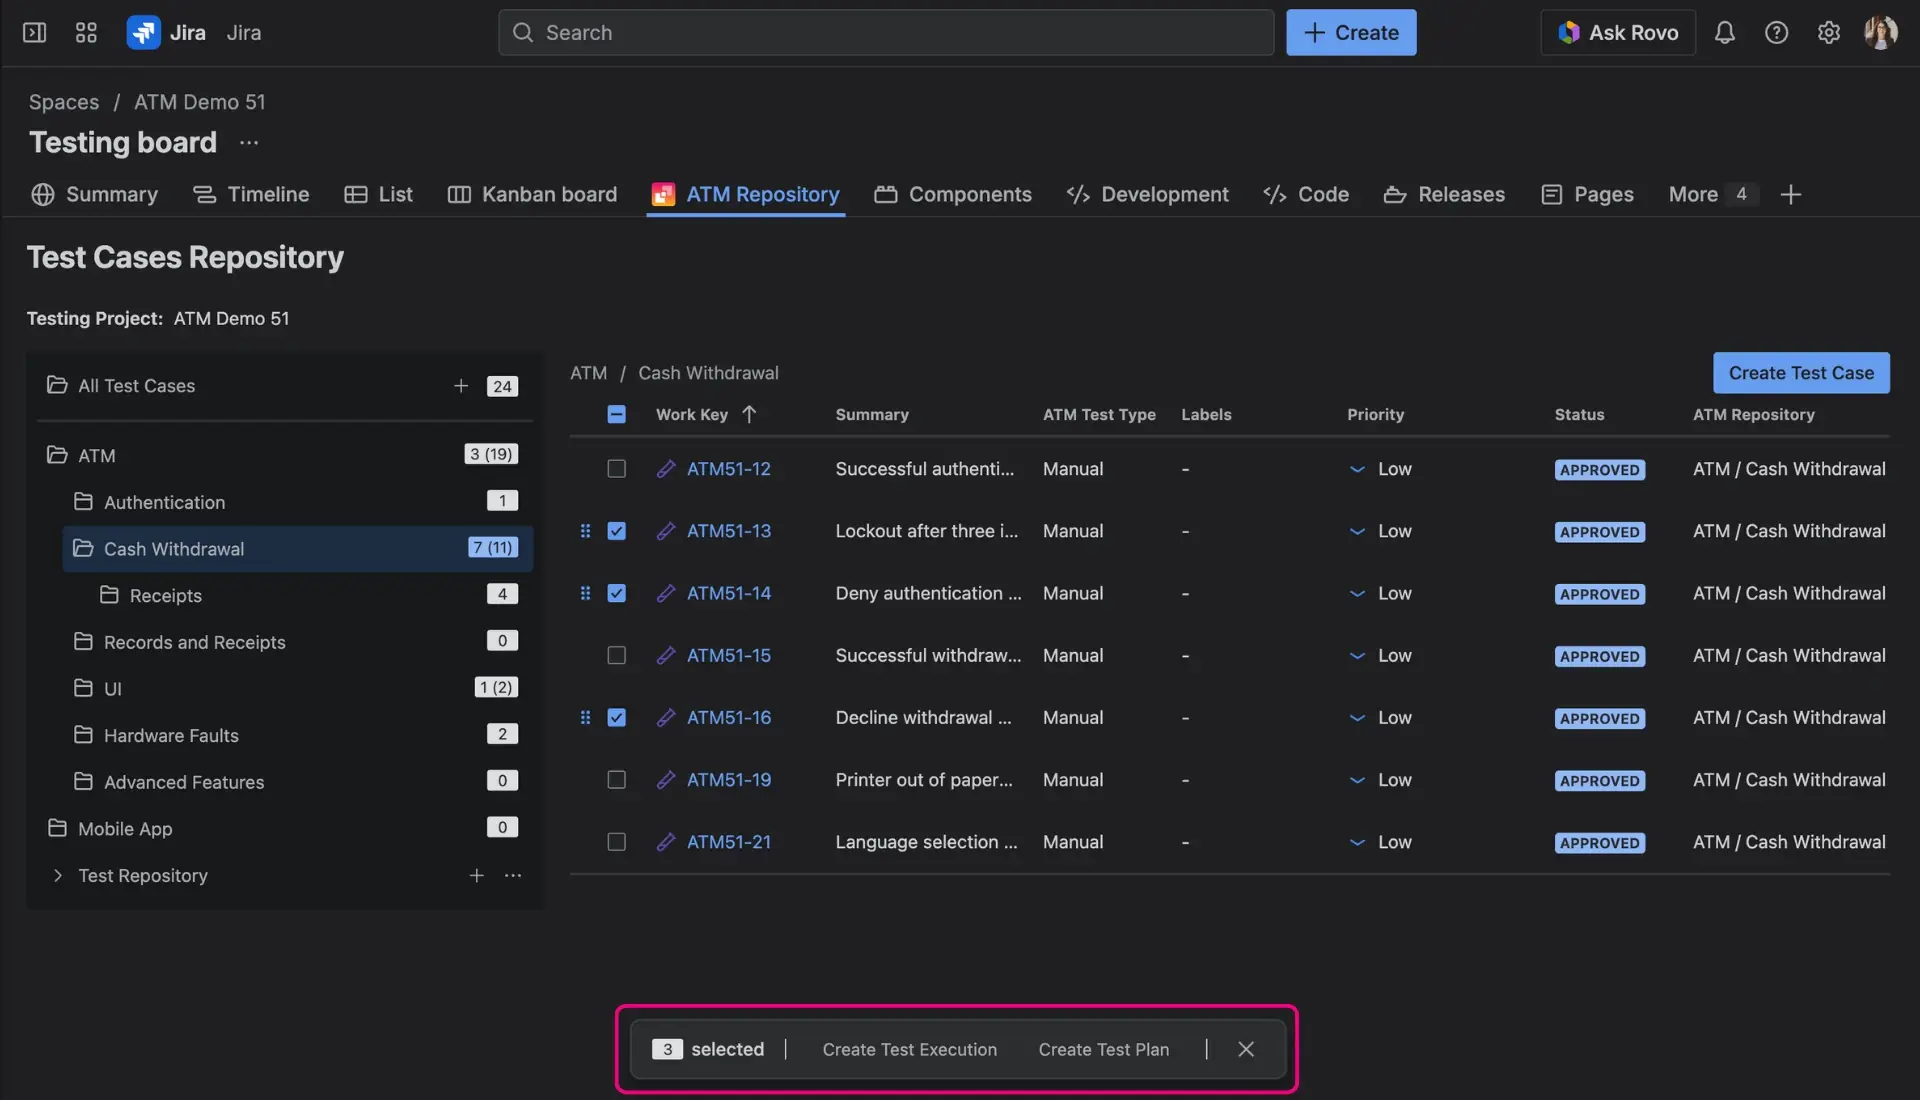
Bulk Actions via Floating Menu
When you select one or multiple Test Cases using the checkboxes in the table, a floating action menu automatically appears at the bottom of the page. This menu allows you to perform quick, multi-selection workflows:
- Create Test Execution: Opens the native Jira Create issue screen with the correct project and work type pre-selected. Additionally, the ATM Test Cases field will be automatically populated with all the Test Cases you selected from the table.
- Create Test Plan: Opens the native Jira Create issue screen preconfigured for your testing project, with the ATM Test Cases field already filled out with your selected items.