Global Statuses
Appsvio Test Management (ATM) keeps one global list of statuses for Test Executions and Test Case Executions. A final status marks an execution as finished. Any non-final status counts as in progress.
Open the Statuses page
- In the Jira sidebar, go to Apps › Test Management.
- Expand Configuration. Only Jira administrators see this group. See Permissions.
- Select Statuses.
The Statuses page opens with the Create status button and the list of statuses.

- To change the order, drag the handle at the left of a row. The order sets the order of statuses in the app.
- Statuses with the Default badge are Passed, Failed, In progress, and Not Executed. You can’t edit or disable them.
- The … menu of a custom status has only Edit and Disable.
Create a status
Go to Apps › Test Management › Configuration › Statuses.
Click Create status.
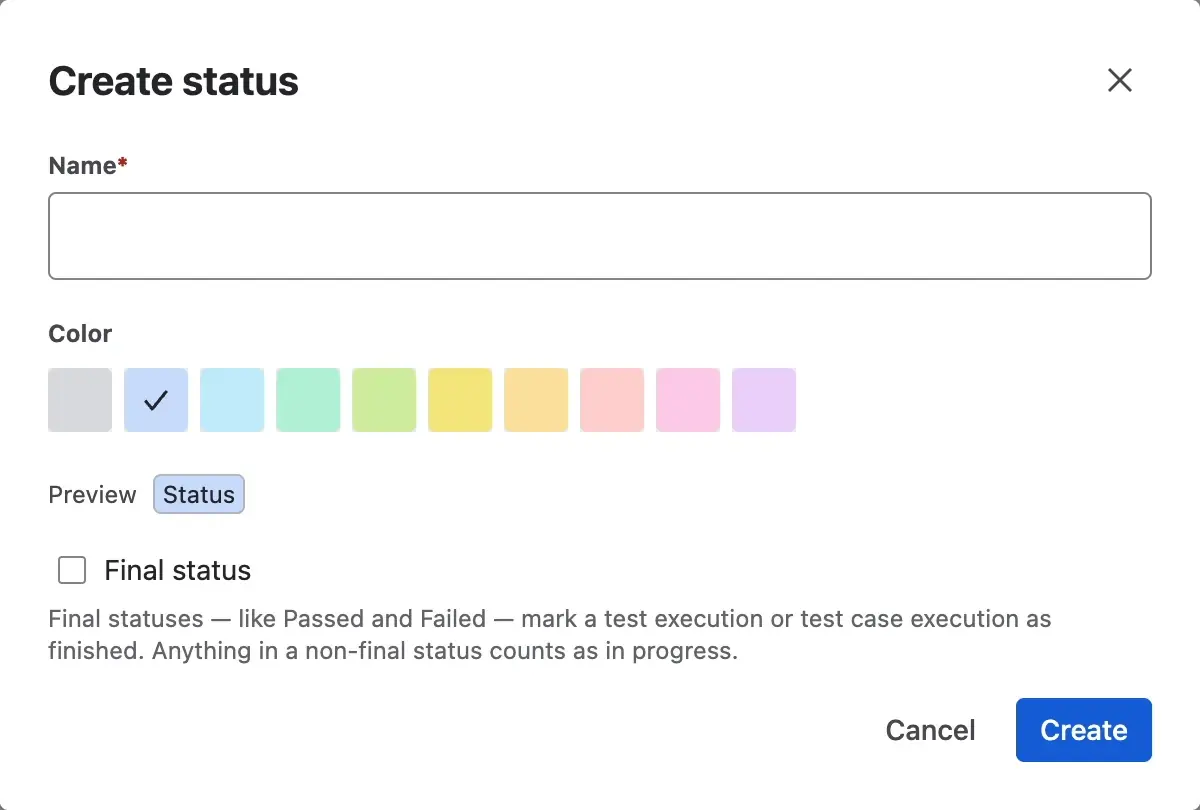
In Name, enter a name. It is required, must be unique, and can have up to 50 characters.
Click one of the 10 colors in the palette. Preview shows the status badge in that color.
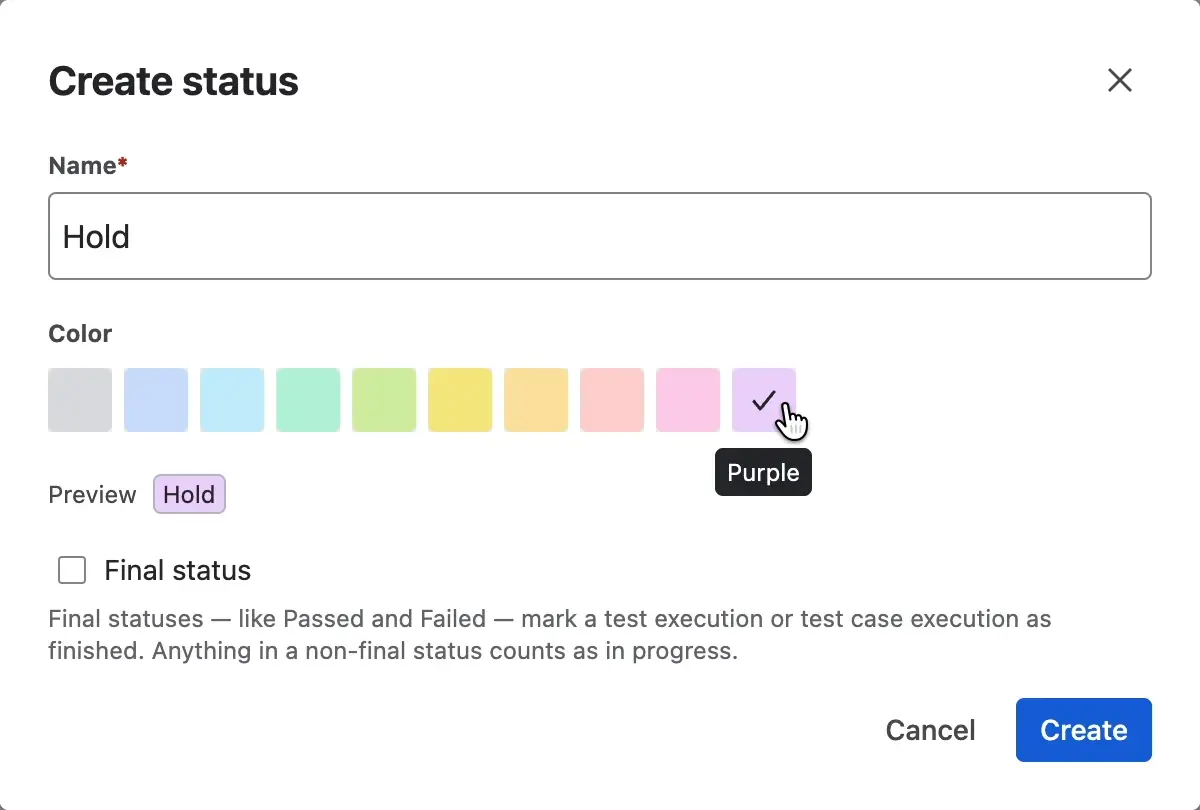
To mark the status as final, select Final status.
Click Create.


A message such as “Hold” created appears, and the new status is at the end of the list.
Edit or disable a status
To change the name or color of a custom status:
In the row of the status, click ….
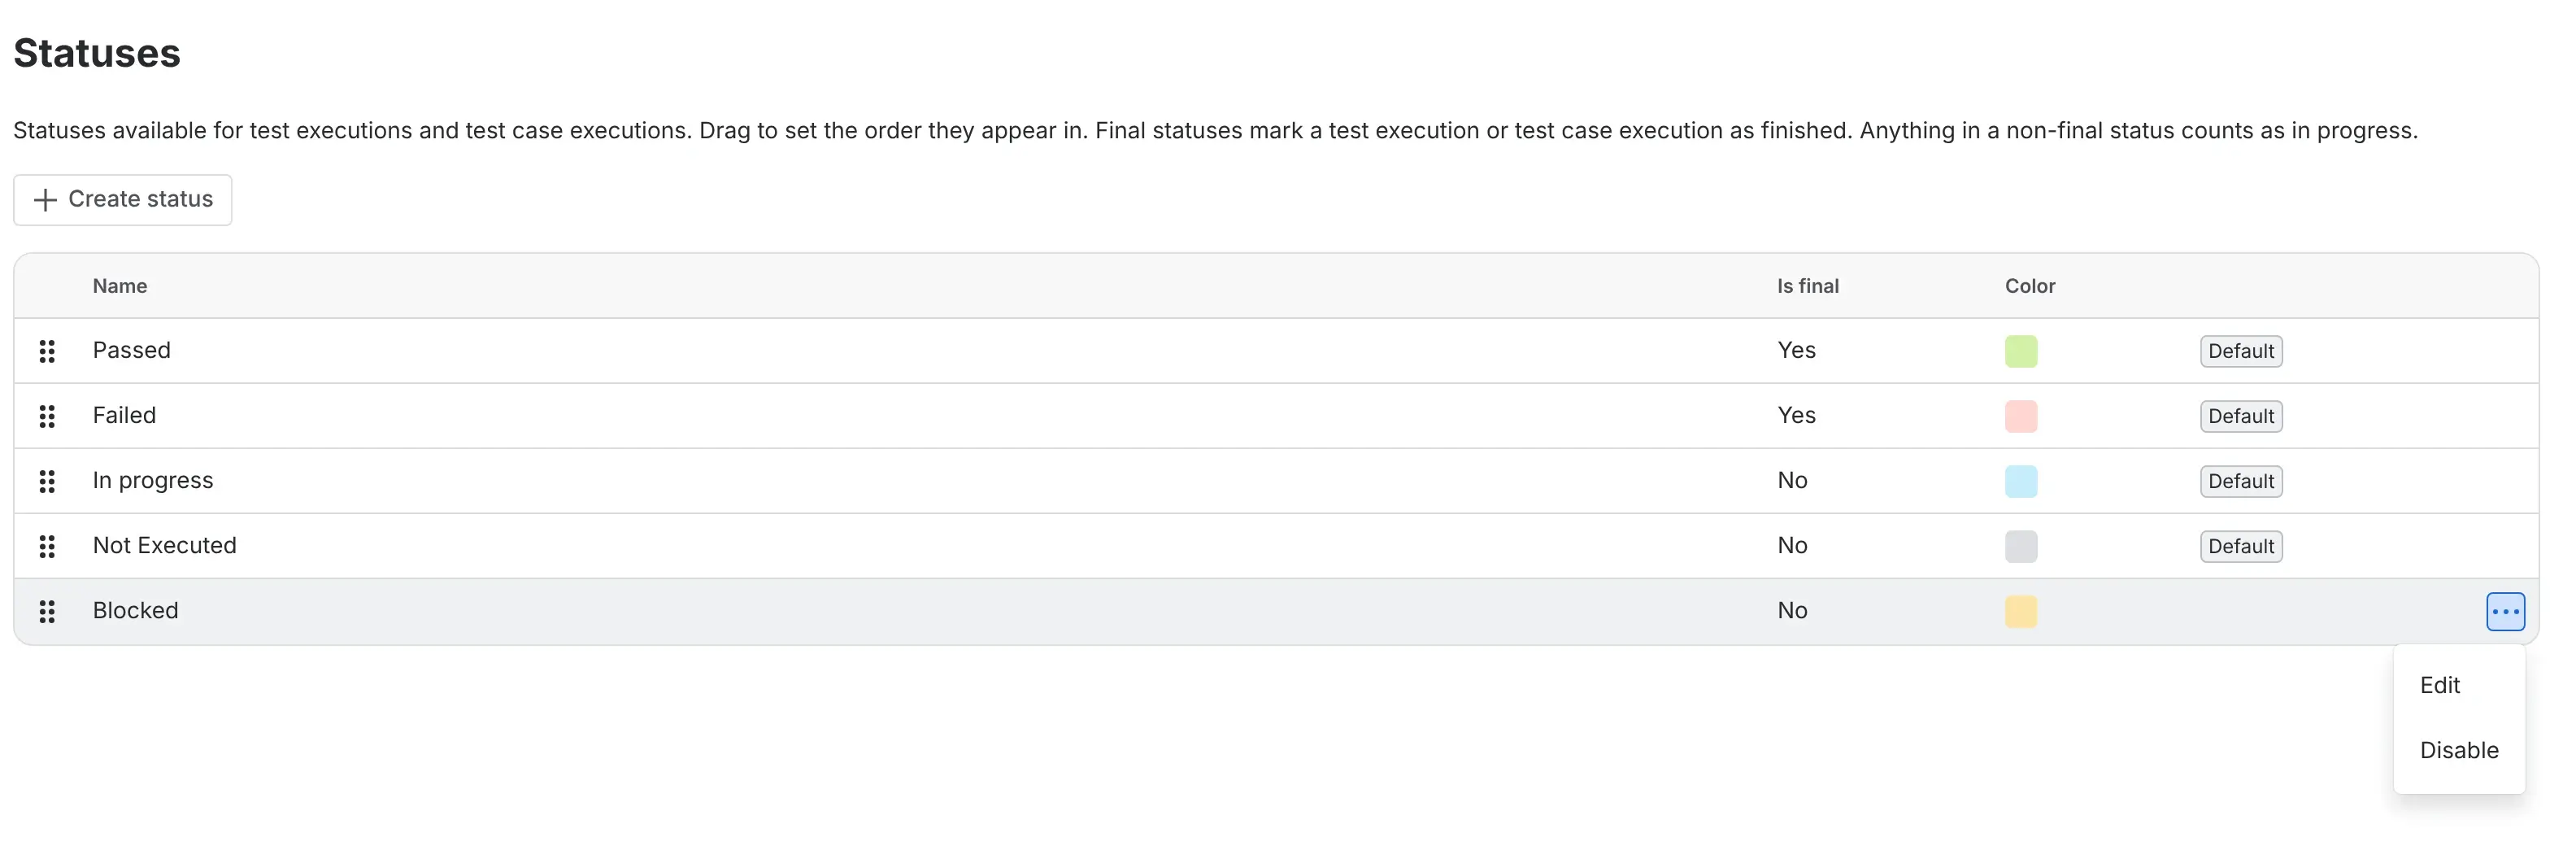
Select Edit.
Change Name or the color.
Click Save.

Final status is greyed out in this window. You can’t change it after you create the status. To use a different setting, create a new status.
To disable a custom status:
In the row of the status, click ….
Select Disable.
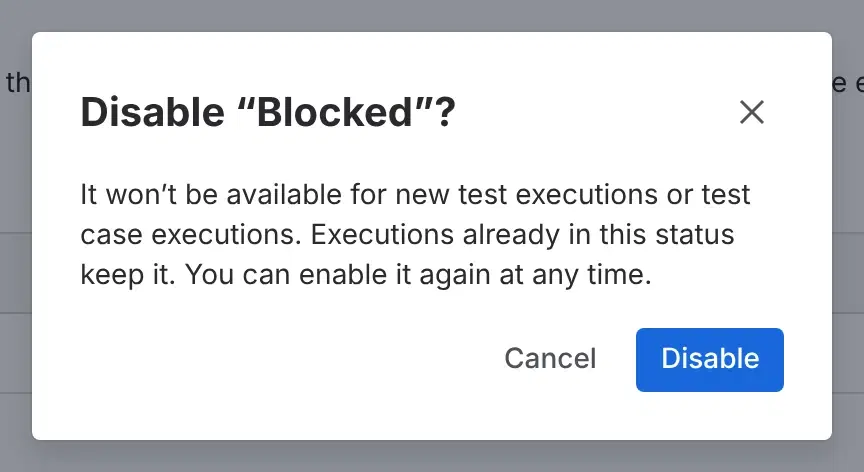
In the confirmation window, click Disable.

The status is no longer available for new Test Executions or Test Case Executions. Executions that already have this status keep it. The row of a disabled status shows the Disabled badge.
To enable a status again:
- In the row of the status, click ….
- Select Enable.
The status is available again right away.