
Jira Incident Management: 5 Steps for Handling an Outage
Handle an outage in Jira Service Management in 5 steps: merge duplicates, post banners, give agents context, track volume, and update all reporters.


Incident management is how a service team records, prioritizes, and resolves unplanned outages. Jira Service Management gives you the incident workflow, queues, SLAs, and major incident handling out of the box. The hard part comes when one outage hits many customers at once and the service desk fills up with duplicate requests. Here are 5 steps for that moment, each with the app that helps. They raise customer satisfaction and speed up resolution.
Step 1: Avoid Being Flooded by Requests via the Customer Portal
There was an incident, and customers reported it through the Jira customer portal. Very often, there are many of the same ones, so it’s a wise step to set up automatic merging, especially if the incidents affect many customers. This way, all new tickets will be merged to the first issue, and you won’t get cluttered with recurring issues. And also, you gain all relevant data about requests and reporters in one place, which really makes it easier on agents.
For how merging works step by step, see How to Merge Issues in Jira.
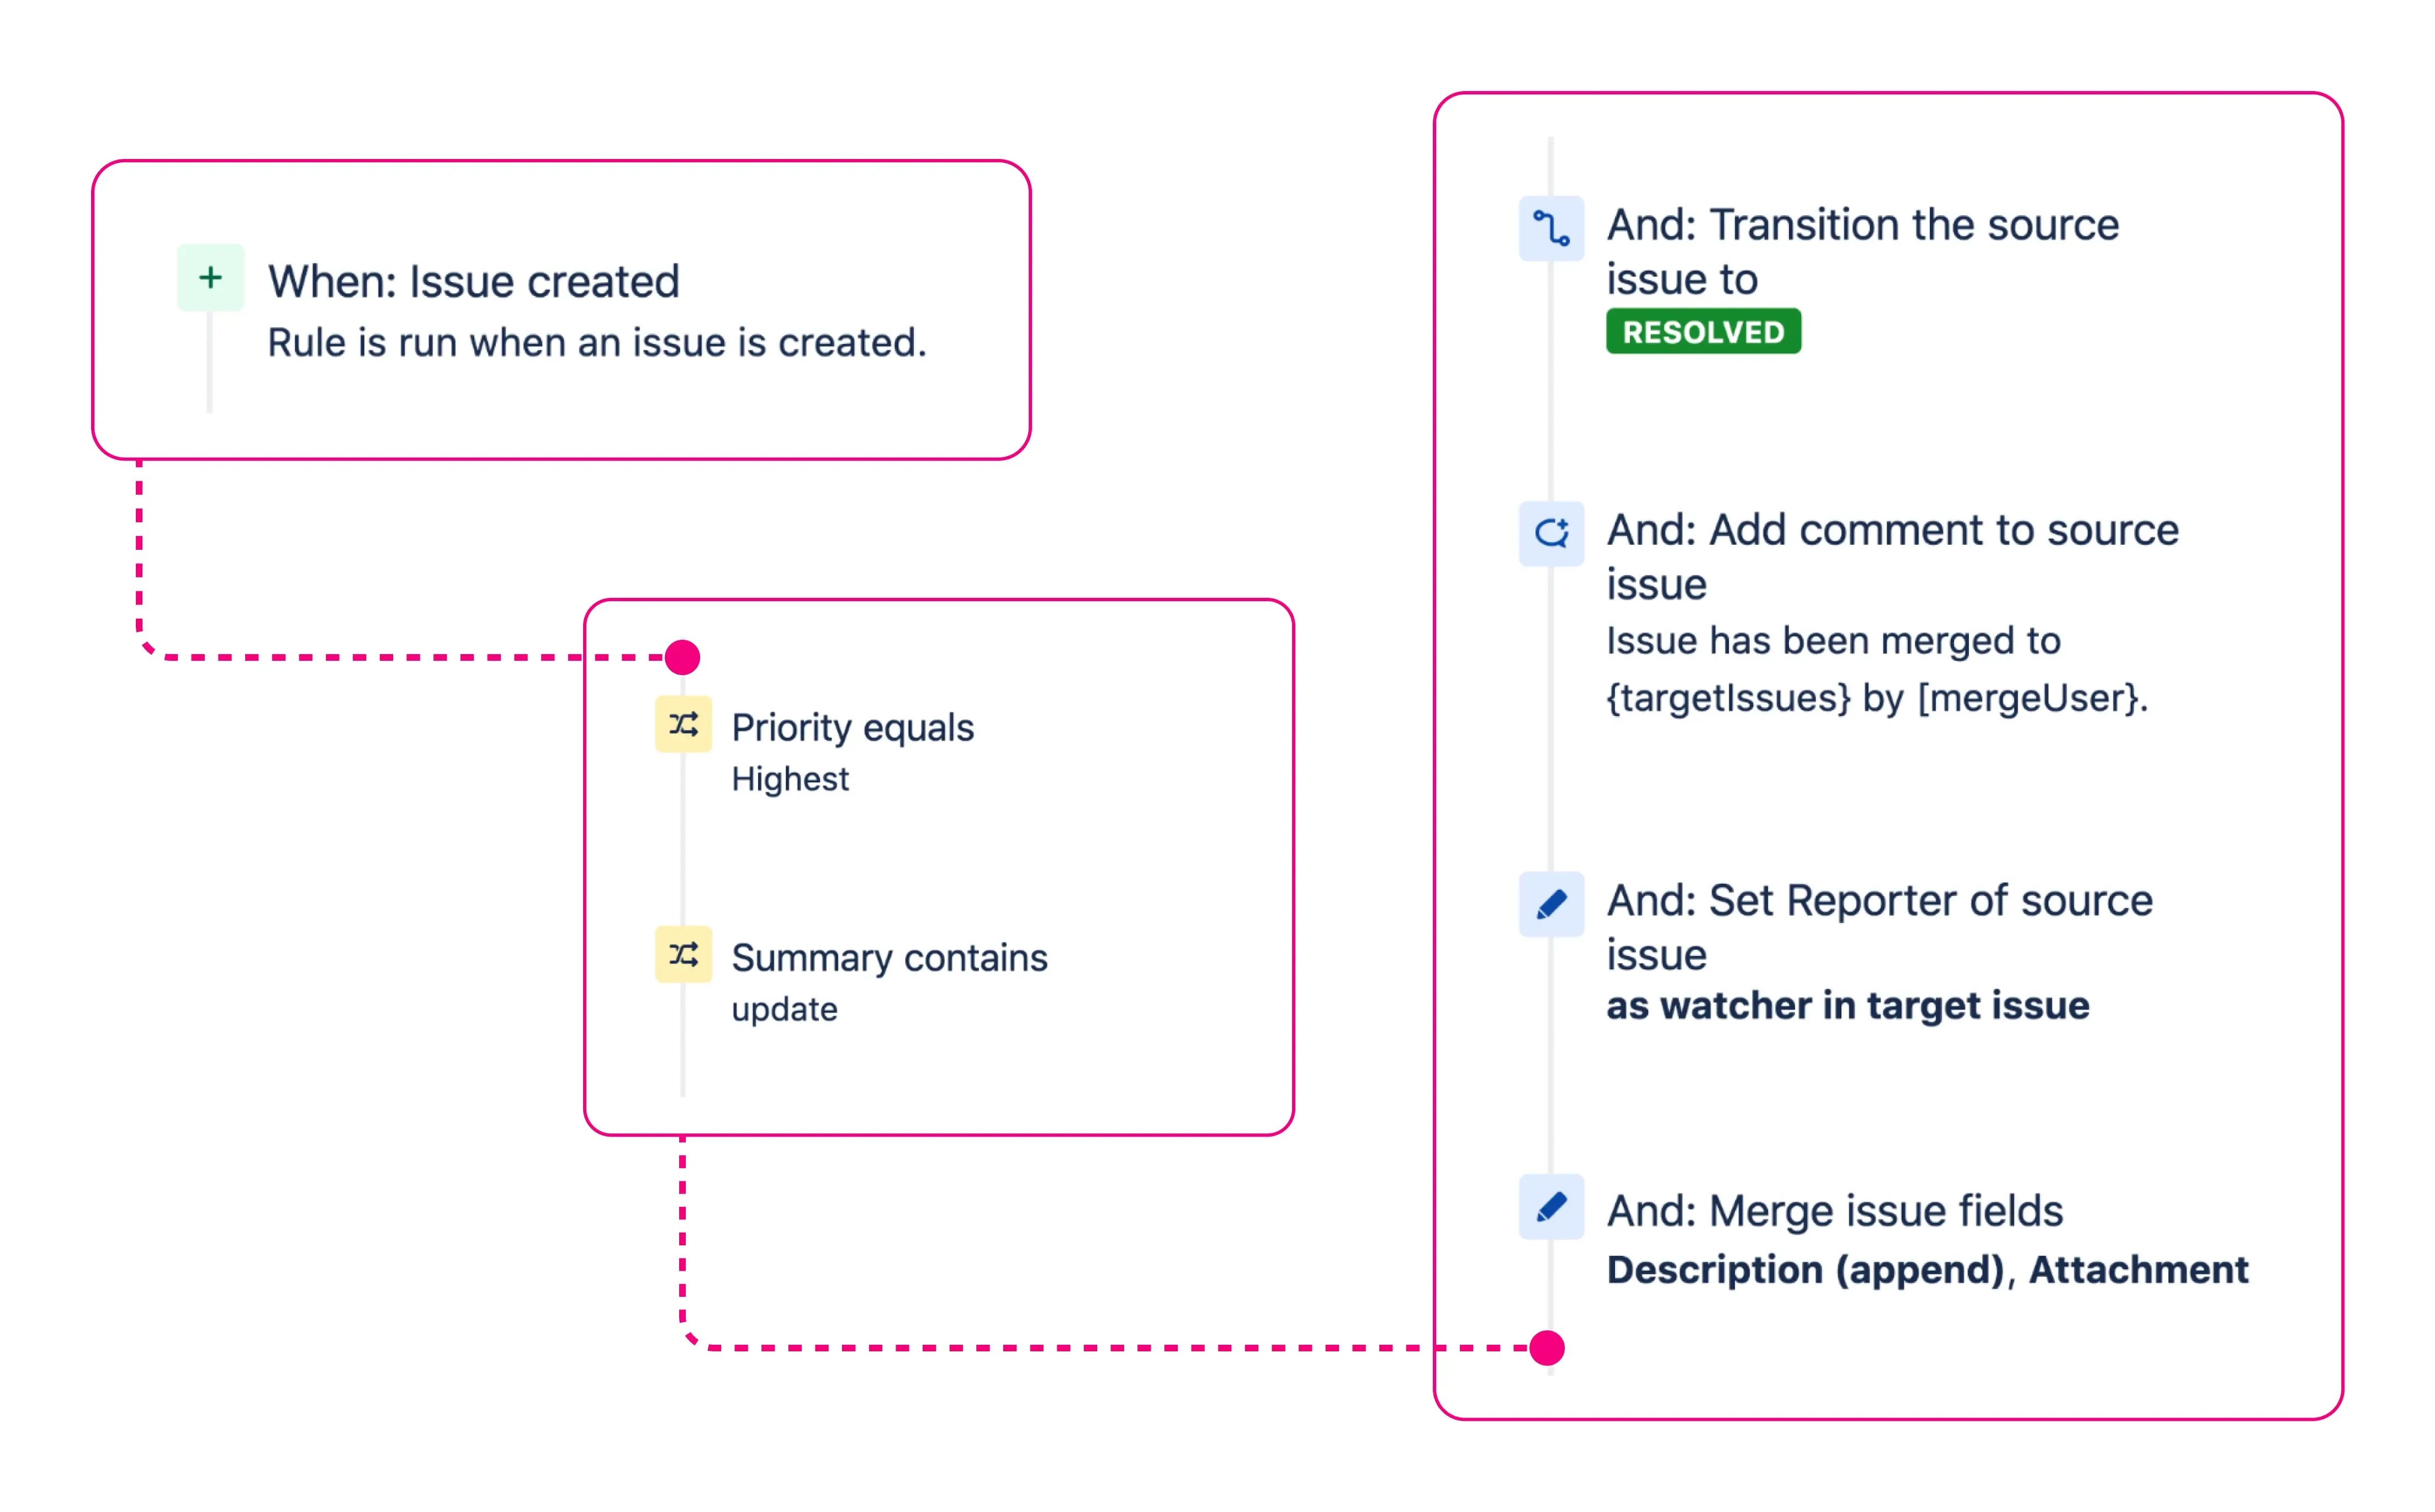
Recommended App: Service Pack for Agents
Step 2: Customize Jira Portal for Incident Reporting
Once you know there’s a major incident, add a banner on the portal saying you’re already working on it. You can show an announcement banner for a particular request type with Feature Bundle, or create an incident banner right from the work item with Service Pack for Agents. This way, some of your customers will stop creating new requests.
For customers the incident hits hardest, set up escalation as a customer action. Then, the ticket goes to a special escalated queue, and agents can solve it first.
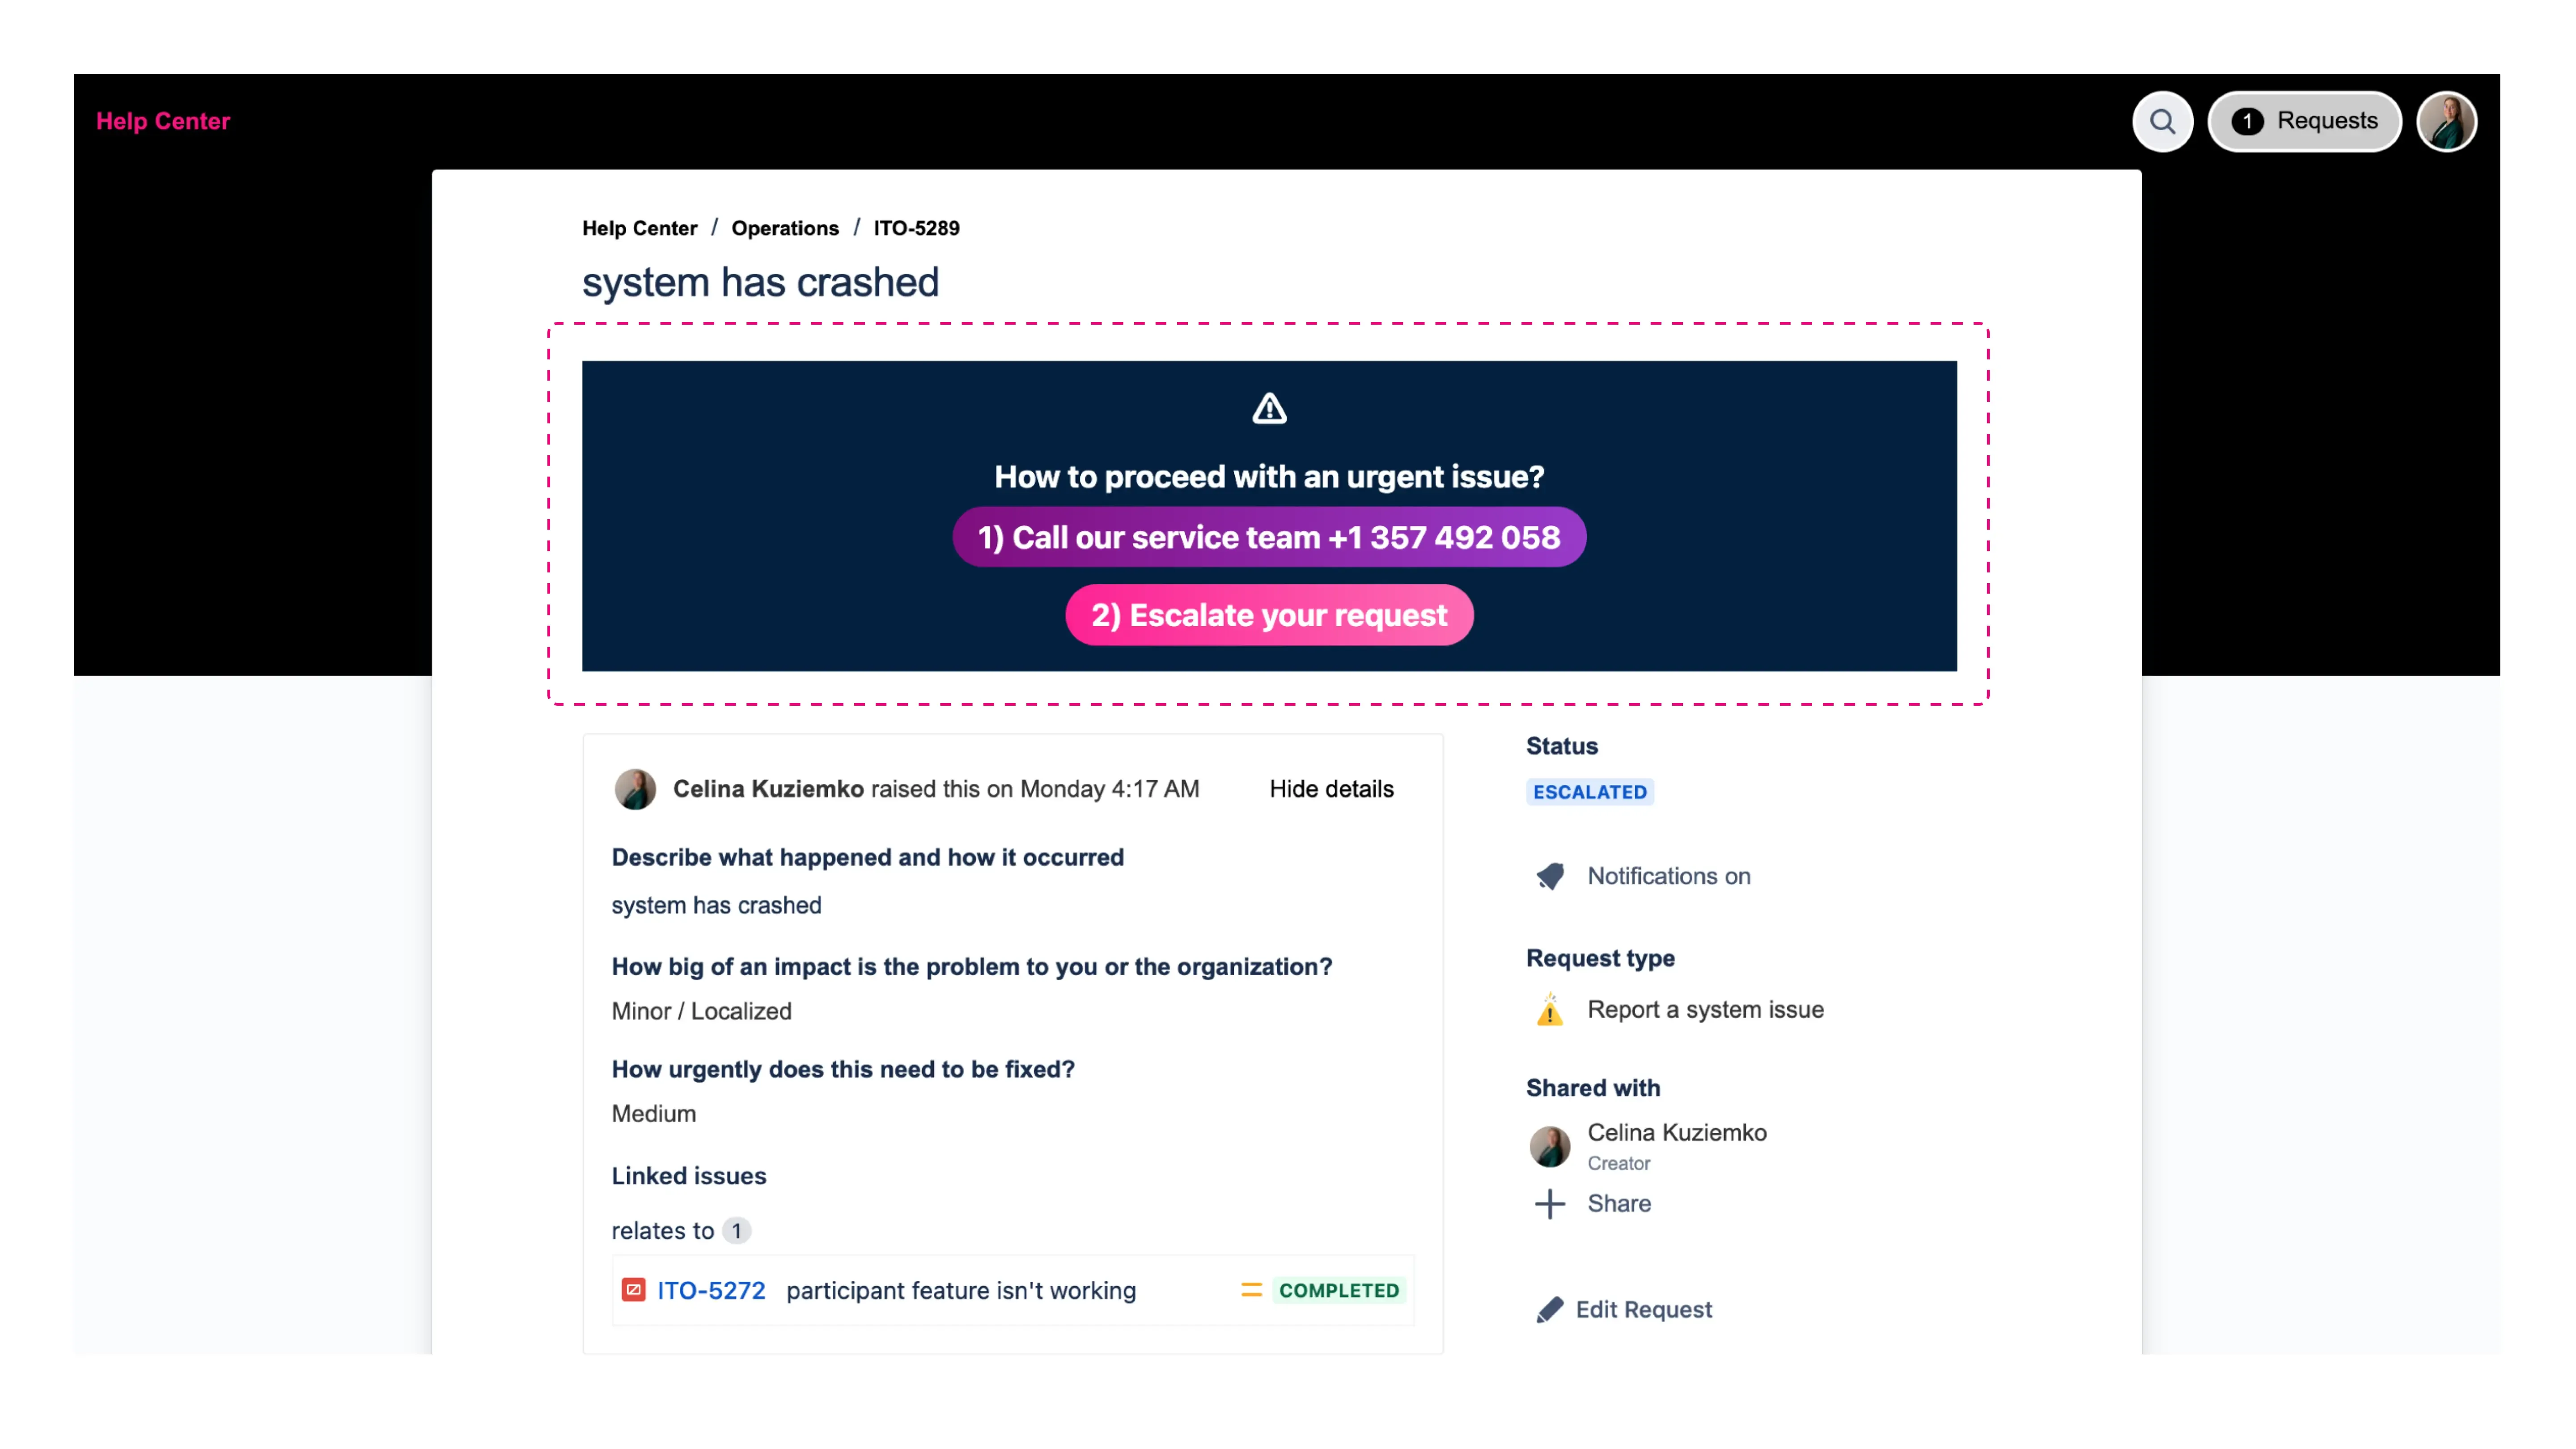
Recommended App: Feature Bundle
“This plugin made it very simple to gather required information from Servicedesk customers AFTER initial creation. It saves us lots of time, decreases errors and avoids ticket ping-pong” Fabian Dengel, Atlassian Expert at Catworkx
Step 3: Give Service Desk Agents All the Customer Context
When agents handle escalated incidents, they see information about the reporter and the organization right in the work item, so they can resolve it faster without asking for more data.
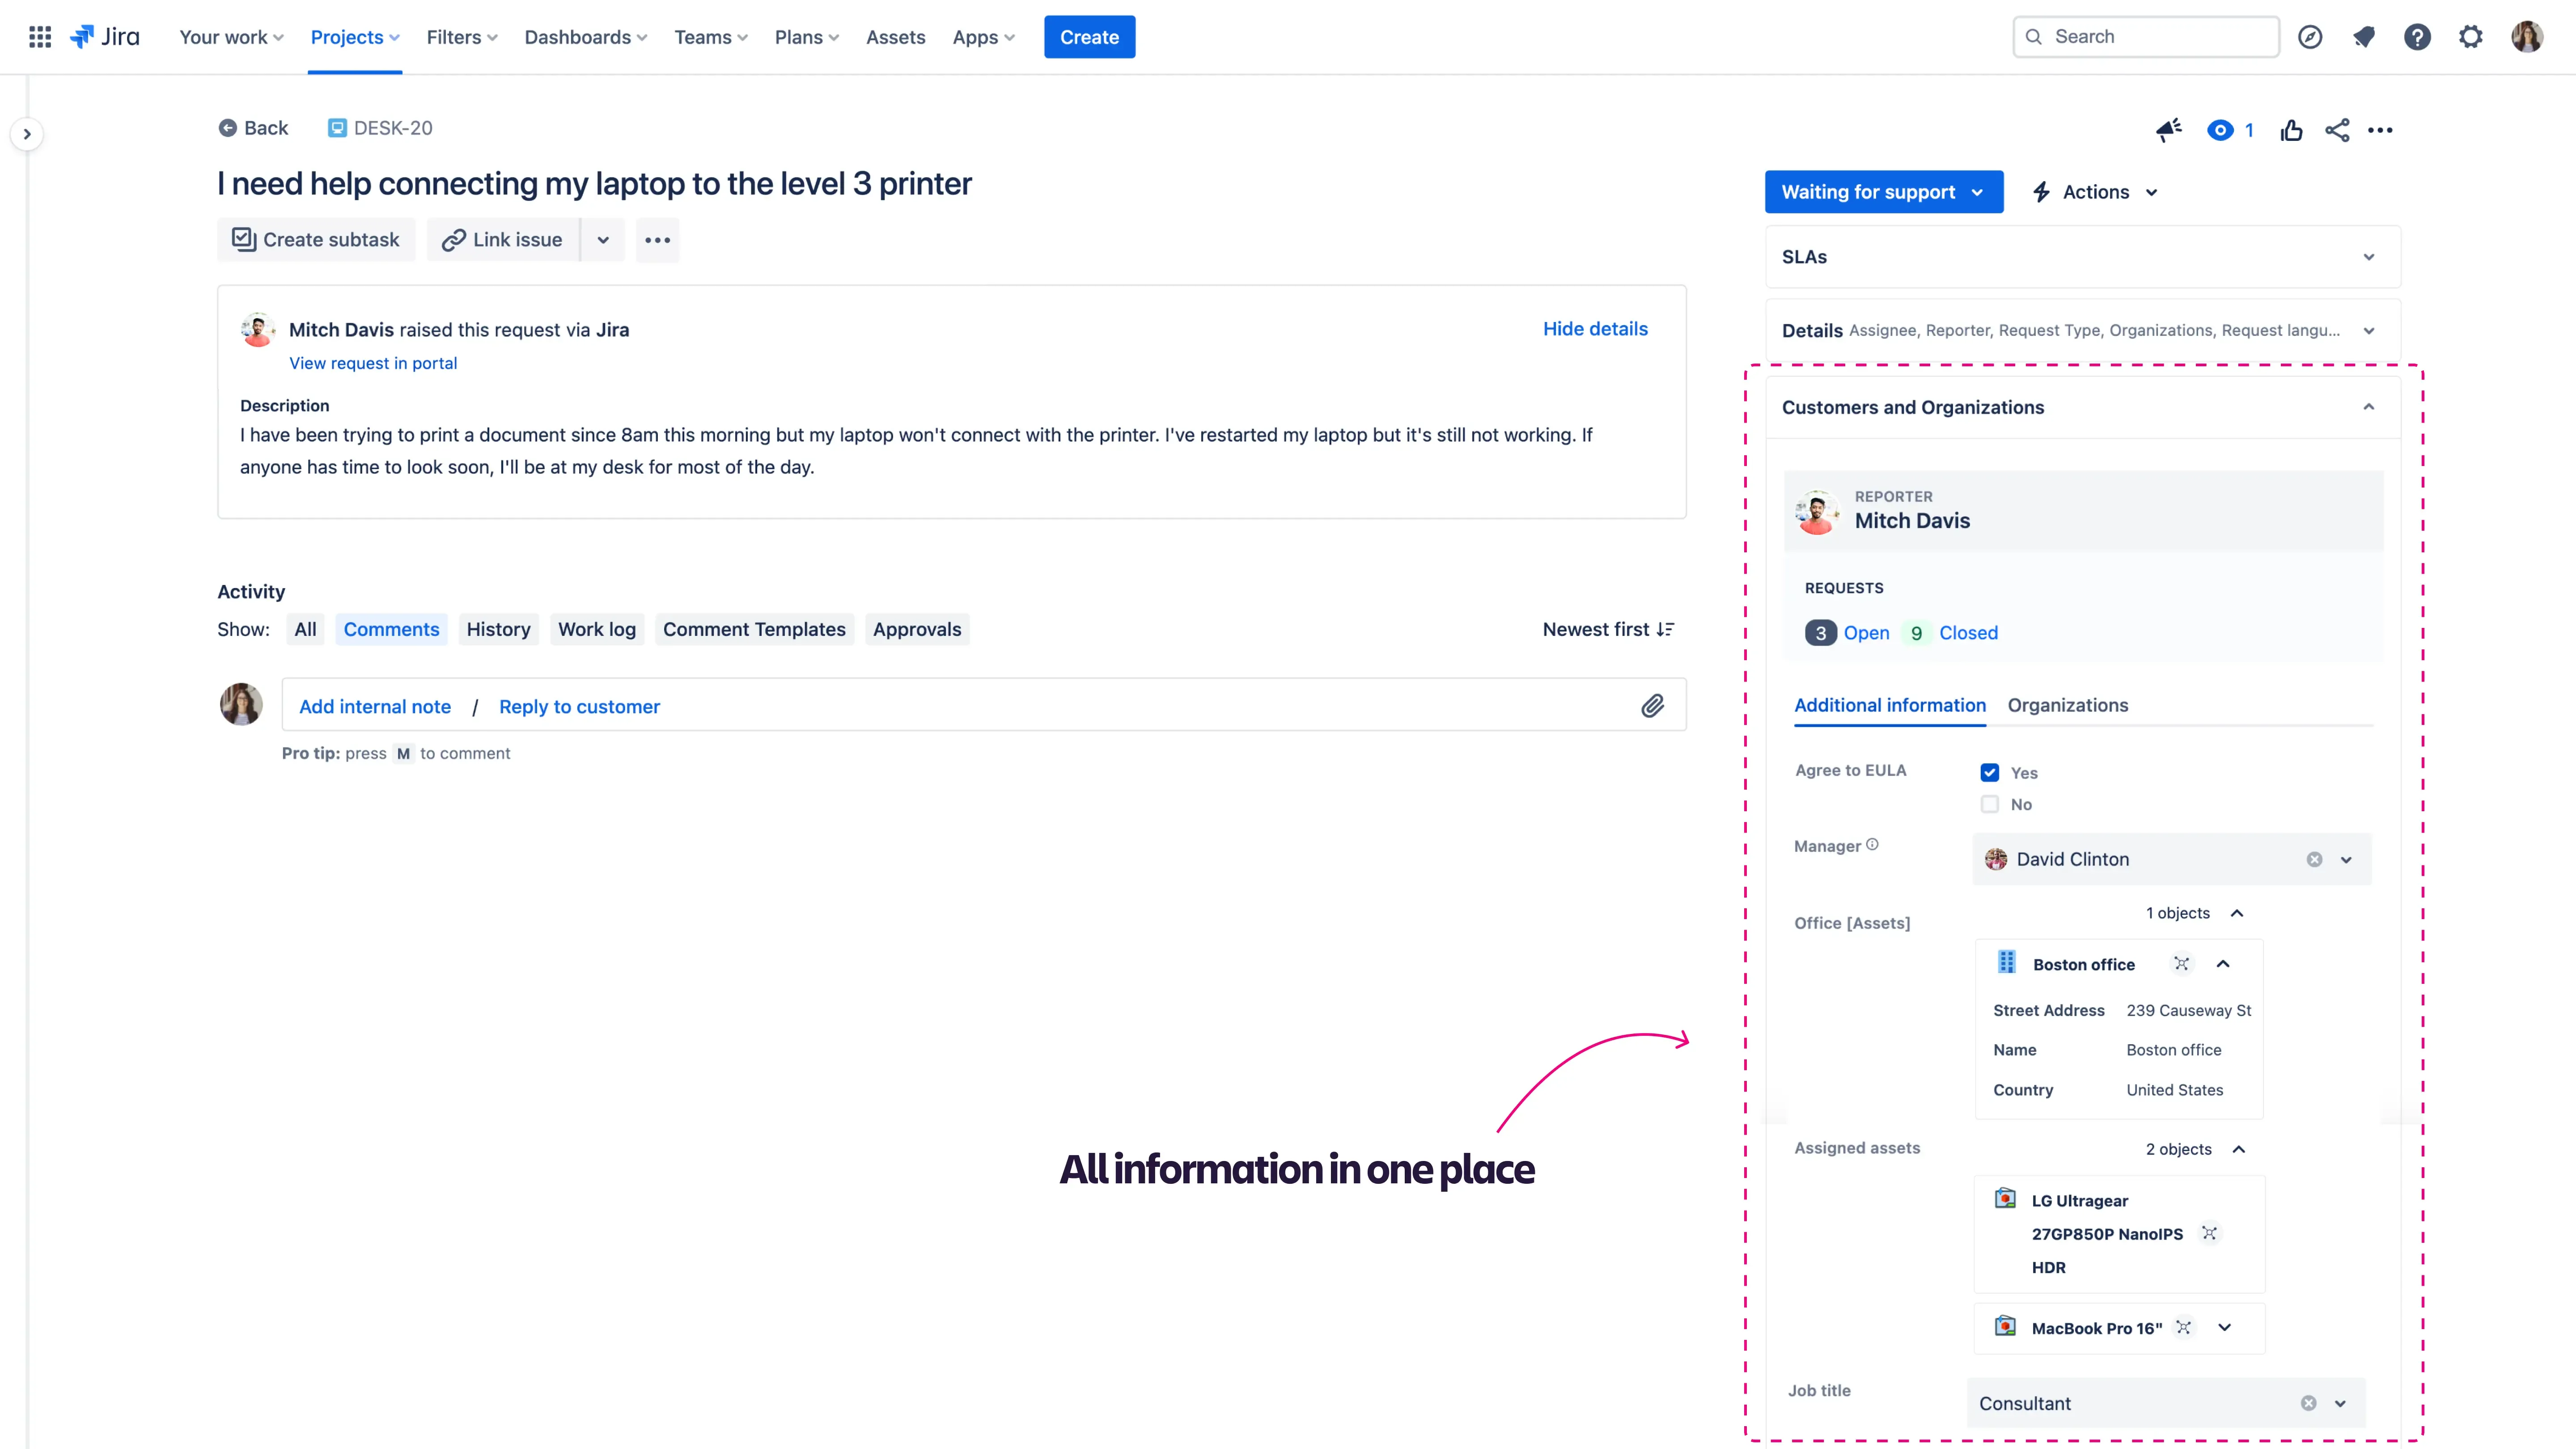
Recommended App: Perspective | Custom Attributes for Jira
Step 4: Monitor Service Desk Metrics
Statistics don’t lie, so start using them. Monitor the request distribution over time metrics and see if there is an increase in assumed tickets in a given hour and if something like this has occurred before. You can check if this is a recurring incident, and you can learn from it and prevent it in the future. Also, you see exactly when you get the most requests, and you can allocate agents more efficiently.
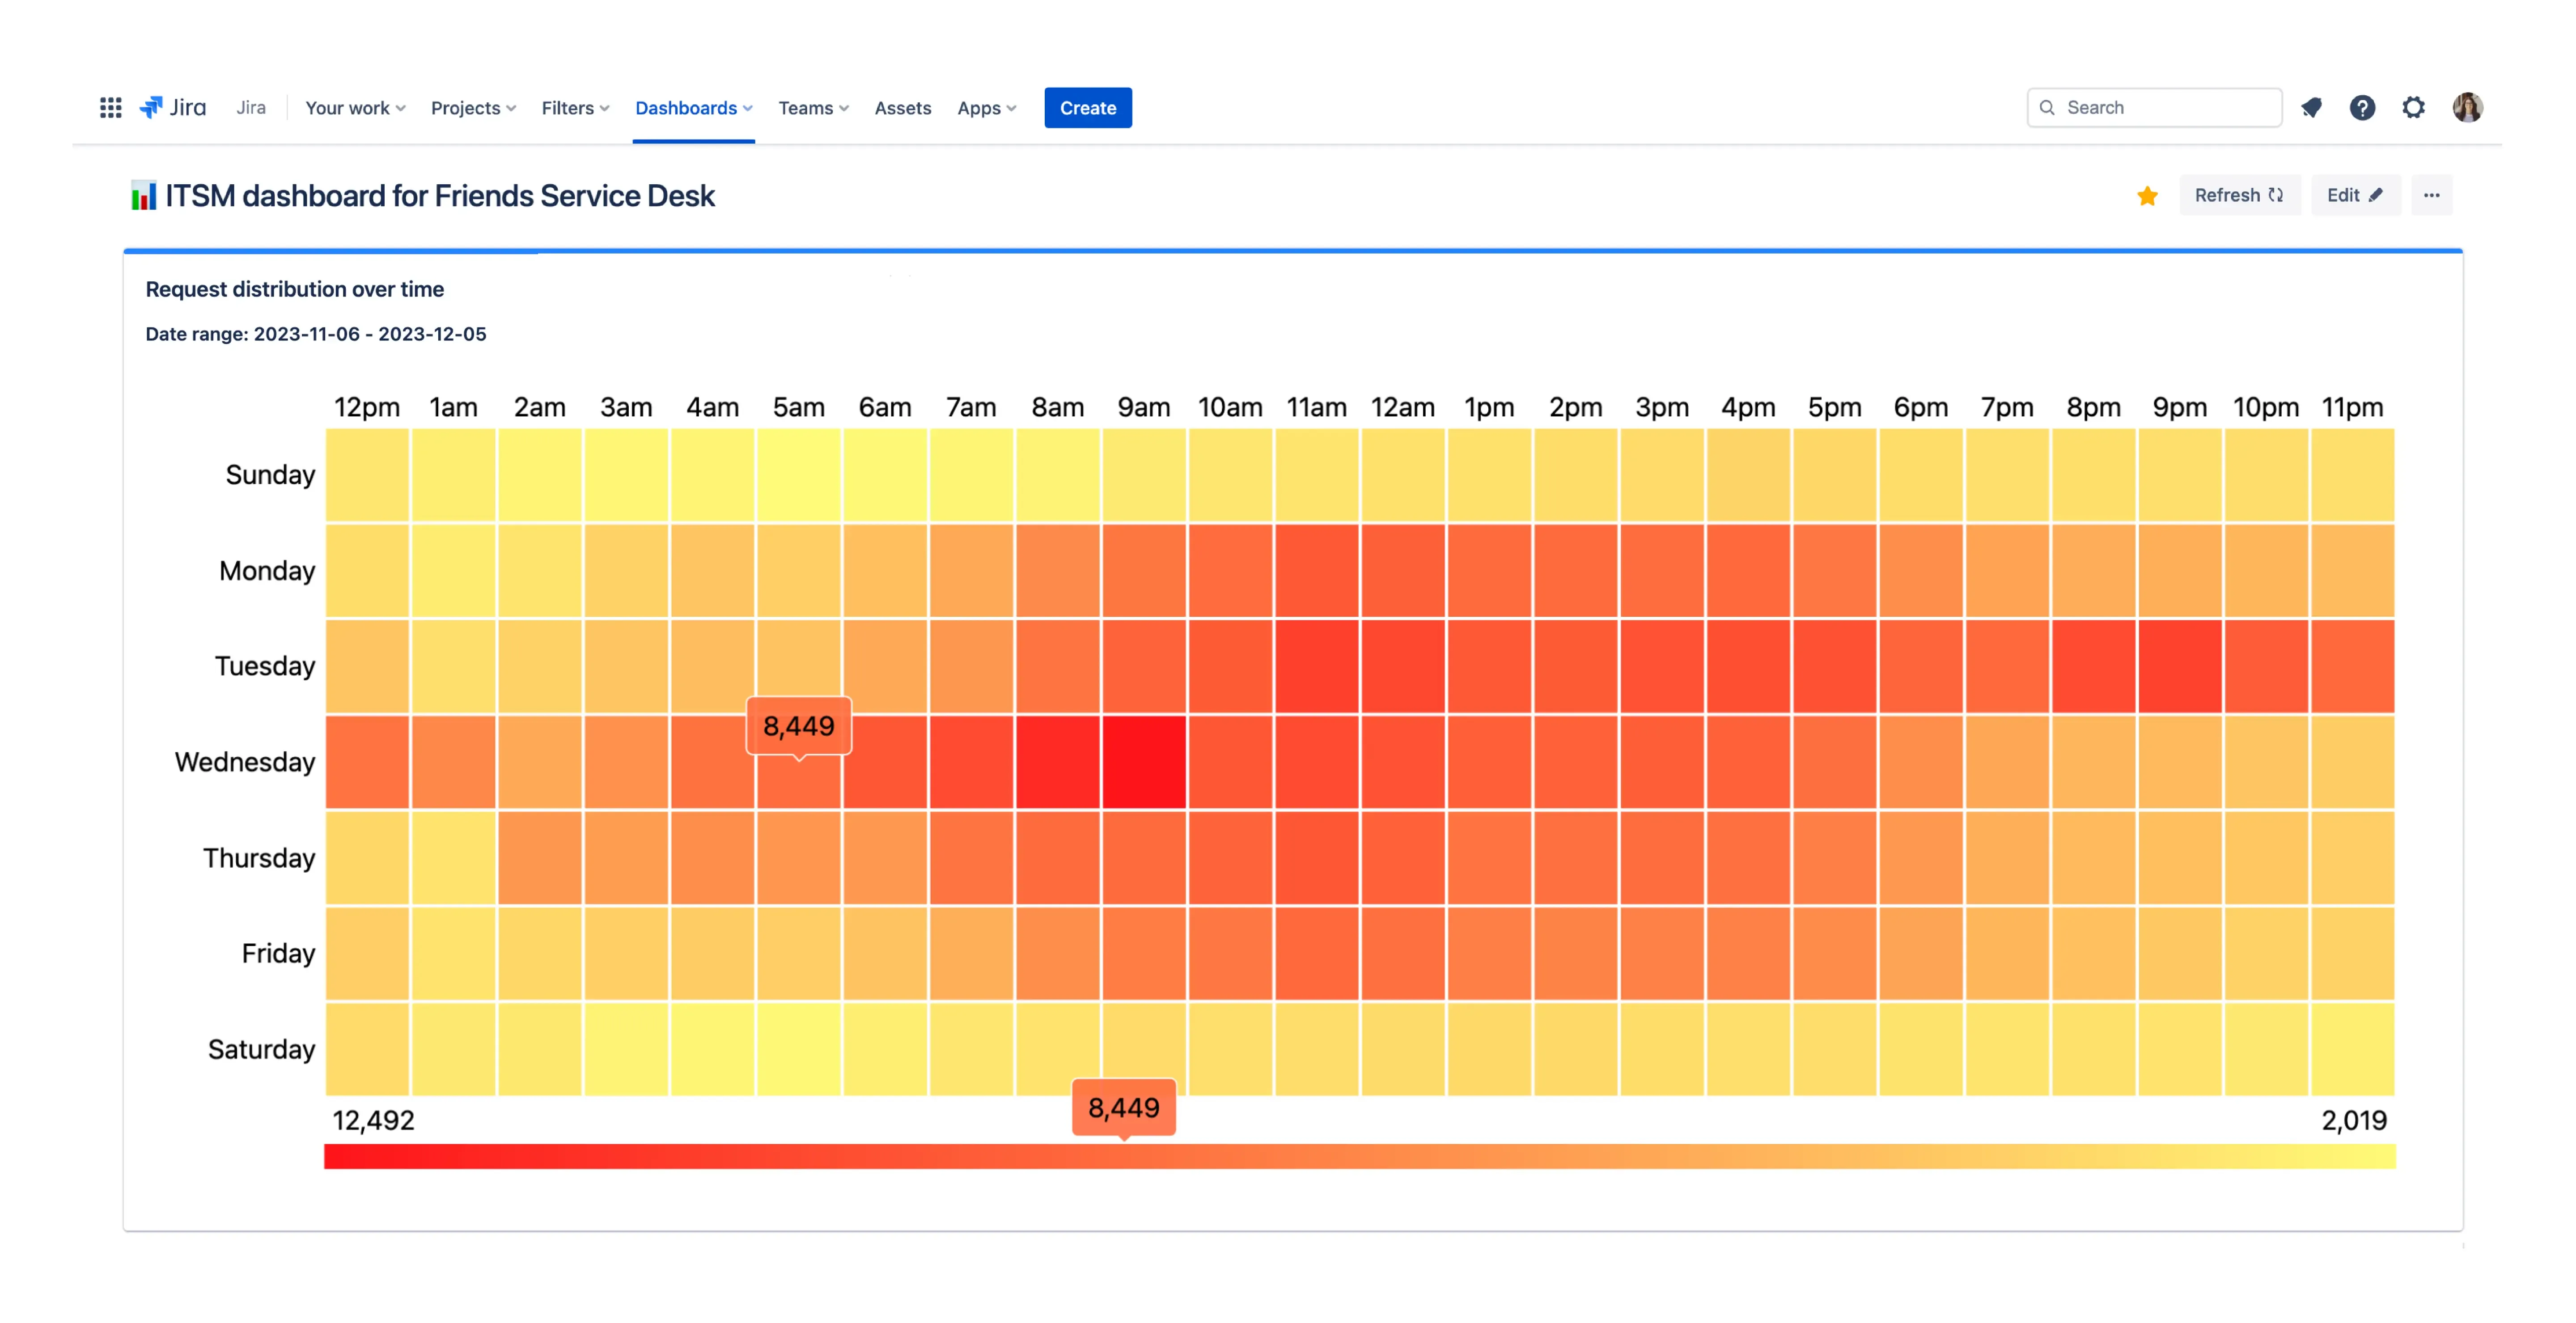
Recommended App: ITSM Reports
Step 5: Manage All Ticket Reporters at Once
As the incident is solved, the agent must inform the reporters. Change the status, and write them back in a comment. Sometimes, there are dozens of these tickets. Therefore, it is advisable to manage reporters in bulk: write off all of them at once and close all the tickets with one click.
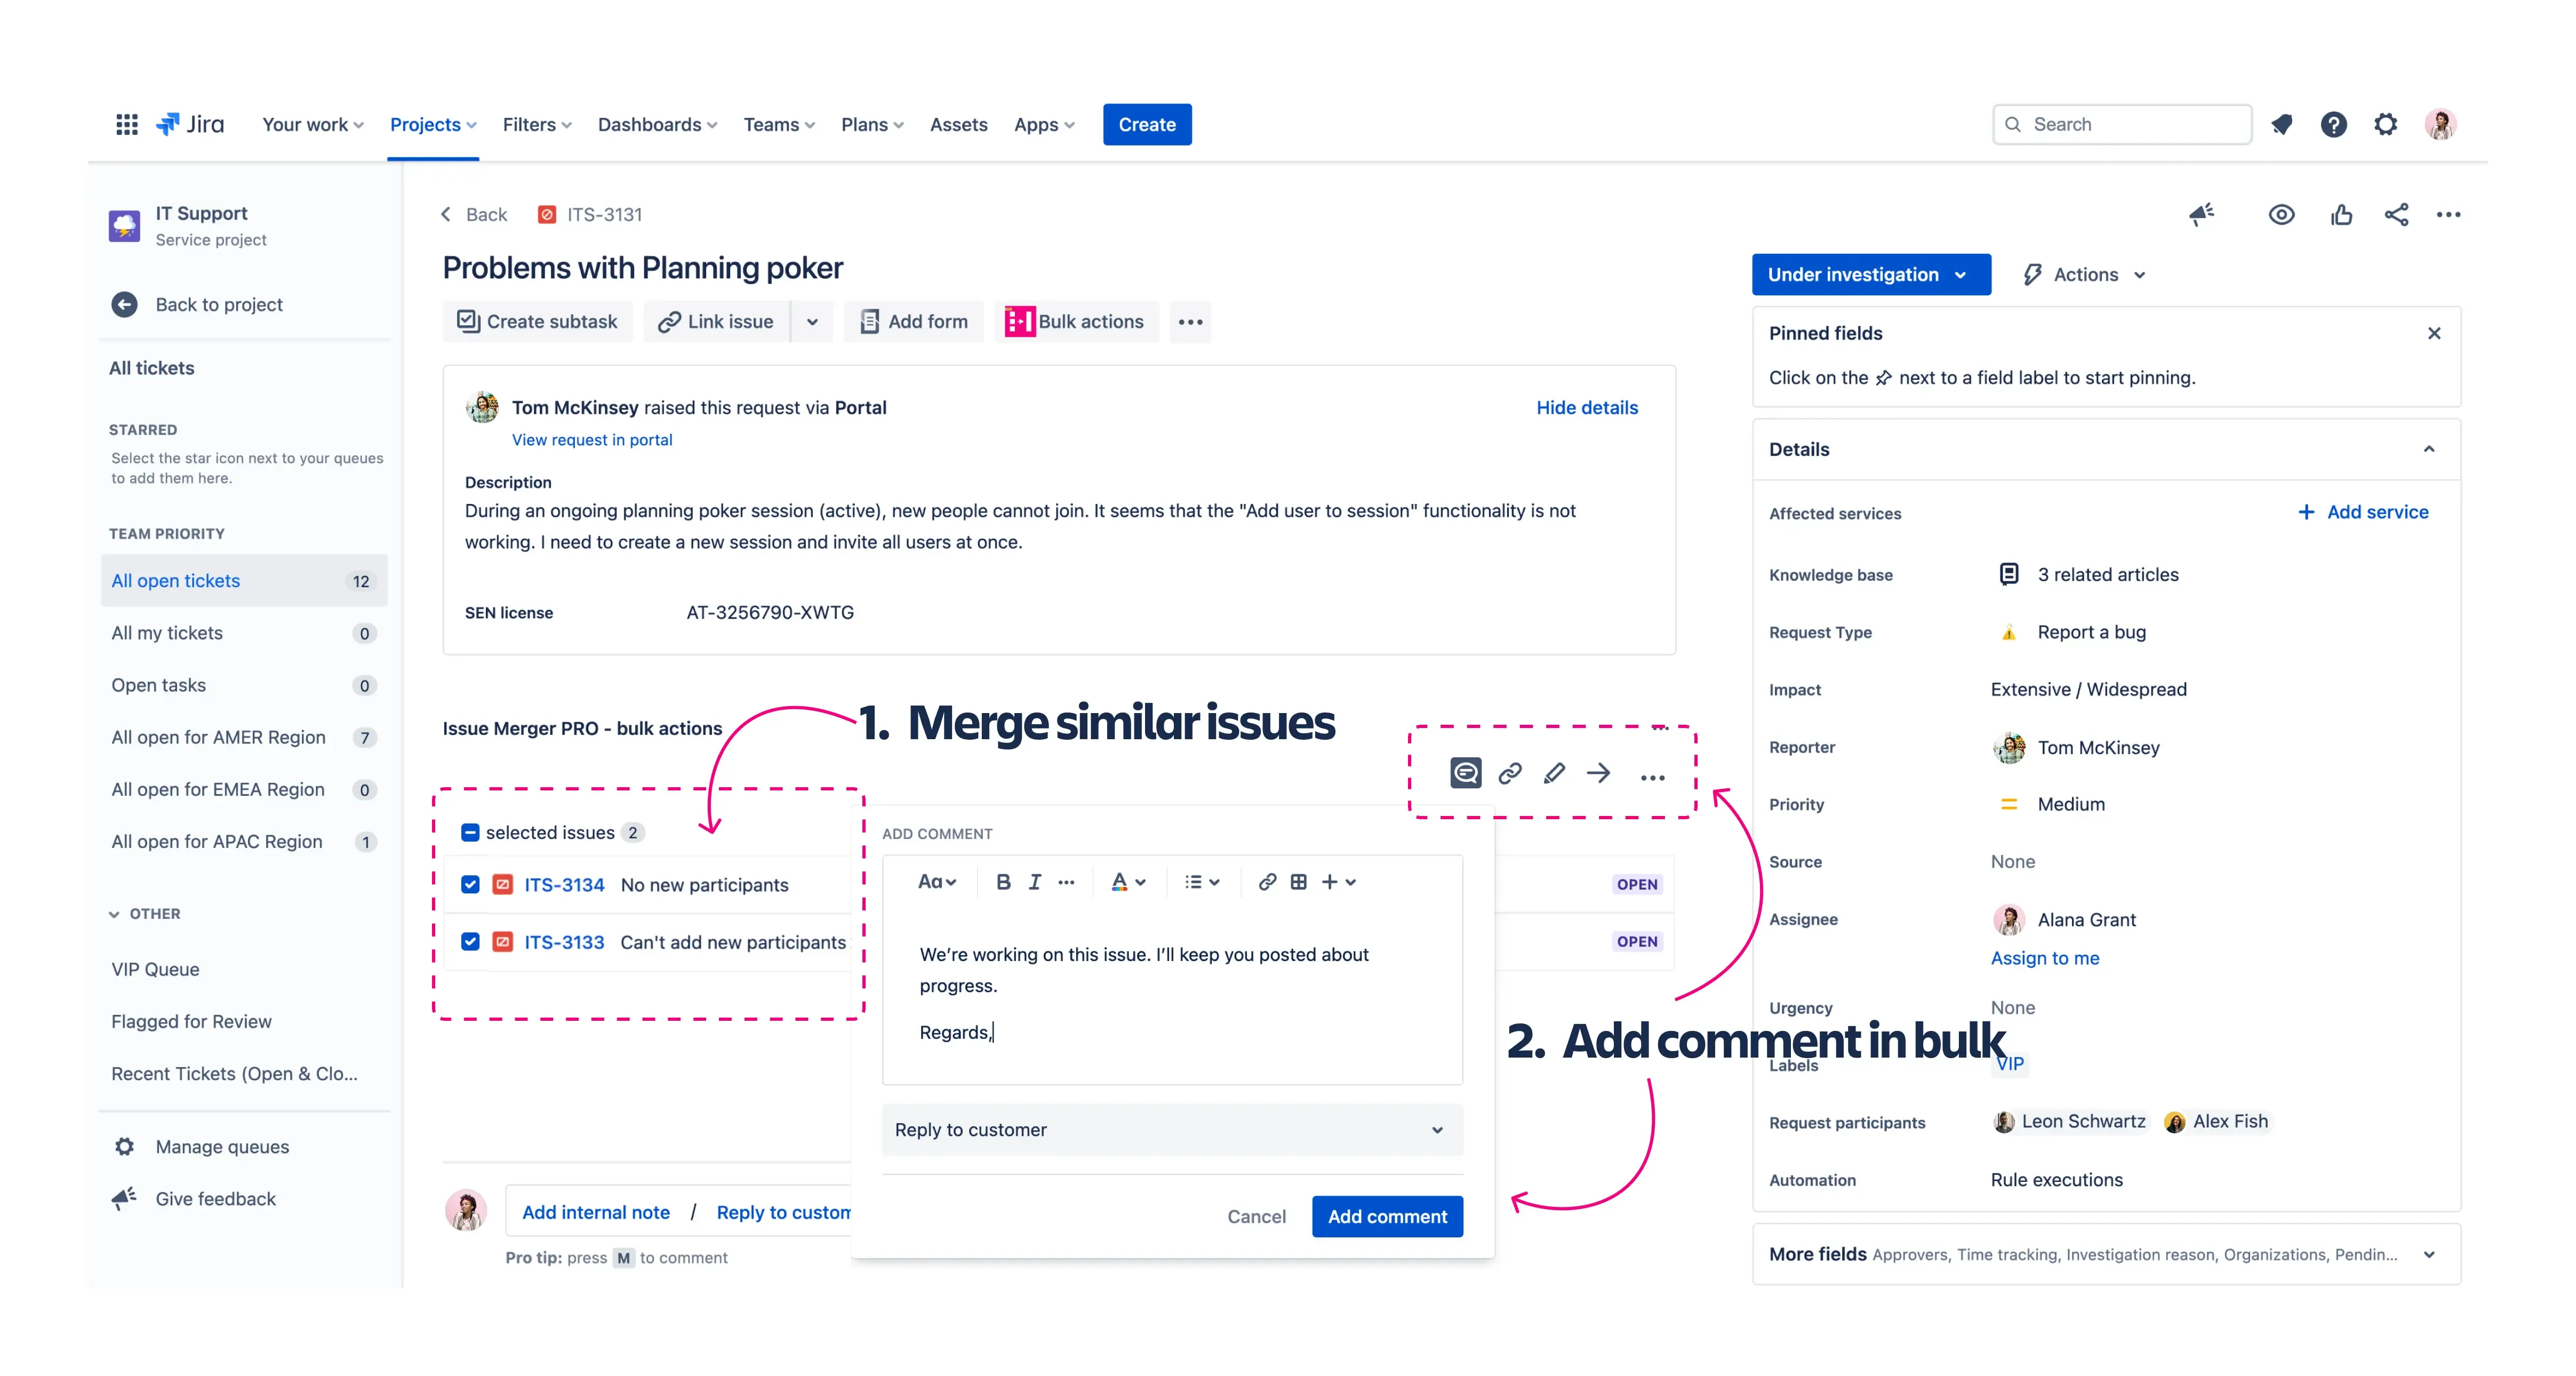
Recommended App: Service Pack for Agents
Final Thoughts
These 5 steps help you get through an outage without drowning in duplicates: customers know you’re on it, agents have the context they need, and everyone gets the same update when it’s fixed. For more on incident communication, watch our webinar Stress-free incident communication with Jira Service Management or download the free e-book Incident communication for Jira Service Desk agents.
This article was created for the annual Hitchhiker’s Guide to the Atlassian App Galaxy by Communardo.
Handle Outages Faster
Merge duplicate requests, post incident banners, and update all reporters at once with Service Pack.
Go to Atlassian MarketplaceUpdated on October 22, 2026.
Related posts
Katarzyna Pawlak
•Sep 24, 2026


Dariusz Jaroń
•Aug 12, 2026